Stap 3 vertalen
Stap 3


-
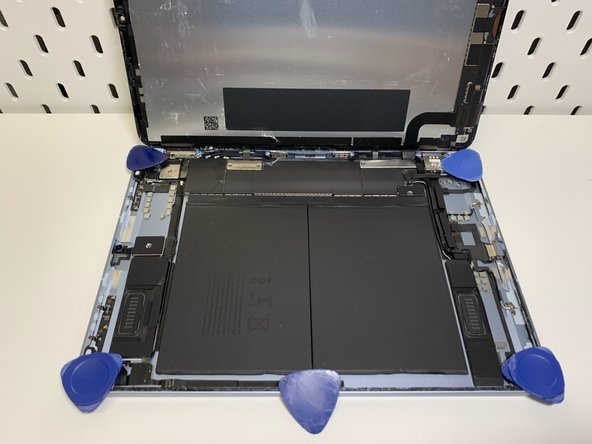
repeat for the upper and lower right corners of the tablet. Move slowly.
-
heat the left edge of the tablet once more and slowly (very gently) lift the screen along the left edge - as if opposite to the book.
-
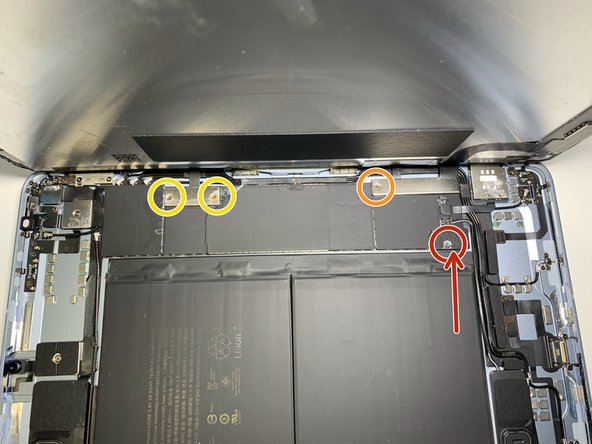
unscrew the marked screws. I mark the battery port with red, after removing the screw, insert an insulator between the negative pole of the battery and the motherboard pin (a thin strip of plastic, which I mentioned at the beginning). In my case, the battery is completely discharged so it doesn't have a significant effect
Je bijdragen zijn gelicentieerd onder de open source Creative Commons-licentie.