Inleiding
Use this guide to replace the loudspeaker on your Xiaomi Redmi Note 7.
If you do not replace the adhesive seals when reassembling, your device will function normally, but will most likely lose its water protection.
You’ll need replacement adhesive to reattach components when reassembling the device.
Wat je nodig hebt
-
-
Apply a heated iOpener to the rear glass to loosen the adhesive underneath. Apply the iOpener for at least two minutes.
-
-
-
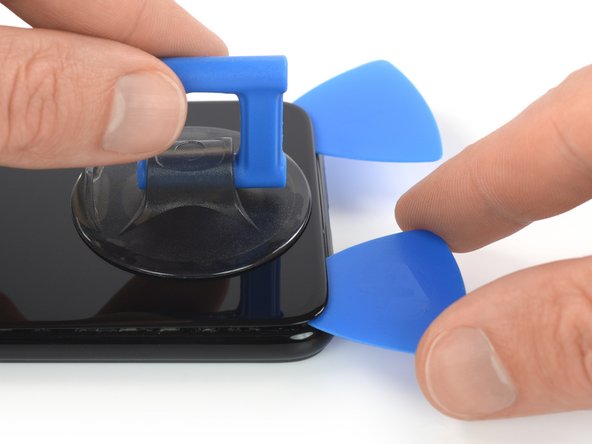
Secure a suction handle to the bottom edge of the rear glass, as close to the edge as possible.
-
Lift the rear glass with the suction handle to create a small gap between the glass and the frame.
-
Insert an opening pick into the gap.
-
Slide the opening pick to the bottom right corner to slice the adhesive.
-
-
-
Insert a second opening pick and slide it to the bottom left corner to slice the adhesive.
-
Leave the opening picks in place to prevent the adhesive from resealing.
-
-
-
Insert a third opening pick at the bottom left corner.
-
Slide the opening pick along the left edge of the phone to slice the rear glass adhesive.
-
Leave the opening pick in its place at the top left corner to prevent the adhesive from resealing.
-
-
-
Insert a fourth opening pick under the top left corner of the rear glass.
-
Slide the opening pick along the top edge of the phone to slice the rear glass adhesive.
-
Leave the opening pick in the top right corner to prevent the adhesive from resealing.
-
-
-
-
Insert a fifth opening pick at the top right corner of the phone.
-
Slide the opening pick along the right edge to slice the remaining adhesive.
-
-
-
Carefully fold the rear glass to the left side of the phone assembly like you'd open the front cover of a book.
-
-
-
Use a Phillips screw driver to remove the three 3.3 mm-long screws securing the connector cover to the midframe.
-
-
-
Use a pair of tweezers to remove the connector cover.
-
-
-
Use the flat end of a spudger to pry up and disconnect the battery flex cable from the motherboard.
-
-
-
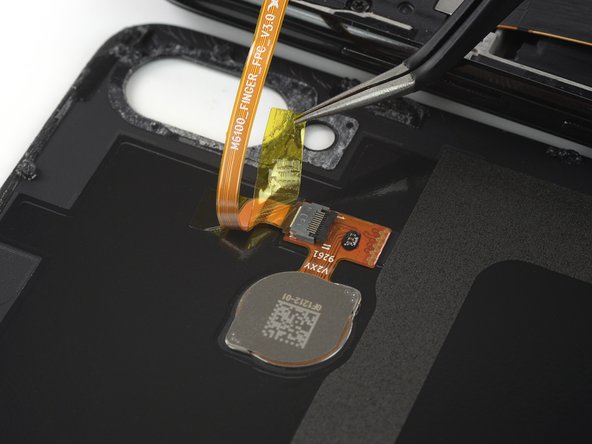
Use a pair of tweezers to carefully peel the yellow protective foil off the ZIF connector.
-
-
-
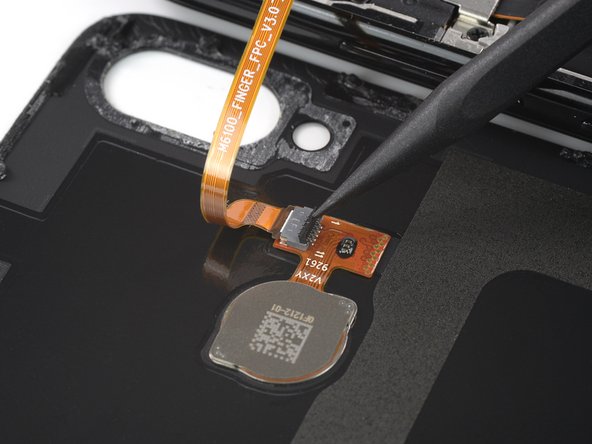
Use the pointed end of a spudger to open the ZIF connector by bringing its black flap in an upright position.
-
-
-
Disconnect the fingerprint flex cable by pulling it straight out off the ZIF connector using a pair of tweezers.
-
-
-
Use a Phillips screw driver to remove the eight 3.3 mm-long screws securing the loudspeaker assembly.
-
-
-
Slide an opening pick underneath the right edge of the loudspeaker assembly.
-
Use the opening pick to pry up the loudspeaker assembly.
-
Remove the loudspeaker assembly.
-
If possible, turn on your device and test your repair before installing new adhesive and resealing.
Compare your new replacement part to the original part—you may need to transfer remaining components or remove adhesive backings from the new part before installing.
To reassemble your device, follow these instructions in reverse order.
Take your e-waste to an R2 or e-Stewards certified recycler.
Repair didn’t go as planned? Try some basic troubleshooting, or ask our Answers community for help.
Annuleren: ik heb deze handleiding niet afgemaakt.
11 andere personen hebben deze handleiding voltooid.


