Inleiding
This is the second time one of the buttons stopped working correctly, caused by wetness.
The first time, it was the boost button, followed by an error 41. I took a trip to Amsterdam to get it fixed fast. They shipped my bike back a week later.
This time, it hit the bell button, and it got wet and stuck.
First, I tried to fix it with compressed air and ethanol. It worked for a while, but then it started to double-tap every time it got pushed.
So I could not unlock the bike without a phone.
This time, I wanted to try to fix it myself.
I called for support, and they sent me a replacement cable, telling me that it would be an easy task.
But they have not sent a manual, and I could not find any tutorials online. So I just tried it myself.
Here is the result.
I hope this helps!
Wat je nodig hebt
-
-
In my case, the button was glued additionally. Cut around it to make it loose.
-
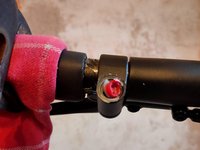
Use the 2mm hex screwdriver and remove the tiny screw on the side of the bell housing.
-
Use the pliers to unscrew the button. Screw to the left.
 Vraag FixBot
-
-
-
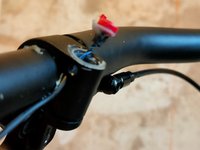
Loosen the 5mm screw located below the button.
-
This screw holds the brake/button part on the wheel. Later, you will need to pull it off. As you can see, the cable goes through the rubber grips.
-
-
-
Use the wrench and the cloth to remove the handle grips. The cable goes through it - then through the handlebars.
-
-
-
-
Unscrew the handlebar with the 5mm hex wrench.
-
Remove the rubber cap located under the handlebars. Remember where you put it.
-
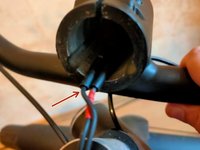
In my case, the bell button was the unmarked cable. Start to pull it to get the new one through. Good luck!
-
-
Gereedschap gebruikt in deze stap:Tweezers$4.99
-
If you are unlucky and lose the cable inside. Try to fix it to a wire.
-
You can also try to use the wire to block the path through that hole in the wheel, and push just the cable. It should then bend and appear in the hole.
-
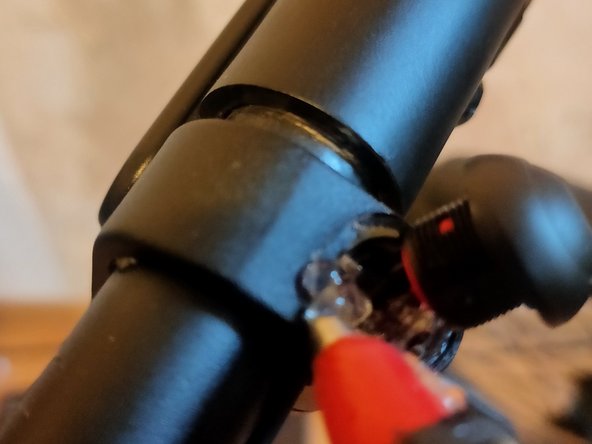
Use the hole and the tweezers to get the cable halfway through.
-
Connect the cables. And try the bell.
-
-
-
Put everything back together. Use some proper electrical tape to get the cable in place.
-
I removed the old glue with the tweezers and applied some fresh hot glue.
-


To reassemble your device, follow these instructions in reverse order.
Annuleren: ik heb deze handleiding niet afgemaakt.
3 andere personen hebben deze handleiding voltooid.
Bijgevoegde documenten
9Gids Commentaar
https://www.ebay.de/itm/115776735689 i was sold out.
Vielen Dank für diese ausführliche Anleitung. Das hat mir wirklich sehr geholfen beim E41!
Moin hätte eine Frage welche Größe hat die Mini Schraube an der Seite vom Knopf hab sie verloren Weis jetzt nicht ob m2 oder 2.5 würde mich über eine Antwort freuen