
Sony Cyber-shot DSC-HX1 Motherboard Replacement
Inleiding
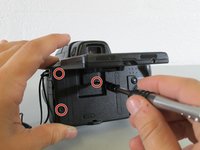
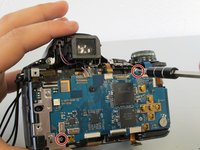
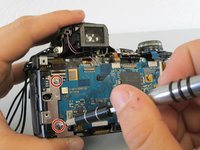
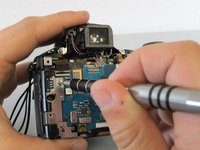
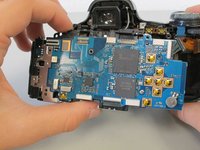
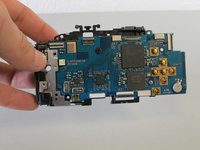
Ga naar stap 1To remove or replace the motherboard, you must disassemble a majority of the camera. Make sure to keep your screws separated and labeled.
Wat je nodig hebt
Gereedschap


-
-
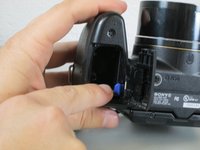
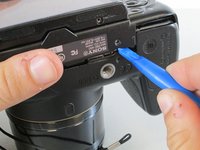
Close the battery cover by pushing the cover inwards and sliding it to the left to allow more maneuverability when disassembling other parts of the camera.
-
-
-
-
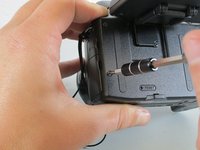
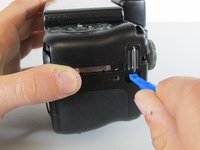
Using the plastic opening tool, pry apart the bottom of the camera at the line between the four removed screws.
-
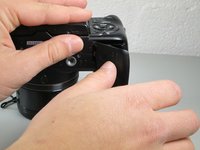
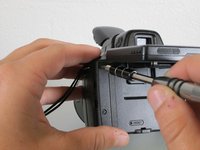
Place the camera on its lens and use the plastic opening tool to pry at the crack in the case on all four sides of the camera.
-
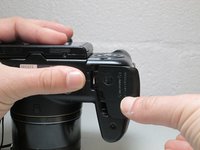
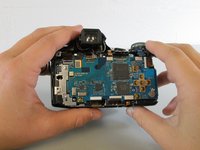
Apply moderate force to the backside of the camera enclosure until the two pieces separate.
-


To reassemble your device, follow these instructions in reverse order.
To reassemble your device, follow these instructions in reverse order.
Annuleren: ik heb deze handleiding niet afgemaakt.
8 andere personen hebben deze handleiding voltooid.
Team

Cal Poly, Team 17-3, Forte Spring 2015 Lid van Cal Poly, Team 17-3, Forte Spring 2015
CPSU-FORTE-S15S17G3
4 Leden
10 handleidingen geschreven
3 opmerkingen
Excellent partial disassembly overview!
Several suggestions to make this information more useful:
Provide Sony motherboard part number at top of page where there is a place to list parts.
Please list the size of the battery on the motherboard. My guess is the battery can be easily replaced once the battery type, size and voltage is known.
Distingush between location of 4.0 mm retaining screw and 6.0 mm retaining screw.
Highlight location of eight motherboard ribbon cable ports.
Detail how to disconnect ribbon cables without destroying motherboard cable ports.
Replacement parts for the Sony DSC-HX1 digital cameras should be available from Encompass, https://sony.encompass.com/search/?model.... However, the website indicates the main board is no longer available. Sony also lists Union Electronics, https://www.ued.net/index.html, as a parts supplier but I am unable to find any parts on Union Electronics website. Of course one can always try eBay or Amazon.
The motherboard battery is soldered to the board so it can be dangerous to replace.
My camera sat without a rechargeable battery installed for a few months. The next time I used the camera the motherboard would not retain my settings. I found that leaving the replaceable battery installed for a few days recharged the motherboard battery. I now leave a rechargeable battery installed all the time and swap batteries about once a month when I’m not using the camera.