
Sega Game Gear Case Replacement
Inleiding
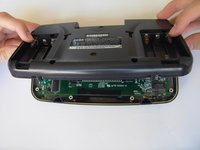
Ga naar stap 1How to open the Sega Game Gear case.
Wat je nodig hebt


-
-
-
Remove the following screws:
-
Six Phillips screws
-
One 4.5 mm Gamebit screw
The screw hole in the bottom center is for the PowerBack. Also there are not 7 screws there are only 6
-
-
-
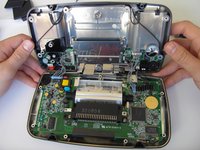
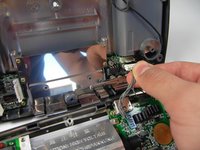
Carefully unplug the 2 white-tipped connectors on the top cover.
Il faut aussi débrancher le connecteur du haut parleur (2 broches, en haut à droite).
There is a third cable on the right side of the top half in this picture which is the speaker. Unplug that too.
-


To reassemble your device, follow these instructions in reverse order.
To reassemble your device, follow these instructions in reverse order.
Annuleren: ik heb deze handleiding niet afgemaakt.
9 andere personen hebben deze handleiding voltooid.
Team

Cal Poly, Team 28-33, Regan Spring 2010 Lid van Cal Poly, Team 28-33, Regan Spring 2010
CPSU-REGAN-S10S28G33
5 Leden
13 handleidingen geschreven
1Gids Commentaar
Is this guide made to help replacing the Game Gear shell? Almost doesn't seem like a thorough guide, I'm still seeing screws on the motherboard in the last photo, I assume those get taken out too?