
Samsung Galaxy S5 Active Front-Facing Camera Replacement
Inleiding
Ga naar stap 1The removal of the front facing Camera is a time consuming process. It involves the use of a few tools such as a guitar pick, a heat gun, tweezers, a screwdriver, and plastic opening tools. You should be aware of the hazards and safety procedures of these tools before starting the process.
Wat je nodig hebt


-
-
Insert your fingernail or plastic opening tool into the divot at the top of the rear-facing camera.
-
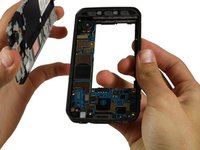
Gently pry and twist the flexible rear cover off the back of the phone.
-
-
-
Insert a fingernail or plastic opening tool into the recess in the bottom right corner of the battery and lift upward.
-
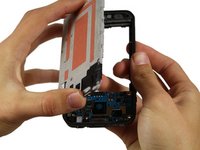
Remove the battery away from the phone.
-
-
-
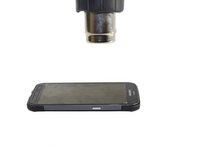
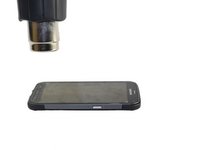
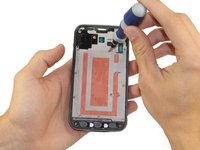
Use a heat gun at an approximate distance of 2-3 inches from the phone to apply heat to the phone and loosen up the adhesive in the display.
-
-
-
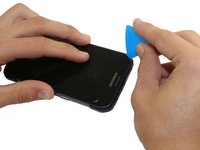
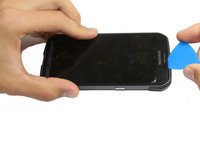
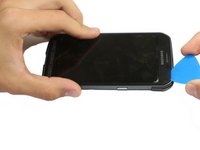
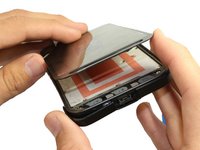
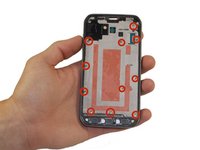
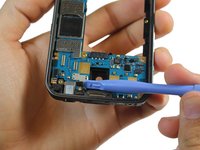
Starting from the upper left corner, insert a guitar pick in between the display and the phone case.
Steps 7 through 9 are redundant and should be removed.
First, starting the first edge is a huge pain. As soon as the thin guitar pick got near the warm phone, it softened up and wouldn't pry the edge up. I found it easier to use a thumbnail to get the first edge lifted and then get the tip of a pick in the opening. Second, this repair is essentially impossible if you are trying to replace an internal component without replacing the glass/digitizer/LCD. The adhesive holding the glass to the digitizer/LCD is released easier than the adhesive tape behind it. As such, the glass releases from the digitizer/LCD unevenly, shattering the digitizer/LCD. It almost seems like it would be better to put the whole phone in a warming oven to soften the adhesive evenly. Mine phone is already destroyed thanks, in part, to these instructions. Anyone else want to give it a try?
How can you blame the instructions on your incompatantcy you can clearly see the pictures of this "mechanically inclined" fellow disassembling his phone. He had nothing to do with you #<:(>,g yours up. (Check symbols on samsung galaxy keyboard to disifer).
I am a repair tech for phone repair shop, so I've repaired a ton of phones. Getting this glass to come up with the lcd was nearly impossible. The adhesive between the glass and the LCD is released much easier than the adhesive behind the LCD. Therefore, the LCD breaks about 99% of the time. I was extremely cautious and patient, and the lcd still cracked from being pulled on by the glass. Long story short, bgauch, you're not wrong about this.
Andrew -
You have obviously never tried this. If you had, or seen it done IRL then you'd know how hard it can be.
What you don't see in the video is how many phones were destroyed in training the tech and while shooting to get the finished product.
I'm an IT pro, Android developer, and fix all kinds of phones. Sign in my workshop.
I DON'T DO SCREEN REPLACEMENTS
(if you manage to talk me into it, and I fry it, U SHOULDA READ THE SIGN.
I'm not a factory trained tech. The only screens I'll do are ones not. bonded to the LCD. If you can successfully separate these, my hats off to you.
Rather than criticize, do it, then come back
Okay, I want to know who here was successful? I'm pretty mechanically inclined and I'm tempted to try it. I would think those of you cracking the screen just are not getting the adhesive warm enough! You've got to get it so it releases completely, that's why he keeps saying don't pry further if ANY resistance is felt. Any being the key word
I did it!
I carefully lift the edges and then cutting off the middle part of the adhesive with a tooth floss. It went very nice.
It is true that the phone still is not usable because it has fallen to the sea and is full of salt. I wanted to check if it makes sense to restore it but is too dirty.
Good luck, Matej
-
-
-
-
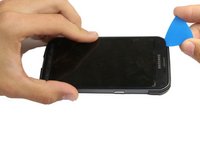
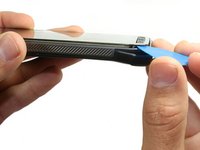
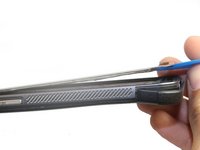
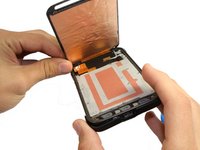
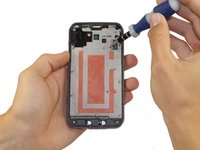
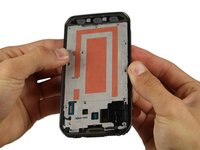
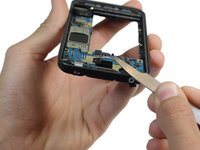
Slightly lift, but do not remove, the upper end of display assembly.
The Samsung Galaxy s 5 active does not have a finger print scanner
Nope thats the galaxy s 5 reg ,which should got instead same thing but less money
How can I even trust this when the Galaxy Active doesn't have a fingerprint scanner? %#*@... Sigh
-


To reassemble your device, follow these instructions in reverse order.
To reassemble your device, follow these instructions in reverse order.
Annuleren: ik heb deze handleiding niet afgemaakt.
6 andere personen hebben deze handleiding voltooid.
Team

USF Tampa, Team 1-5, Hickman Fall 2014 Lid van USF Tampa, Team 1-5, Hickman Fall 2014
USFT-HICKMAN-F14S1G5
3 Leden
7 handleidingen geschreven
1Gids Commentaar
This is obviously not the front facing camera which is taken out in the end.
Those are the sensors. The camera is still in the upper right corner.
Same goes for the motherboard guide. Front camera is never disconnect nor taken out, this is an issue.
Great looking guide with well lit pictures and very concise bullet points.
Rusbell Gonzalez - Antwoord