Ga door naar hoofdinhoud
Samsung Galaxy S20 Plus Wireless Charging Coil Replacement

Samsung Galaxy S20 Plus Wireless Charging Coil Replacement

Alex Diaz-Kokaisl

Alex Diaz-Kokaisl en 3 andere bijdragers

Voor het laatst geüpdatet op March 29, 2025

45 minuten - 1 uur
Gemiddeld
Alleen vereisten
Deze handleiding is alleen bedoeld als vereiste voor andere handleidingen. Het staat niet op zichzelf.

Use this guide to replace the wireless charging coil and the loudspeaker in your Samsung Galaxy S20+.

  1. Samsung Galaxy S20 Plus Wireless Charging Coil Replacement, Unfasten the motherboard bracket: stap 1, afbeelding 1 van 2 Samsung Galaxy S20 Plus Wireless Charging Coil Replacement, Unfasten the motherboard bracket: stap 1, afbeelding 2 van 2
    Gereedschap gebruikt in deze stap:
    Magnetic Project Mat
    $19.95
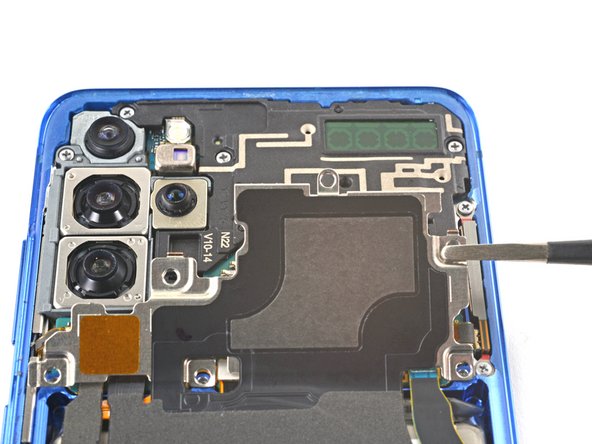
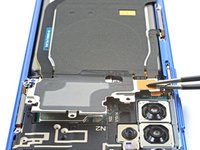
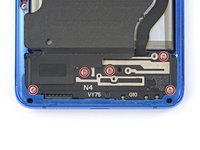
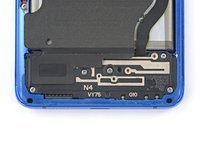
    • Use a Phillips #00 screwdriver to remove the six 4 mm-long screws securing the motherboard bracket.

    • Throughout this repair, keep track of each screw and make sure it goes back exactly where it came from.

  2. Samsung Galaxy S20 Plus Wireless Charging Coil Replacement, Unclip the motherboard bracket: stap 2, afbeelding 1 van 2 Samsung Galaxy S20 Plus Wireless Charging Coil Replacement, Unclip the motherboard bracket: stap 2, afbeelding 2 van 2
    Gereedschap gebruikt in deze stap:
    Tweezers
    $4.99
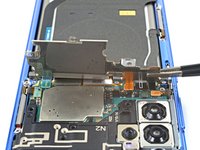
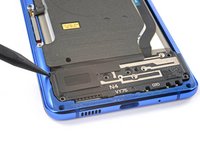
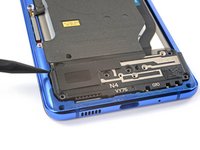
    • Use a pair of tweezers to gently pull up and unclip the motherboard bracket from the plastic midframe.

    • Do not completely remove the bracket yet, as its still attached to the wireless charging coil.

  3. Samsung Galaxy S20 Plus Wireless Charging Coil Replacement: stap 3, afbeelding 1 van 2 Samsung Galaxy S20 Plus Wireless Charging Coil Replacement: stap 3, afbeelding 2 van 2
    • Gently tilt up the motherboard bracket so the orange battery connector is accessible.

  4. Samsung Galaxy S20 Plus Wireless Charging Coil Replacement, Disconnect the battery: stap 4, afbeelding 1 van 2 Samsung Galaxy S20 Plus Wireless Charging Coil Replacement, Disconnect the battery: stap 4, afbeelding 2 van 2
    • Use a spudger to pry up and disconnect the battery connector.

    • When you disconnect connectors like these, be careful not to dislodge the small surface-mounted components surrounding the socket.

  5. Samsung Galaxy S20 Plus Wireless Charging Coil Replacement, Disconnect the wireless charging coil: stap 5, afbeelding 1 van 2 Samsung Galaxy S20 Plus Wireless Charging Coil Replacement, Disconnect the wireless charging coil: stap 5, afbeelding 2 van 2
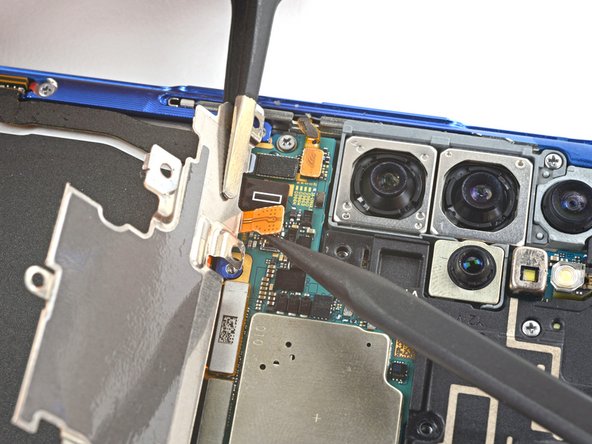
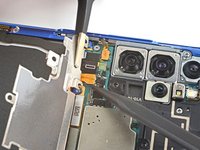
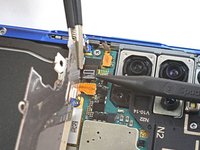
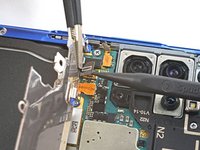
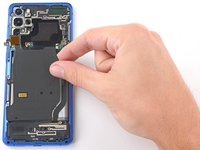
    • Use a spudger to pry up and disconnect the wireless charging coil connector.

  6. Samsung Galaxy S20 Plus Wireless Charging Coil Replacement, Unfasten the loudspeaker: stap 6, afbeelding 1 van 2 Samsung Galaxy S20 Plus Wireless Charging Coil Replacement, Unfasten the loudspeaker: stap 6, afbeelding 2 van 2
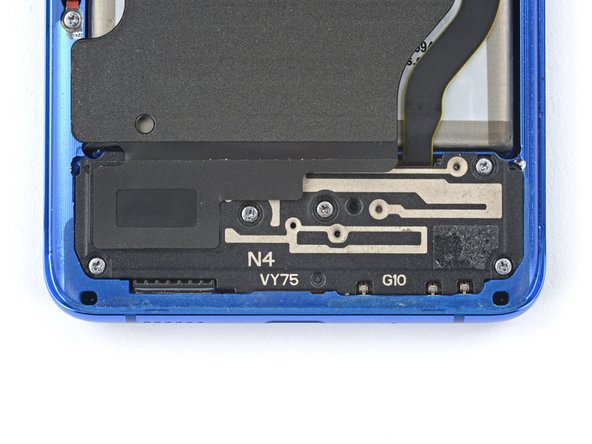
    • Use a Phillips #00 screwdriver to remove the five 4 mm-long screws securing the loudspeaker and lower midframe.

  7. Samsung Galaxy S20 Plus Wireless Charging Coil Replacement, Disconnect the loudspeaker: stap 7, afbeelding 1 van 2 Samsung Galaxy S20 Plus Wireless Charging Coil Replacement, Disconnect the loudspeaker: stap 7, afbeelding 2 van 2
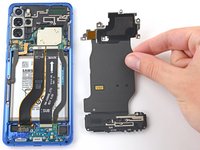
    • Insert the point of a spudger into the notch in the top left corner of the midframe and pry up to release the clips holding it in place.

    • Remove the loudspeaker and lower midframe.

  8. Samsung Galaxy S20 Plus Wireless Charging Coil Replacement, Remove the wireless charging coil: stap 8, afbeelding 1 van 2 Samsung Galaxy S20 Plus Wireless Charging Coil Replacement, Remove the wireless charging coil: stap 8, afbeelding 2 van 2
    • Use a pair of blunt-nose tweezers to gently peel the wireless charging coil away from the device.

    • Remove the wireless charging coil.

    • During reassembly, first reconnect the charging coil and battery connectors and refasten the motherboard bracket screws to properly align everything into place, then firmly press the coil pad down to adhere it.

Conclusie

To reassemble your device, follow these instructions in reverse order.

Repair didn’t go as planned? Check out our Answers community for troubleshooting help.

Alex Diaz-Kokaisl

Lid sinds: 01/16/22

163.222 Reputatie

769 handleidingen geschreven

Team

iFixit Lid van iFixit

Staff

118 Leden

19.537 handleidingen geschreven

0 opmerkingen

Voeg opmerking toe

Weergavestatistieken:

Afgelopen 24 uren: 0

Afgelopen 7 dagen: 12

Afgelopen 30 dagen: 18

Altijd: 58