Inleiding
Disassembling the case requires removing screws under the batteries. Removing anything inside requires this guide.
Wat je nodig hebt
-
-
Flip the Wii Remote over so the battery cover faces you.
-
Push up on the bottom tab.
-
Remove the battery cover.
-
-
-
-
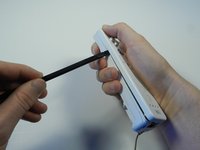
With the flat end of a spudger, gently apply pressure to the tabs located on left side of the controller.
-
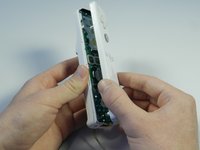
Open the front plate like a book.
Mine is not opening like a book? What do I do?
It stops short of explaining replacing rechargeable battery. Unless you’re referring to the AA’s which don’t involve removing cover
-


To reassemble your device, follow these instructions in reverse order.
To reassemble your device, follow these instructions in reverse order.
Annuleren: ik heb deze handleiding niet afgemaakt.
43 andere personen hebben deze handleiding voltooid.
Team

Cal Poly, Team 3-44, Amido Spring 2013 Lid van Cal Poly, Team 3-44, Amido Spring 2013
CPSU-AMIDO-S13S3G44
4 Leden
28 handleidingen geschreven
4 opmerkingen
Worked! Had to solder the tab to contact the battery which had broken. Saved $50.00.
The Tools section lists a Tri-Point Y1 Screwdriver but the guide mentions a Tri-Wing Y1 Screwdriver. This could cause people to purchase the wrong item.
iFixit’s guides seem to be based on the original Wii controller, model RVL-003. I’m not sure if Nintendo has changed fasteners for subsequent versions but the Wii MotionPlus Controller, model RVL-036, uses a Tri-Wing Y0 screw.
my battery cover is different. The batteries are attached to the actual cover and come out when the back is removed.
Kim Pearson - Antwoord