Ga door naar hoofdinhoud
Nintendo DS Back Panel Replacement

Nintendo DS Back Panel Replacement

dnguye26

dnguye26 en 15 andere bijdragers

Voor het laatst geüpdatet op June 9, 2024

5 minuten
Eenvoudig

Removing the back panel is simple, provided you have the correct screwdriver. Nintendo uses a special Tri-point bit for the case, be sure you have one of these before disassembling!

Wat je nodig hebt

Gereedschap

Toon meer…

  1. Nintendo DS Back Panel Replacement, Battery: stap 1, afbeelding 1 van 3 Nintendo DS Back Panel Replacement, Battery: stap 1, afbeelding 2 van 3 Nintendo DS Back Panel Replacement, Battery: stap 1, afbeelding 3 van 3
    • Remove the cartridge from the console.

    • Use a Phillips #00 Screwdriver to remove the screw securing the battery door to the rear case.

    • Remove the battery door.

    • In the images, it shows that the fixer is using a flathead screwdriver. This flathead screwdriver will work just like the Phillips #00 Screwdriver.

  2. Nintendo DS Back Panel Replacement: stap 2, afbeelding 1 van 1
    • Use a plastic opening tool or spudger to pry out the battery from the bottom. If a plastic opening tool or spudger isn't available, your fingernails may work.

  3. Nintendo DS Back Panel Replacement: stap 3, afbeelding 1 van 1
    • Remove the battery from the Nintendo DS.

  4. Nintendo DS Back Panel Replacement, Back Panel: stap 4, afbeelding 1 van 1
    • Remove the seven 6.4mm Y00 screws located on the back.

    • If your DS has a lanyard attached to it, you can remove it to make the process of opening the top-left screw easier.

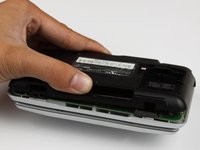
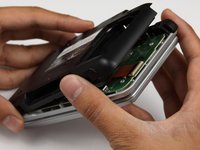
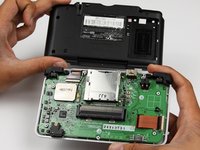
  5. Nintendo DS Back Panel Replacement: stap 5, afbeelding 1 van 3 Nintendo DS Back Panel Replacement: stap 5, afbeelding 2 van 3 Nintendo DS Back Panel Replacement: stap 5, afbeelding 3 van 3
    • With your hands, pry the back panel off the main case.

    • Separate the back from the front, and set it aside.

    If some of your screws spin free but can’t be removed, it maybe that the screw posts have separated from the shell.

    This makes separating the back panel more difficult, but it will still work.

    The plastic used for the original silver nds may be the most prone to the UV damage that causes the plastic to become brittle.

    Del Riordan - Antwoord

Conclusie

To reassemble your device, follow these instructions in reverse order.

18 andere personen hebben deze handleiding voltooid.

dnguye26

Lid sinds: 10/28/09

710 Reputatie

4 handleidingen geschreven

Team

Cal Poly, Team 18-3, Maness Fall 2009 Lid van Cal Poly, Team 18-3, Maness Fall 2009

CPSU-MANESS-F09S18G3

4 Leden

31 handleidingen geschreven

2Gids Commentaar

Where do I get a nintendo DS gamepak?

Kayla Maison - Antwoord

Kayla Maison , a gamepak is simply a GBA game.

Bob - Antwoord

Voeg opmerking toe

Weergavestatistieken:

Afgelopen 24 uren: 7

Afgelopen 7 dagen: 36

Afgelopen 30 dagen: 158

Altijd: 18,792