Ga door naar hoofdinhoud

Nikon Coolpix S9700 Back Panel Replacement

Wat je nodig hebt

  1. Nikon Coolpix S9700 Back Panel Replacement, Battery: stap 1, afbeelding 1 van 2 Nikon Coolpix S9700 Back Panel Replacement, Battery: stap 1, afbeelding 2 van 2
    • Press the ON/OFF button to power off the S9700.

    • Not doing so can damage the S9700 or cause electric shock.

  2. Nikon Coolpix S9700 Back Panel Replacement: stap 2, afbeelding 1 van 3 Nikon Coolpix S9700 Back Panel Replacement: stap 2, afbeelding 2 van 3 Nikon Coolpix S9700 Back Panel Replacement: stap 2, afbeelding 3 van 3
    • Place the S9700 upside down

    • Place your finger on the battery compartment cover and gently push toward the front of the S9700.

    • The cover will open up by itself.

  3. Nikon Coolpix S9700 Back Panel Replacement: stap 3, afbeelding 1 van 3 Nikon Coolpix S9700 Back Panel Replacement: stap 3, afbeelding 2 van 3 Nikon Coolpix S9700 Back Panel Replacement: stap 3, afbeelding 3 van 3
    • Push the yellow tab inside the battery compartment in the direction of the arrow. This will allow the battery to spring up.

  4. Nikon Coolpix S9700 Back Panel Replacement: stap 4, afbeelding 1 van 2 Nikon Coolpix S9700 Back Panel Replacement: stap 4, afbeelding 2 van 2
    • Grab the battery and pull out.

  5. Nikon Coolpix S9700 Back Panel Replacement, Back Panel: stap 5, afbeelding 1 van 2 Nikon Coolpix S9700 Back Panel Replacement, Back Panel: stap 5, afbeelding 2 van 2
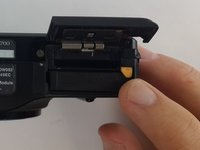
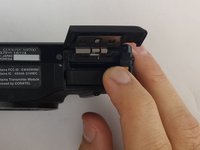
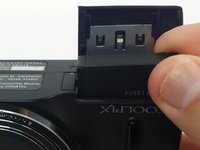
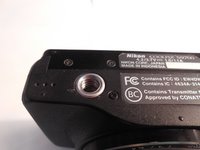
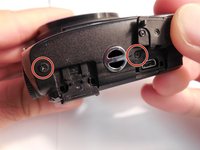
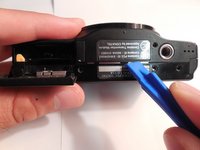
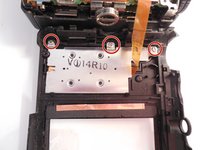
    • Remove the two 4-mm and three 3-mm J000 screws from the bottom of the S9700.

    • Three 3-mm screws are on the side opposite the battery compartment.

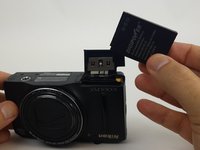
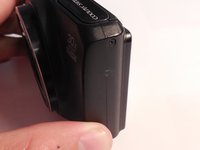
    • Two 4-mm screws are on the side with the battery compartment. One of these screws is in the battery compartment. Open it up for access.

  6. Nikon Coolpix S9700 Back Panel Replacement: stap 6, afbeelding 1 van 2 Nikon Coolpix S9700 Back Panel Replacement: stap 6, afbeelding 2 van 2
    • Remove the one 3-mm J000 screw on the left side of the S9700 (side with no ports).

    • Remove the two 3-mm J000 screws on the right side (side with HDMI and charging ports).

    • One of these screws is underneath the HDMI port cover. Lift the port cover up to access.

  7. Nikon Coolpix S9700 Back Panel Replacement: stap 7, afbeelding 1 van 3 Nikon Coolpix S9700 Back Panel Replacement: stap 7, afbeelding 2 van 3 Nikon Coolpix S9700 Back Panel Replacement: stap 7, afbeelding 3 van 3
    • Insert the plastic opening tool on the bottom of the S9700 between the front panel and the back panel.

    • Twist the plastic opening tool so that both halves separate.

    • When both halves are separated, the HDMI cover, charging cover, and the ON/OFF switch will fall out.

    • There is a flex ribbon attached to the back panel. Forcing the back panel off may rip it.

  8. Nikon Coolpix S9700 Back Panel Replacement: stap 8, afbeelding 1 van 3 Nikon Coolpix S9700 Back Panel Replacement: stap 8, afbeelding 2 van 3 Nikon Coolpix S9700 Back Panel Replacement: stap 8, afbeelding 3 van 3
    • Remove the three silver 3-mm J000 screws on the back panel holding the silver button / dial component to the panel and ribbon.

    • Gently remove the back panel.

Conclusie

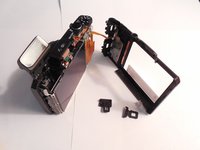
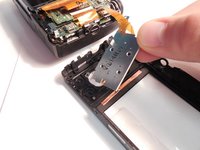
To reassemble your device, follow these instructions in reverse order.

Matt Staubus

Lid sinds: 10/05/16

825 Reputatie

5 handleidingen geschreven

Team

USF Tampa, Team 9-5, Lacy Fall 2016 Lid van USF Tampa, Team 9-5, Lacy Fall 2016

USFT-LACY-F16S9G5

4 Leden

10 handleidingen geschreven

0 opmerkingen

Voeg opmerking toe

Weergavestatistieken:

Afgelopen 24 uren: 0

Afgelopen 7 dagen: 0

Afgelopen 30 dagen: 6

Altijd: 1,103