Ga door naar hoofdinhoud
Motorola Droid Rear Case Replacement

Motorola Droid Rear Case Replacement

Brett Hartt

Brett Hartt en 6 andere bijdragers

Voor het laatst geüpdatet op October 22, 2018

10 minuten
Gemiddeld

This guide will take you through the delicate process of removing the rear panel of the Motorola Droid.

Wat je nodig hebt

Gereedschap

  • Spudger
    Spudger
  • T5 Torx Screwdriver
    T5 Torx Screwdriver
  1. Motorola Droid Rear Case Replacement, Battery: stap 1, afbeelding 1 van 3 Motorola Droid Rear Case Replacement, Battery: stap 1, afbeelding 2 van 3 Motorola Droid Rear Case Replacement, Battery: stap 1, afbeelding 3 van 3
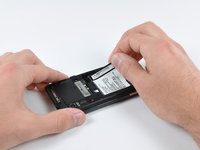
    • Slide the battery cover downwards while applying pressure to the center of the battery cover with your thumb.

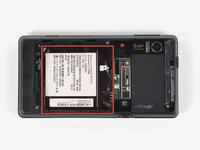
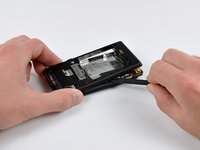
    • Lift and remove the battery cover out from the phone.

  2. Motorola Droid Rear Case Replacement: stap 2, afbeelding 1 van 1
    • Grasp the upper left corner of the battery and lift it out of its housing.

  3. Motorola Droid Rear Case Replacement, Rear Case: stap 3, afbeelding 1 van 1
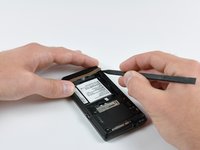
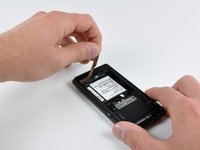
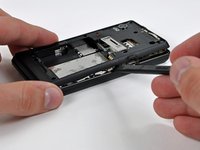
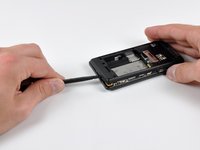
    • Use a spudger to lift and remove the black plastic screw cover at the top of the phone near the camera.

    • The cover is attached by adhesive, so some force may be required.

  4. Motorola Droid Rear Case Replacement: stap 4, afbeelding 1 van 2 Motorola Droid Rear Case Replacement: stap 4, afbeelding 2 van 2
    • Using the tip of a spudger, peel up one corner of the gold ribbon beneath the battery compartment.

    • Peel the ribbon up off the phone.

  5. Motorola Droid Rear Case Replacement: stap 5, afbeelding 1 van 2 Motorola Droid Rear Case Replacement: stap 5, afbeelding 2 van 2
    • Carefully peel the device information label that covers the motherboard EMI shields.

    • This label contains important information specific to the phone. Remove it with care and keep it in a safe place.

  6. Motorola Droid Rear Case Replacement: stap 6, afbeelding 1 van 1
    • Insert the flat end of a spudger and pry the plastic camera cover up off the phone.

    • The thin plastic cover is attached to the phone with an adhesive. Work slowly and carefully.

  7. Motorola Droid Rear Case Replacement: stap 7, afbeelding 1 van 1
    • Remove the seven 5.5 mm T5 Torx screws securing the rear case to the inner case.

  8. Motorola Droid Rear Case Replacement: stap 8, afbeelding 1 van 1
    • Insert the flat end of a spudger and pry downwards to release the plastic tab holding the rear case to the motherboard screw.

  9. Motorola Droid Rear Case Replacement: stap 9, afbeelding 1 van 1
    • Gently insert a spudger between the rear case and front case at the top of the phone, near the audio jack.

    • Carefully pry the top edge of the rear case up from the rest of the phone.

  10. Motorola Droid Rear Case Replacement: stap 10, afbeelding 1 van 2 Motorola Droid Rear Case Replacement: stap 10, afbeelding 2 van 2
    • With the spudger still inserted between the rear case and front case, slide the spudger along the right edge of the device, moving toward the bottom, prying as you go.

    • Continue prying along the bottom edge of the device from right to left, freeing it from the front panel.

  11. Motorola Droid Rear Case Replacement: stap 11, afbeelding 1 van 2 Motorola Droid Rear Case Replacement: stap 11, afbeelding 2 van 2
    • Continue prying the rear case from the front case along the left side, moving from bottom to top.

    • Lift the rear case up out of the phone.

Conclusie

To reassemble your device, follow these instructions in reverse order.

6 andere personen hebben deze handleiding voltooid.

Brett Hartt

Lid sinds: 04/12/10

129.851 Reputatie

143 handleidingen geschreven

Team

iFixit Lid van iFixit

Staff

118 Leden

19.474 handleidingen geschreven

0 opmerkingen

Voeg opmerking toe

Weergavestatistieken:

Afgelopen 24 uren: 0

Afgelopen 7 dagen: 2

Afgelopen 30 dagen: 16

Altijd: 40,783