Ga door naar hoofdinhoud
Motorola Droid RAZR Rear Case Replacement

Motorola Droid RAZR Rear Case Replacement

David Hodson

David Hodson en 2 andere bijdragers

Voor het laatst geüpdatet op January 5, 2015

Geen schatting
Moeilijk

The rear case of the Droid RAZR contains the loudspeaker and the flash for the rear-facing camera. Removing the rear case is necessary in order to access either of those components.

Wat je nodig hebt

Gereedschap

Toon meer…

  1. Motorola Droid RAZR Rear Case Replacement, Back Cover: stap 1, afbeelding 1 van 2 Motorola Droid RAZR Rear Case Replacement, Back Cover: stap 1, afbeelding 2 van 2
    • Insert a plastic opening tool between the back cover and rear case at the lower left edge of the back cover.

    • Pry the back cover up with the plastic opening tool to free the plastic clips.

    • Continue prying along the left edge of the back cover towards the top of the phone.

  2. Motorola Droid RAZR Rear Case Replacement: stap 2, afbeelding 1 van 3 Motorola Droid RAZR Rear Case Replacement: stap 2, afbeelding 2 van 3 Motorola Droid RAZR Rear Case Replacement: stap 2, afbeelding 3 van 3
    • Work the plastic opening tool across the top of the back case to free the plastic clips.

    • The top edge of the back case is very thin. Pry carefully to avoid cracking or snapping it.

    • Continue prying down the right side of the back cover to free the remaining clips.

  3. Motorola Droid RAZR Rear Case Replacement: stap 3, afbeelding 1 van 3 Motorola Droid RAZR Rear Case Replacement: stap 3, afbeelding 2 van 3 Motorola Droid RAZR Rear Case Replacement: stap 3, afbeelding 3 van 3
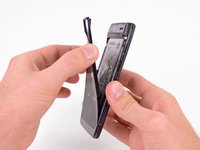
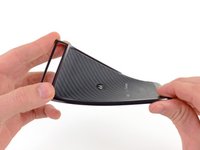
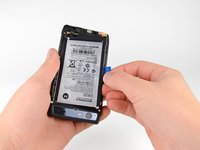
    • Pull the back cover away from the phone to remove it.

    • The back cover is attached to the battery with a generous amount of adhesive, so you may have to use quite a bit of force to separate the two pieces.

    • The battery must remain in the phone and not come off with the back cover or you will break the power lead.

    • Since the back cover is made of Kevlar, it can handle a fair amount of twisting and tugging without breaking.

  4. Motorola Droid RAZR Rear Case Replacement, Battery: stap 4, afbeelding 1 van 2 Motorola Droid RAZR Rear Case Replacement, Battery: stap 4, afbeelding 2 van 2
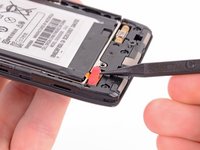
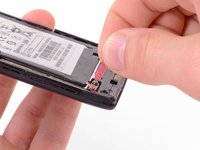
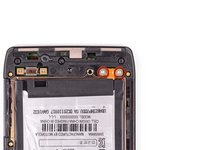
    • Use the tip of a spudger to lift up the red silicone cover over the battery terminal screws and remove it.

  5. Motorola Droid RAZR Rear Case Replacement: stap 5, afbeelding 1 van 3 Motorola Droid RAZR Rear Case Replacement: stap 5, afbeelding 2 van 3 Motorola Droid RAZR Rear Case Replacement: stap 5, afbeelding 3 van 3
    • Remove the two 3.3 mm T5 Torx battery terminal screws.

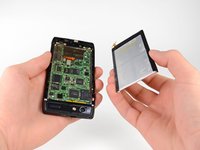
    • Grab the blue battery removal tab and lift the battery out to remove it.

    • There is quite a bit of adhesive securing the battery to the motherboard. Work slowly to avoid deforming the battery.

    • Your phone will have a number of metal EMI shields on the motherboard, rather than the bare ICs seen here.

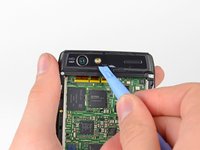
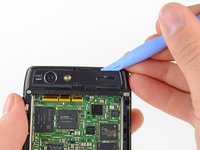
  6. Motorola Droid RAZR Rear Case Replacement, Camera Cover: stap 6, afbeelding 1 van 2 Motorola Droid RAZR Rear Case Replacement, Camera Cover: stap 6, afbeelding 2 van 2
    • Use a heat gun or hair dryer to soften the adhesive underneath the camera cover.

    • The following steps were performed without the use of a heat gun. Notice that the camera cover cracks very easily if you do not heat the adhesive that holds it in place.

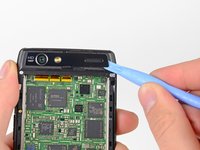
    • Gently pry up the bottom edge of the camera cover with a plastic opening tool.

    • Carefully slide the plastic opening tool across the bottom edge to free it from the adhesive.

    • Continue to use the heat gun as needed to soften the adhesive as you remove the camera cover.

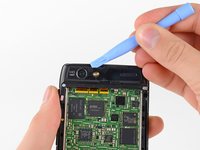
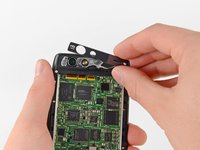
  7. Motorola Droid RAZR Rear Case Replacement: stap 7, afbeelding 1 van 3 Motorola Droid RAZR Rear Case Replacement: stap 7, afbeelding 2 van 3 Motorola Droid RAZR Rear Case Replacement: stap 7, afbeelding 3 van 3
    • Insert the plastic opening tool underneath the top edge of the camera cover.

    • Gently pry the camera cover up as you slide the plastic opening tool across the top edge to free it from the adhesive.

    • Remove the camera cover.

  8. Motorola Droid RAZR Rear Case Replacement, Rear Case: stap 8, afbeelding 1 van 1
    • Remove the six screws securing the rear case to the rest of the phone:

    • three 6.7 mm silver T3 Torx screws at the top,

    • four 4.0 mm gold T3 Torx screws in the middle,

    • and three 4.5 mm black T5 Torx screws at the bottom.

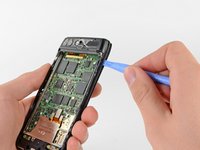
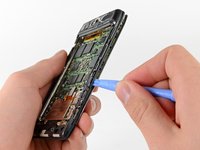
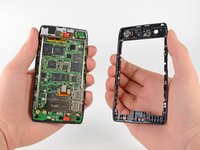
  9. Motorola Droid RAZR Rear Case Replacement: stap 9, afbeelding 1 van 3 Motorola Droid RAZR Rear Case Replacement: stap 9, afbeelding 2 van 3 Motorola Droid RAZR Rear Case Replacement: stap 9, afbeelding 3 van 3
    • Insert a plastic opening tool between the rear case and the motherboard assembly.

    • Work your way down the side of the phone and gently pry the rear case up.

    • Separate the rear case from the motherboard assembly.

Conclusie

To reassemble your device, follow these instructions in reverse order.

3 andere personen hebben deze handleiding voltooid.

David Hodson

Lid sinds: 04/13/10

152.745 Reputatie

127 handleidingen geschreven

0 opmerkingen

Voeg opmerking toe

Weergavestatistieken:

Afgelopen 24 uren: 0

Afgelopen 7 dagen: 3

Afgelopen 30 dagen: 5

Altijd: 7,076