Inleiding
Follow this guide to replace the wireless antenna assembly in your MacBook Pro, or to get it out of the way for other repairs.
For your safety, drain your MacBook Pro’s battery to 25% charge or less before you begin.
Wat je nodig hebt
-
-
Power on your Mac and launch Terminal.
-
Copy and paste the following command (or type it exactly) into Terminal:
-
sudo nvram AutoBoot=%00
-
Press [return]. If prompted, enter your administrator password and press [return] again. Note: Your return key may also be labeled ⏎ or "enter."
-
sudo nvram AutoBoot=%03
-
-
Gereedschap gebruikt in deze stap:Magnetic Project Mat$19.95
-
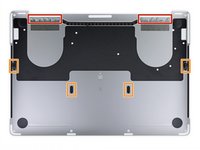
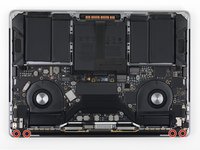
Use a P5 Pentalobe driver to remove the six screws securing the lower case:
-
Two 6.2 mm screws
-
Four 3.4 mm screws
-
-
-
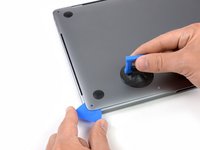
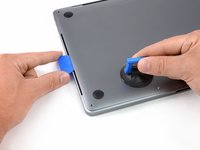
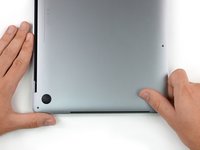
Apply a suction handle to the lower case near the front-center area of the MacBook Pro.
-
Lift the suction handle to create a slight gap between the lower case and the chassis.
-
-
-
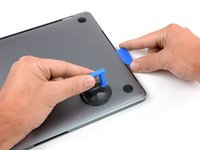
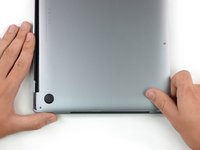
Insert one corner of an opening pick into the space between the lower case and the chassis.
-
Slide the opening pick around the nearest corner and halfway up the side of the case.
-
-
-
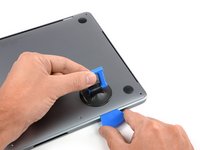
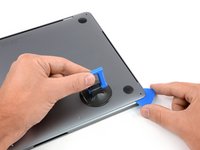
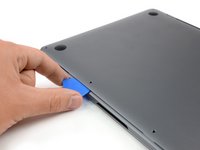
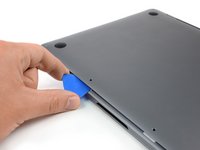
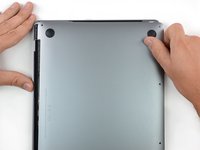
Insert your opening pick once again under the front edge of the lower case, near one of the two centermost screw holes.
-
Give the pick a firm twist to pop free the third clip securing the lower case to the chassis.
-
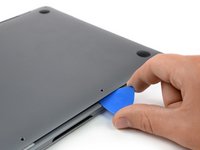
Repeat this procedure near the other of the two centermost screw holes, popping the fourth clip free.
-
-
-
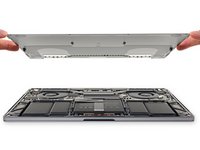
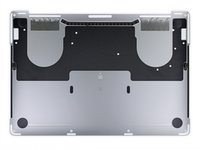
Remove the lower case.
-
Set it in place and align the sliding clips near the display hinge. Press down and slide the cover toward the hinge. It should stop sliding as the clips engage.
-
When the sliding clips are fully engaged and the lower case looks correctly aligned, press down firmly on the lower case to engage the four hidden clips underneath. You should feel and hear them snap into place.
-
-
-
Carefully peel up the large piece of tape covering the battery connector, on the edge of the logic board nearest the battery.
-
Remove the tape.
-
-
-
-
Use a spudger to gently lift the battery power connector, disconnecting the battery.
-
Lift the connector high enough so that it stays separated from its socket. If it accidentally makes contact during the course of your repair, it could damage your MacBook Pro.
-
-
-
Remove the four 1.9 mm T3 Torx screws securing the plastic covers on top of the display hinges.
-
Remove both plastic hinge covers.
-
-
-
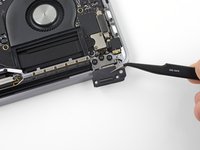
Remove the two 2.9 mm T3 Torx screws securing the aluminum cover on top of the main display cable.
-
Remove the cover.
-
-
Gereedschap gebruikt in deze stap:Tweezers$4.99
-
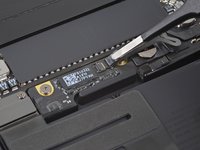
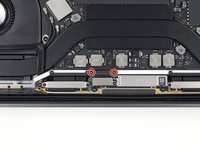
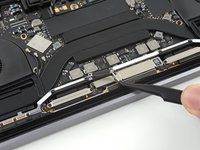
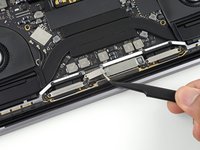
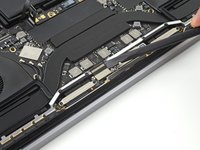
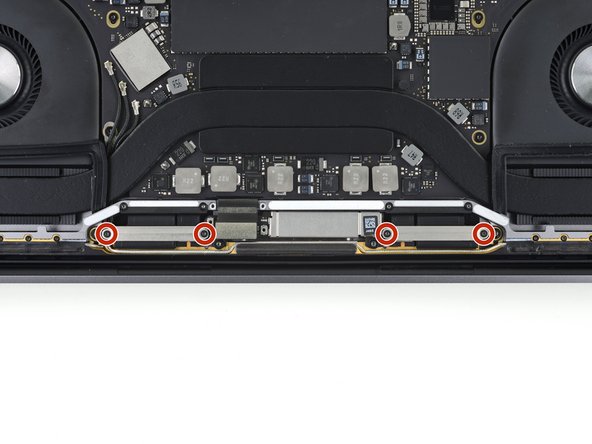
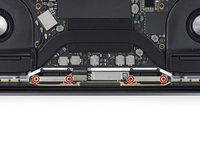
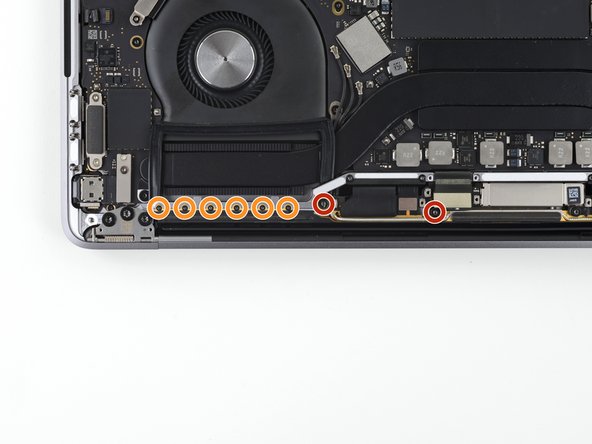
Remove the four 1.5 mm T3 Torx screws securing the two aluminum covers on top of the two display board cables.
-
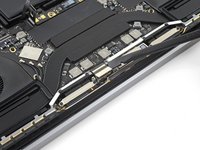
Use a pair of tweezers to remove the two aluminum covers.
-
-
-
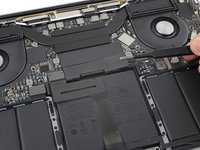
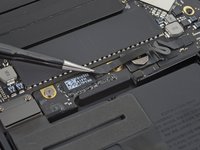
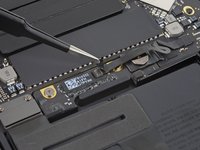
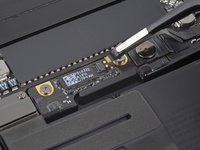
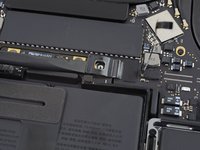
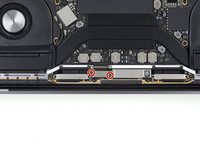
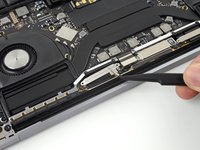
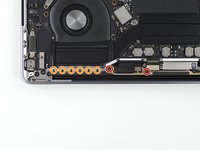
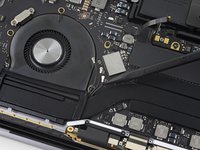
Carefully disconnect the three antenna coax cables by prying them straight up from the logic board.
-
-
-
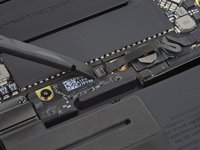
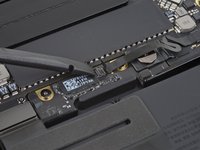
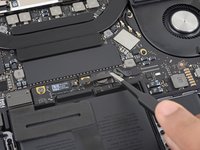
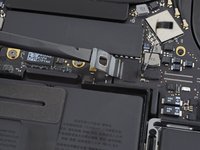
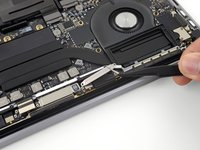
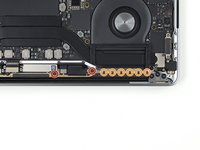
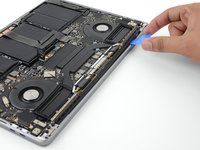
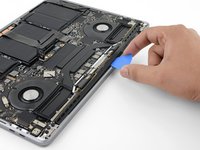
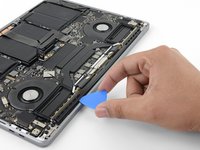
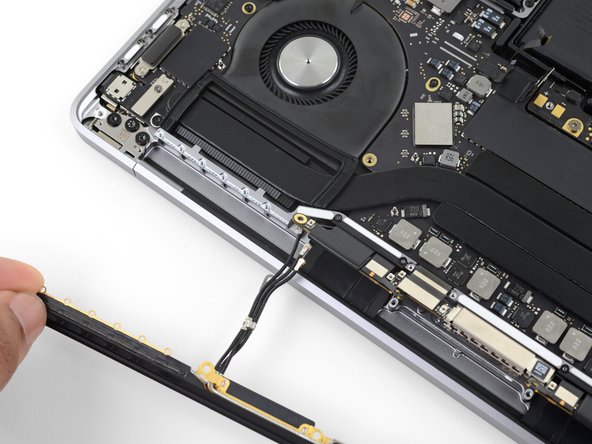
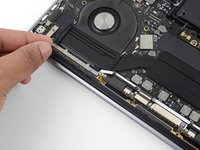
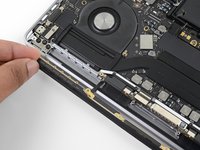
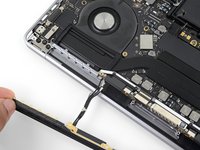
Use an opening pick to lever out the antenna cable assembly in the areas shown.
-
-
-
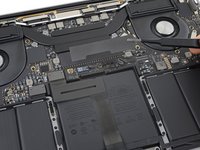
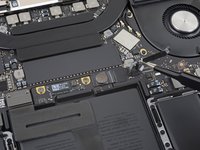
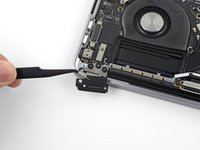
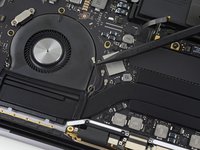
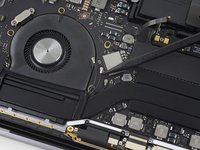
Carefully remove the antenna assembly, while simultaneously feeding the antenna cable bundle out from underneath the heat pipe.
-


Compare your new replacement part to the original part—you may need to transfer remaining components or remove adhesive backings from the new part before installing.
To reassemble your device, follow the above steps in reverse order.
Take your e-waste to an R2 or e-Stewards certified recycler.
Repair didn’t go as planned? Try some basic troubleshooting or search our Answers community for help.
Annuleren: ik heb deze handleiding niet afgemaakt.
Één andere persoon heeft deze handleiding voltooid.
