
Levoit LV-H132 Motherboard Replacement
Inleiding
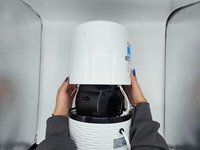
Ga naar stap 1If the control panel on your Levoit LV-H132 device is not working when it's connected to the power outlet, then it is time to replace the motherboard. Is the device overheating, producing strange noises, or smell burnt? Then the motherboard must have short circuited. Other causes could be that it has gone bad or gone old.
Wat je nodig hebt


To reassemble your device, follow these instructions in reverse order.
To reassemble your device, follow these instructions in reverse order.
Annuleren: ik heb deze handleiding niet afgemaakt.
2 andere personen hebben deze handleiding voltooid.
Team

University of North Texas, Team 2-3, Harold Fall 2023 Lid van University of North Texas, Team 2-3, Harold Fall 2023
UNT-HAROLD-F23S2G3
4 Leden
5 handleidingen geschreven