Ga door naar hoofdinhoud
Lenovo V15-ADA Battery Replacement

Lenovo V15-ADA Battery Replacement

Jacob Schorr

Jacob Schorr en 5 andere bijdragers

Voor het laatst geüpdatet op January 20, 2025

15 - 25 minuten
Gemiddeld
Verwarrende Tekst

If your device isn’t charging or loses charge quickly, it may be time to replace the battery. Follow the instructions below to replace the battery in the Lenovo V15-ADA.

Before you begin this repair, make sure your laptop is powered off and unplugged from the charger.

Wat je nodig hebt

Gereedschap

Toon meer…

  1. Lenovo V15-ADA Battery Replacement, Back Panel Assembly: stap 1, afbeelding 1 van 2 Lenovo V15-ADA Battery Replacement, Back Panel Assembly: stap 1, afbeelding 2 van 2
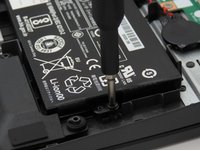
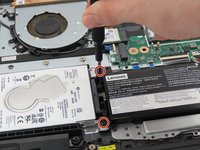
    • Remove the 10 marked screws using a Phillips #1 screwdriver from the back plate.

    • M2.5 × 7 mm, Phillips-head (6) (RED circles)

    • M2.5 × 4 mm, Phillips-head (4) (ORANGE circles)

  2. Lenovo V15-ADA Battery Replacement: stap 2, afbeelding 1 van 2 Lenovo V15-ADA Battery Replacement: stap 2, afbeelding 2 van 2
    • After all 10 screws have been removed, insert a spudger between the bottom plate and the housing and slide across.

    • Repeat for all 4 sides until loose.

    • Pop off the back plate and set aside.

  3. Lenovo V15-ADA Battery Replacement, Battery: stap 3, afbeelding 1 van 3 Lenovo V15-ADA Battery Replacement, Battery: stap 3, afbeelding 2 van 3 Lenovo V15-ADA Battery Replacement, Battery: stap 3, afbeelding 3 van 3
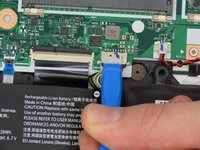
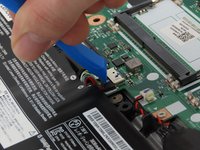
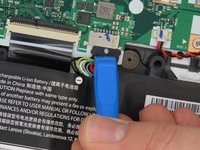
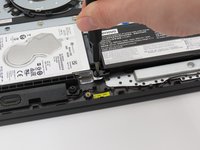
    • To start the removal of the battery, disconnect the ribbon cable connecting the battery to the computer.

  4. Lenovo V15-ADA Battery Replacement: stap 4, afbeelding 1 van 3 Lenovo V15-ADA Battery Replacement: stap 4, afbeelding 2 van 3 Lenovo V15-ADA Battery Replacement: stap 4, afbeelding 3 van 3
    • The battery is held in place by 3 screws. Use the Phillips #0 screwdriver to remove the screws that secure the battery.

    • M2 × 6 mm, Phillips-head, nylok-coated (3)

  5. Lenovo V15-ADA Battery Replacement: stap 5, afbeelding 1 van 1
    • Remove the battery from the device after completing steps 1 and 2.

Conclusie

To reassemble your device, follow these instructions in reverse order.

Jacob Schorr

Lid sinds: 02/21/24

442 Reputatie

4 handleidingen geschreven

0 opmerkingen

Voeg opmerking toe

Weergavestatistieken:

Afgelopen 24 uren: 2

Afgelopen 7 dagen: 9

Afgelopen 30 dagen: 33

Altijd: 237