Inleiding
Replacing the battery on your Kindle 2 is fairly simple. It only requires removing the back cover and a few screws.
Wat je nodig hebt
-
-
Lay the Kindle face down on a soft cloth to protect its screen.
-
Wedge the plastic opening tool in the small opening between the grey plastic and the metal casing.
-
Move the plastic opening tool across the opening while pressing down to separate the grey plastic from the metal casing.
-
Slide the gray plastic top piece away from the Kindle's metal casing.
-
Once the gray plastic top piece is detached from the metal back cover, remove it.
 Vraag FixBot
-
-
-
Use a Phillips #00 screwdriver to remove the two 4 mm screws from the metal casing.
-
-
-
-
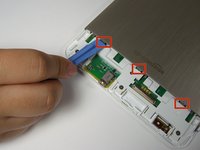
Use the plastic opening tool to push down and pry towards the metal casing to release each of the three clips that hold the metal case in place.
-
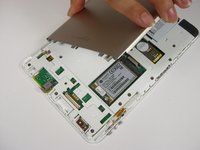
Remove the metal casing.
-
-
-
Use a Phillips #00 screwdriver to remove the two 3 mm screws that hold the battery in place.
-
-
-
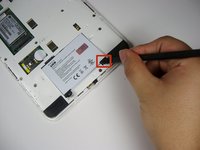
Pry upward under the black tab with the spudger to dislodge the battery.
-
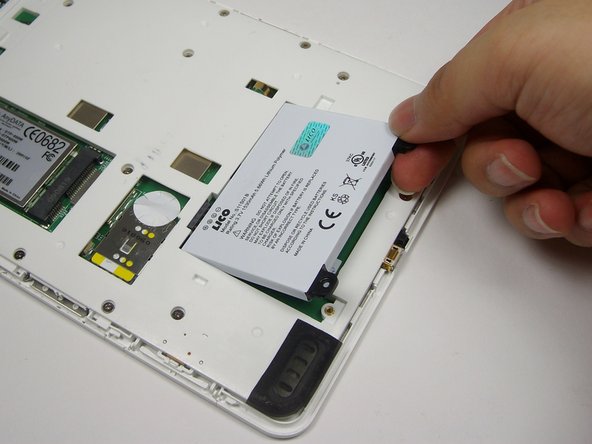
Use your fingers to lift the battery out of the device.
-


To reassemble your device, follow these instructions in reverse order.
Annuleren: ik heb deze handleiding niet afgemaakt.
42 andere personen hebben deze handleiding voltooid.
Team

Cal Poly, Team 12-32, Amido Spring 2013 Lid van Cal Poly, Team 12-32, Amido Spring 2013
CPSU-AMIDO-S13S12G32
4 Leden
14 handleidingen geschreven
9Gids Commentaar
Easy! Worked well with the tools described. Kudos for making this available, it gave my old Kindle a new breath of life!
An ebay-acquired battery fit perfectly, but failed to reboot the kindle or accept a charge.
the battery looks idential to the Kindale battery to an old analog voltmeter.
I conformed that the kindle terminals were receiving battery voltage.
The replacement guide was just fine, Back to the original battery, which is well past its best-by date!