
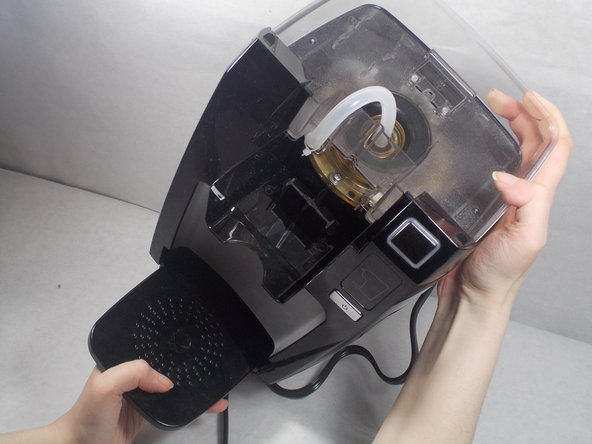
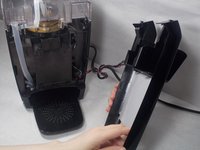
Keurig K10 MINI PLUS Water Pump Replacement
Inleiding
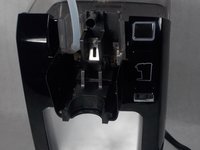
Ga naar stap 1The Water Pump within the Keurig K10 MINI Plus is a deeply embedded part. Due to the nature of it being attached both to an electrical source and a water source, it is not recommended to attempt this guide without previous familiarity with both.
Wat je nodig hebt
Gereedschap


Toon meer…
-
-
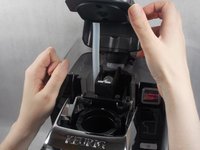
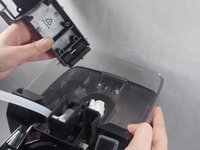
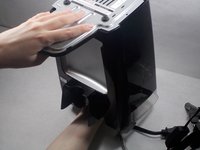
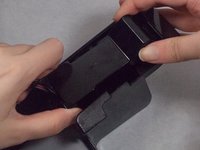
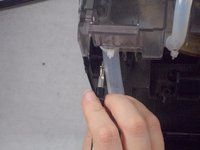
Lift the cold water reserve lid up to reveal its hinge.
-
Using either the metal spudger or the opening tool, gently pry the plastic out of the metal axle.
-
-
-
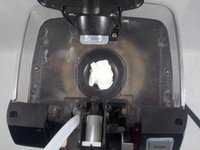
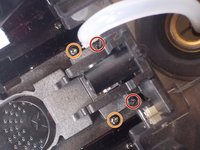
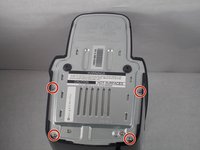
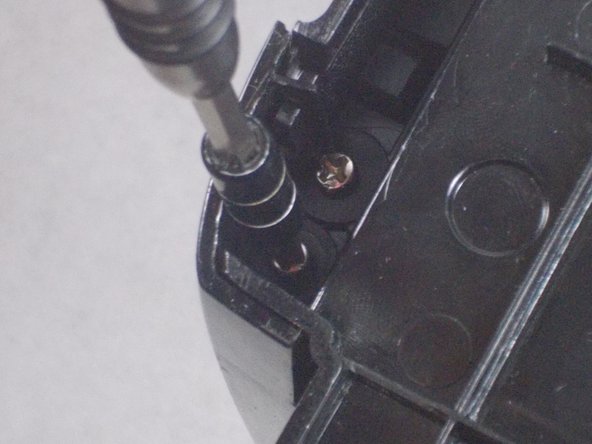
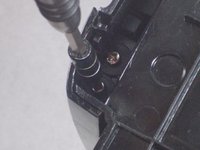
Remove two 9 mm Phillips #1 screws.
-
The screws are located on the top of where the K-Cup would be.
My K10 had two larger screws than the photo. There were Phillips #2 head and could not be retrieved with a magnet when they inevitably fell into a tight space as they were not attracted to magnets. There was also a catch toward the back of the top cover that finally released when an upward force of sufficient force was applied to the bottom front of the cover.
In my case the pump was fine. My problem was coffee grounds in the hose blocking the flow from the pump. The grounds were in the hose shown in Step 4.
-
-
-
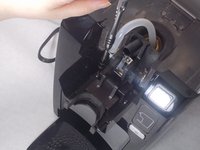
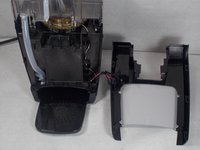
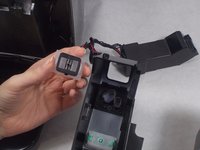
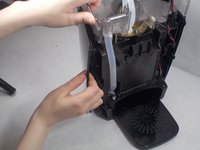
Once you remove the screws, the top cover should come out.
-
You will then want to remove these screws which are the same size.
On my model k10, these screws are actually slightly larger than those on step #3. So it is best to still separate them, just incase. Happy repairing~
The top cover didn’t come off easily on mine. Once I removed the 2 screws I had to slowly lift it up from the front until it popped off. It looks like there might have been a small glue spot at the back center of the plastic edge.
-
-
-
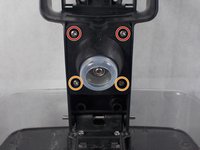
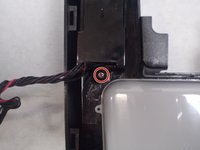
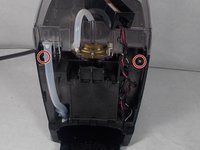
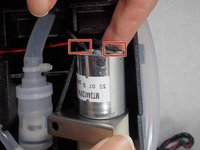
Remove two 14 mm Phillips #2 screws.
-
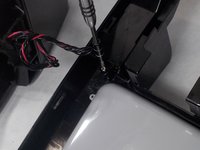
Remove two 12 mm Phillips #2 screws.
-
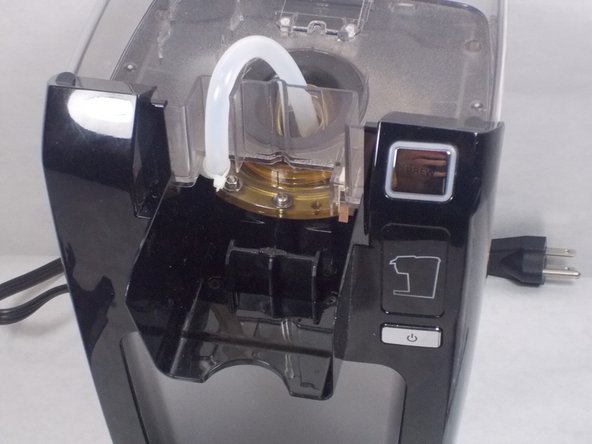
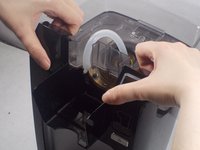
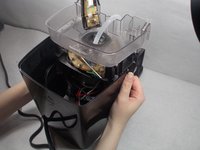
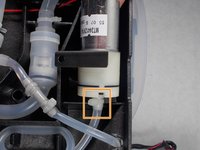
Lift the arm off the assembly. This will reveal the tank hole as shown.
-
-
-
-
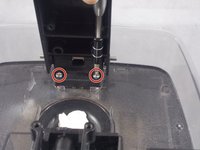
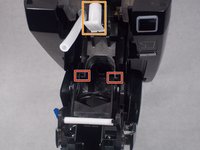
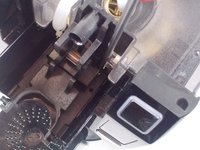
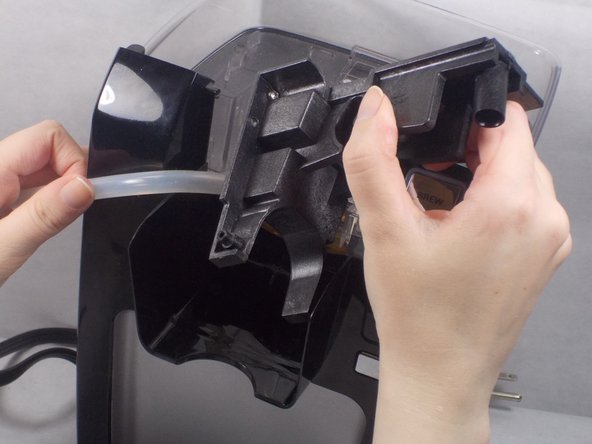
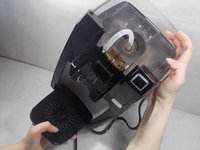
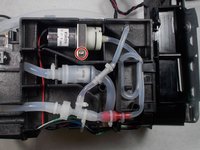
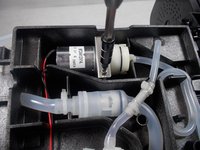
Pull the head assembly forward to reveal the two plastic axle points that keep the head assembly attached to the base.
Note that if you remove the white piece that holds the spring (highlighted in orange) that it needs to go back in the same orientation as shown in the image. If you put it in upside down, the arm assembly will not stay up by itself after reassembly. This gave me a fair amount of frustration so thought I should add it to save some the trouble.
-
-
-
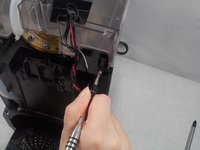
Remove two 14 mm Phillips #2 screws.
-
Remove two 12 mm Phillips #2 screws.
-
-
-
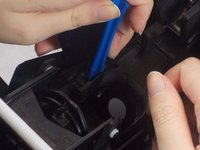
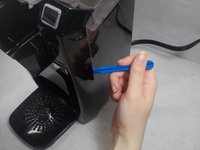
Begin to pry open the front plate using the iFixit Opening Tool as shown.
-
Pry upwards in order to take the cover off.
This is perhaps the hardest part, the pry UPWARD is not emphasized enough. The bottom clip will not pry out until the face is elevated upwards. I'd shift it up before prying on the sides.
-
-
-
Pry open the left, right, and back of the back plate by pulling out and up.
When assembling this back part together, make sure the clips underneath are secured in.
-


To reassemble your device, follow these instructions in reverse order.
To reassemble your device, follow these instructions in reverse order.
Annuleren: ik heb deze handleiding niet afgemaakt.
10 andere personen hebben deze handleiding voltooid.
Team

UMass Dartmouth, Team S5-G7, Gulbrandsen Fall 2018 Lid van UMass Dartmouth, Team S5-G7, Gulbrandsen Fall 2018
UMASSD-GULBRANDSEN-F18S5G7
3 Leden
5 handleidingen geschreven
6 opmerkingen
Great directions on how to disassemble and get at the water pump. I just can’t find where or how to order a replacement pump. Can you help?
I was very surprised I needed a guide to take this silly little coffee maker apart, but boy did I.
I've rebuilt entire engines that were less of a headache.
Thanks for the great write up (especially the heatsink pointer, never can find the last tube of thermal paste I bought)
Thank you a lot!!! you save me too much time
Thanks for the write-up. Keurig sure didn't make the disassembly process on this machine very intuitive!
I had a room-mate that put coffee grounds in the water receptacle and I had to completely dismantle the machine to clean it all out. The check valve was where the crud had built-up.
I found it very interesting to discover that the pump is actually an air pump that forces the water out of the heating chamber and into the coffee pod. The purpose of the loop of smaller tubing is to prevent water from being forced into the air pump.
Once I reached the end of this guide I did not see anything wrong with my K10. The pump checked out good so I started drawing and blowing through hoses myself... Finally water came out of the delivery hose!
The problem turned out to be the check-valve which was stuck or clogged because the machine sat so long without use. It was working fine when put away.
After reassembly the K10 is brewing once again! Thanks for the great Guide!