Ga door naar hoofdinhoud
Word lid van de reparatiegemeenschap - Account aanmaken

Joy-Con 2 (Right) Joystick Replacement

Wat je nodig hebt

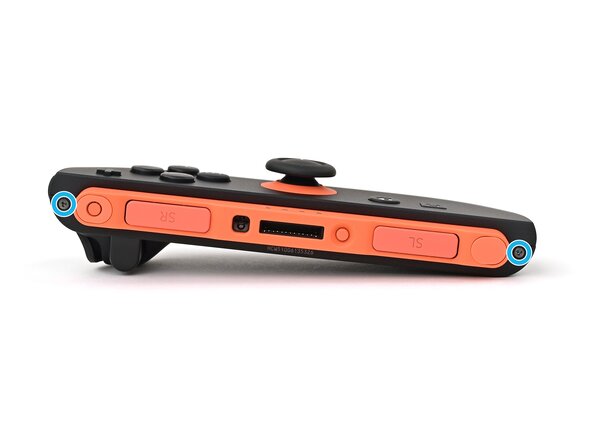
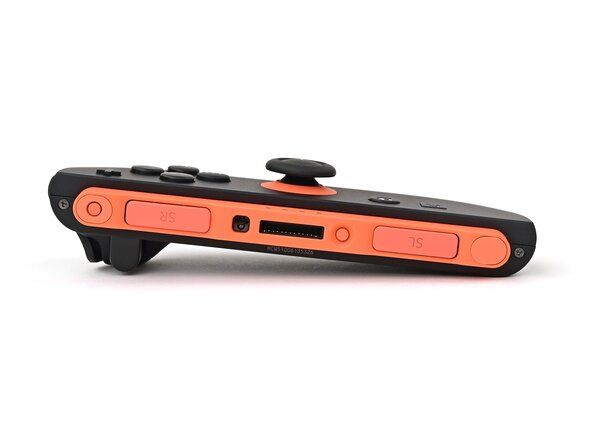
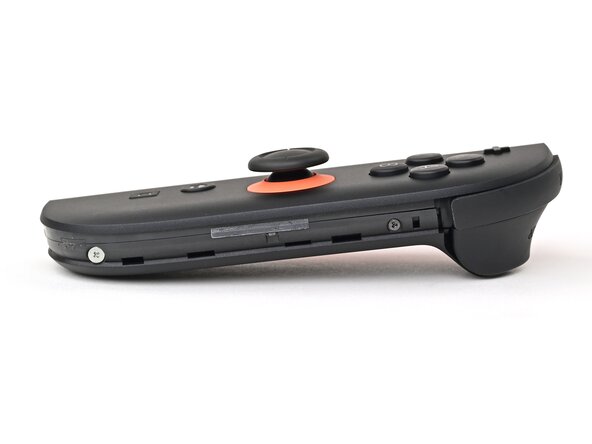
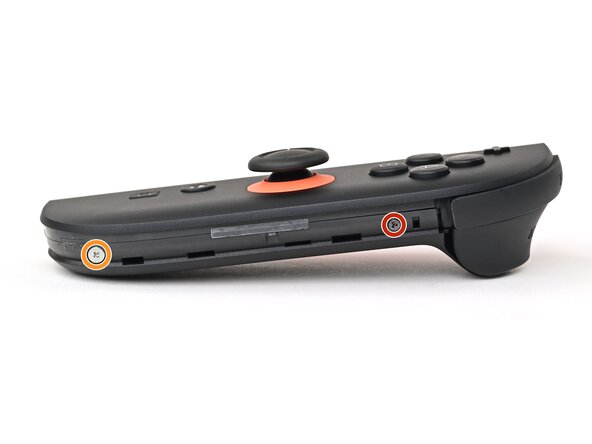
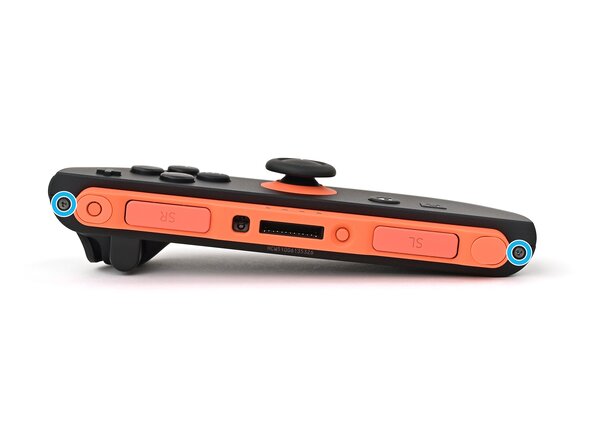
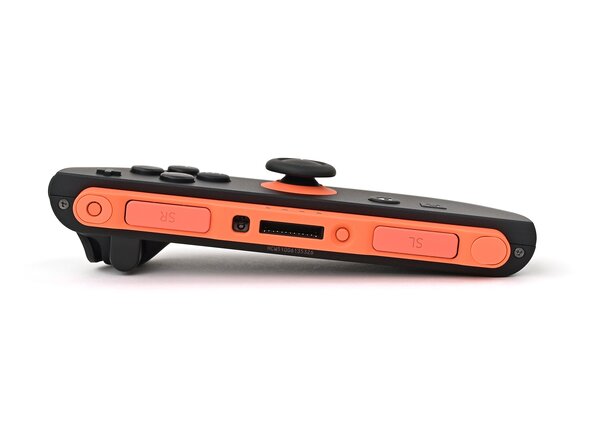
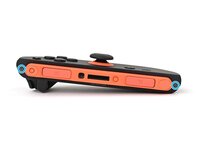
  1. Joy-Con 2 (Right) Joystick Replacement, Remove the left edge screws: stap 1, afbeelding 1 van 2 Joy-Con 2 (Right) Joystick Replacement, Remove the left edge screws: stap 1, afbeelding 2 van 2
    • Use a tri-point Y00 driver to remove the two 3.1 mm‑long black screws on the left edge of the controller.

    Vraag FixBot
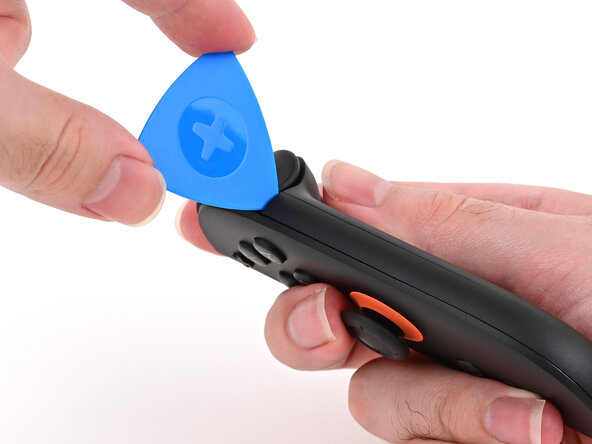
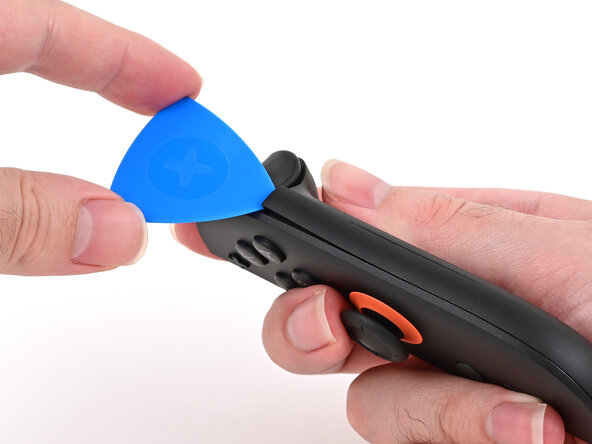
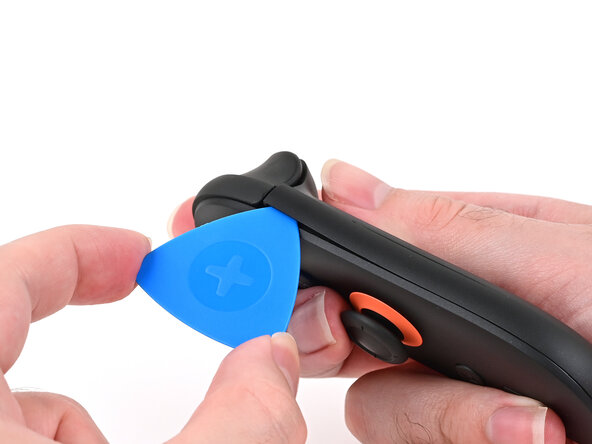
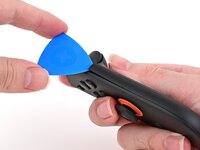
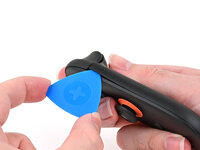
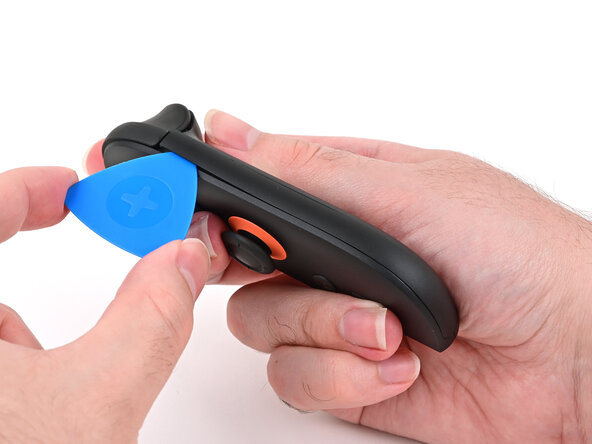
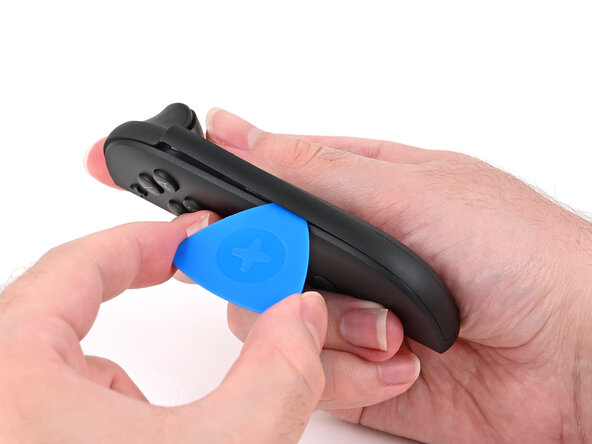
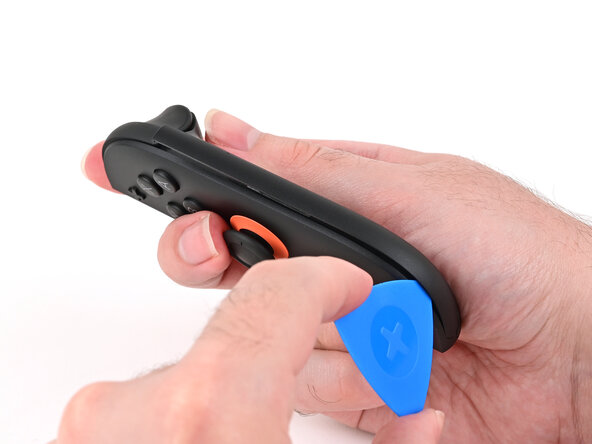
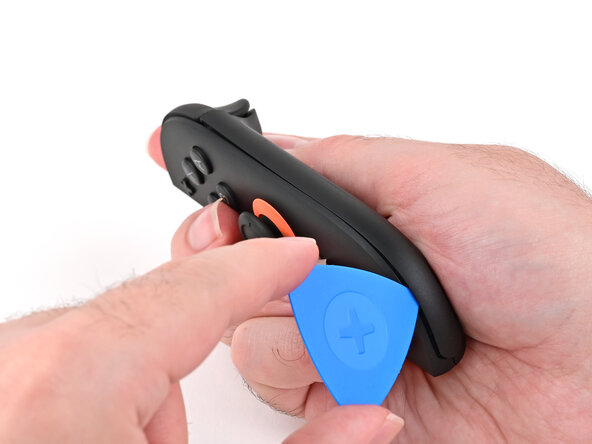
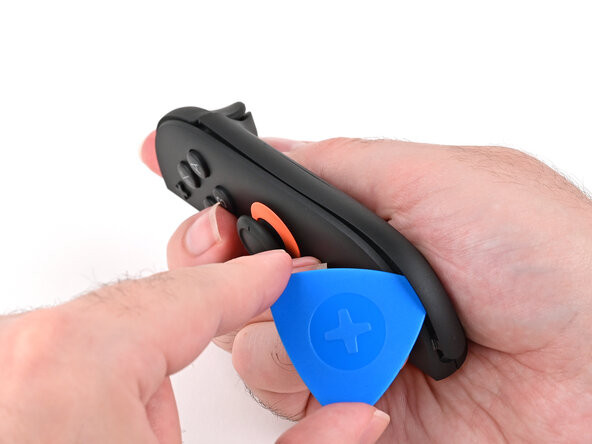
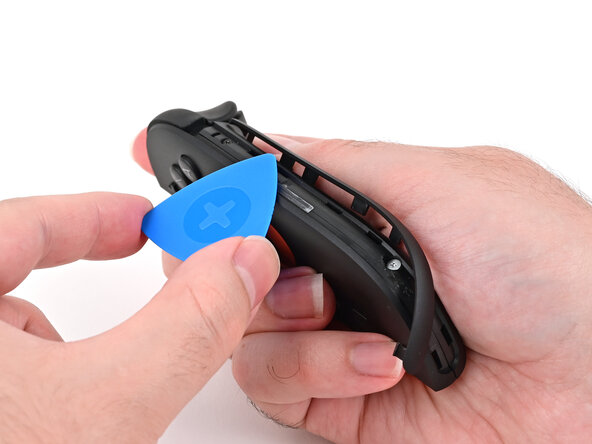
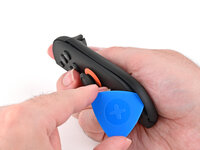
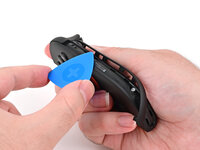
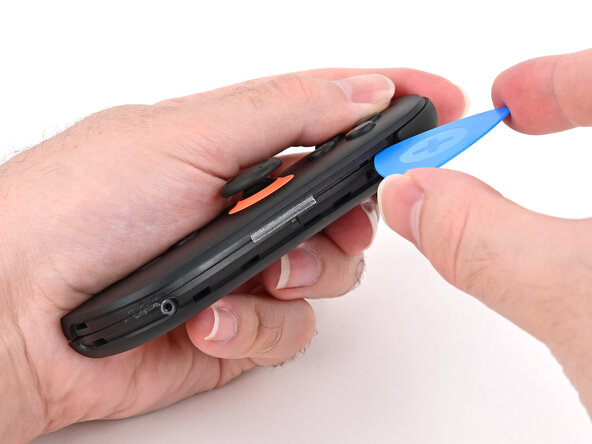
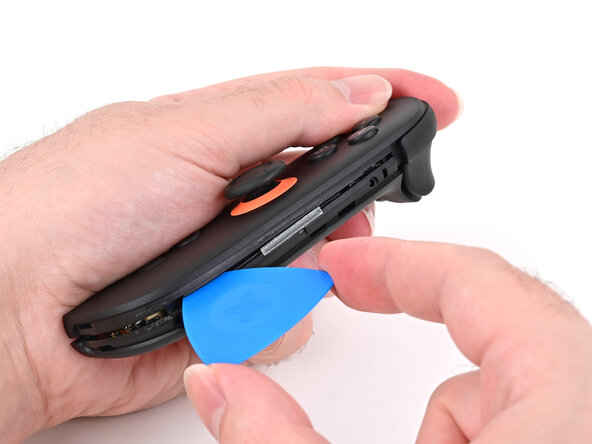
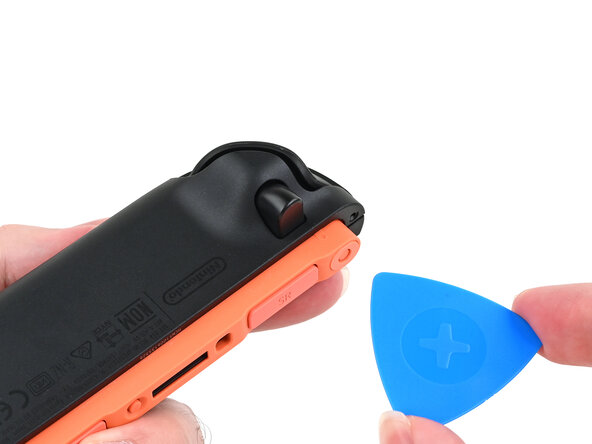
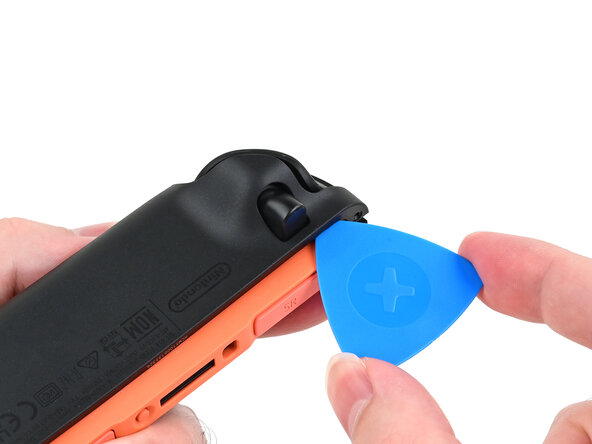
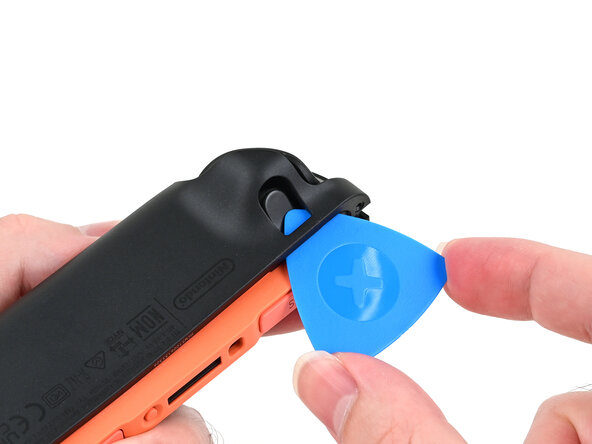
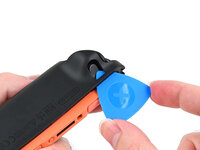
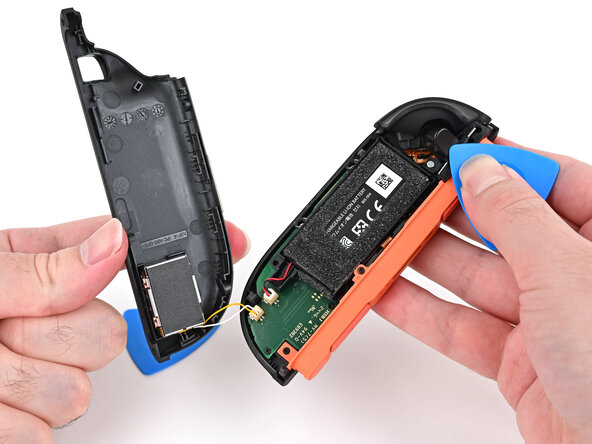
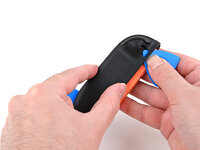
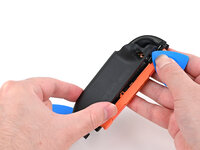
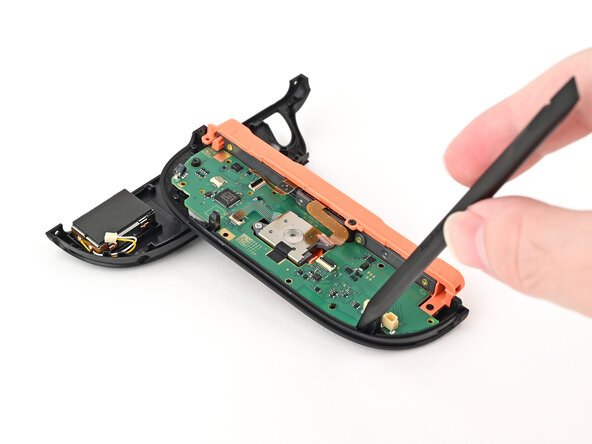
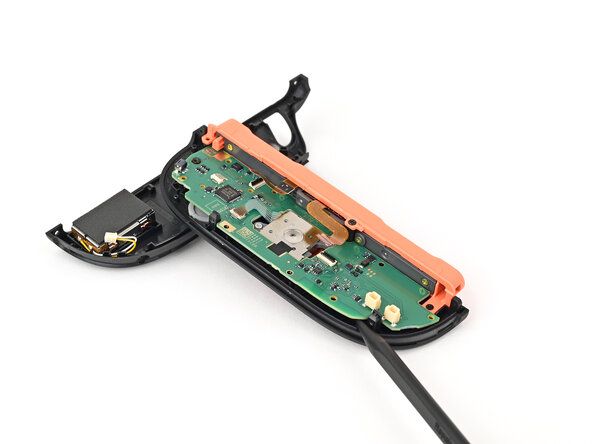
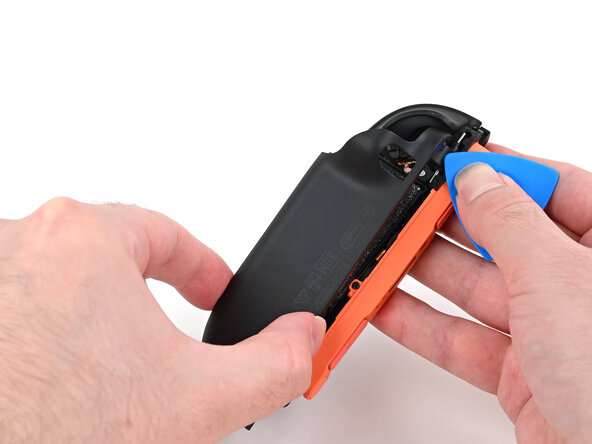
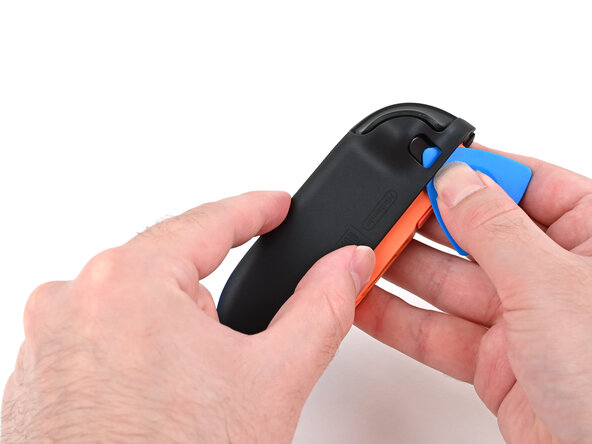
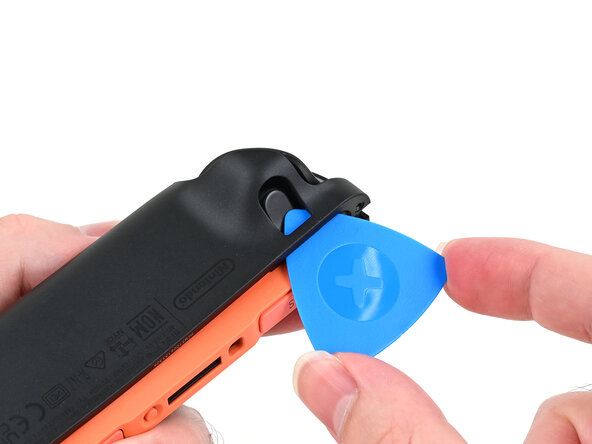
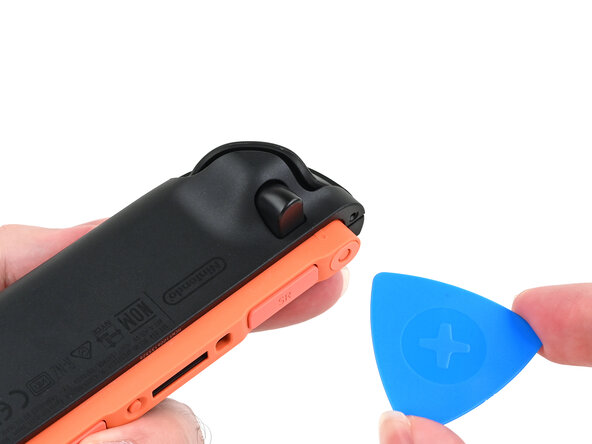
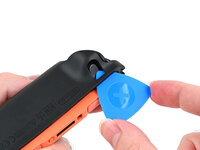
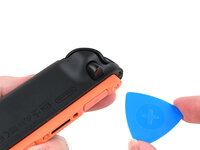
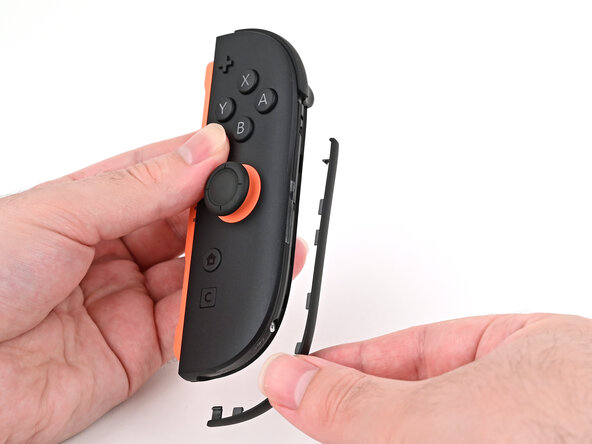
  2. Joy-Con 2 (Right) Joystick Replacement, Insert an opening pick: stap 2, afbeelding 1 van 3 Joy-Con 2 (Right) Joystick Replacement, Insert an opening pick: stap 2, afbeelding 2 van 3 Joy-Con 2 (Right) Joystick Replacement, Insert an opening pick: stap 2, afbeelding 3 van 3
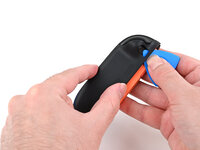
    • Insert an opening pick into the gap underneath the bumper button on the right side of the controller, with a point of the pick pointing downwards.

    • Pry up to slightly lift the plastic strip running across the right edge of the controller.

    • Slide the opening pick around to the front of the controller.

    Vraag FixBot
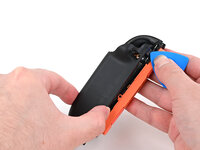
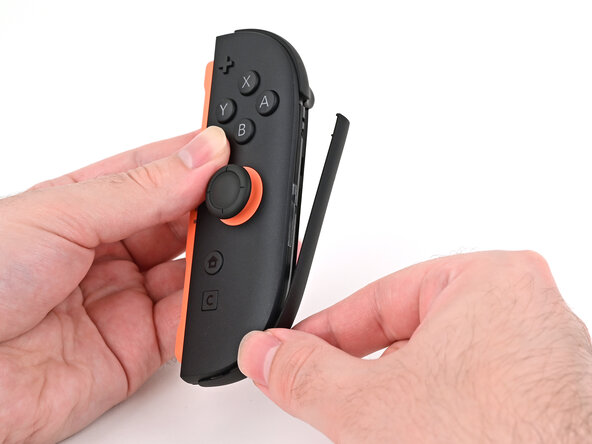
  3. Joy-Con 2 (Right) Joystick Replacement, Separate the plastic strip: stap 3, afbeelding 1 van 3 Joy-Con 2 (Right) Joystick Replacement, Separate the plastic strip: stap 3, afbeelding 2 van 3 Joy-Con 2 (Right) Joystick Replacement, Separate the plastic strip: stap 3, afbeelding 3 van 3
    • Slide the opening pick down the plastic strip to separate the clips and adhesive securing it to the controller's body.

    Vraag FixBot
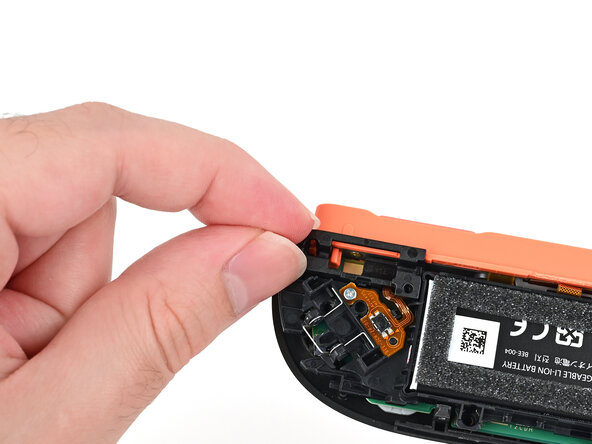
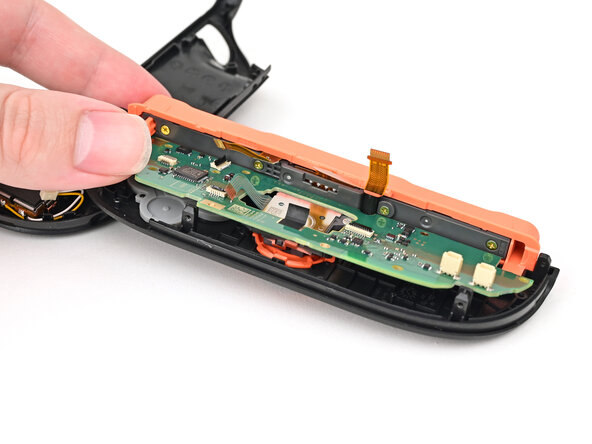
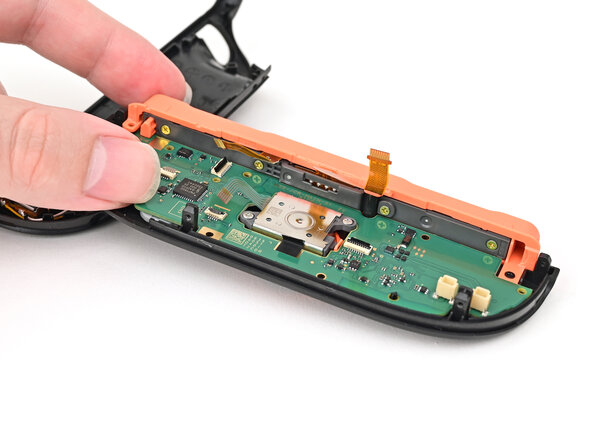
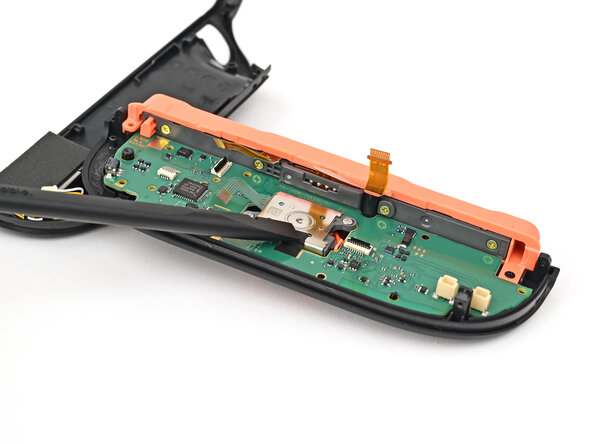
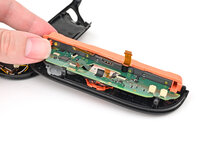
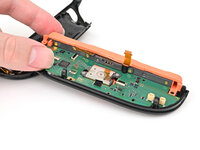
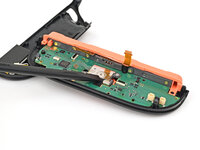
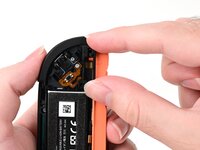
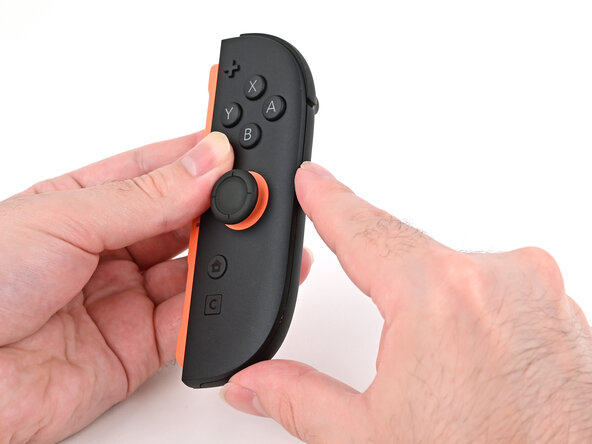
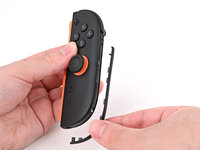
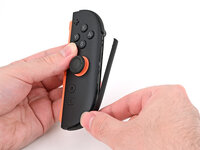
  4. Joy-Con 2 (Right) Joystick Replacement, Remove the plastic strip: stap 4, afbeelding 1 van 3 Joy-Con 2 (Right) Joystick Replacement, Remove the plastic strip: stap 4, afbeelding 2 van 3 Joy-Con 2 (Right) Joystick Replacement, Remove the plastic strip: stap 4, afbeelding 3 van 3
    • Pry up on the bottom edge of the plastic strip with slow, steady force.

    • Repeat this prying action along the length of the strip until it's fully detached.

    Vraag FixBot
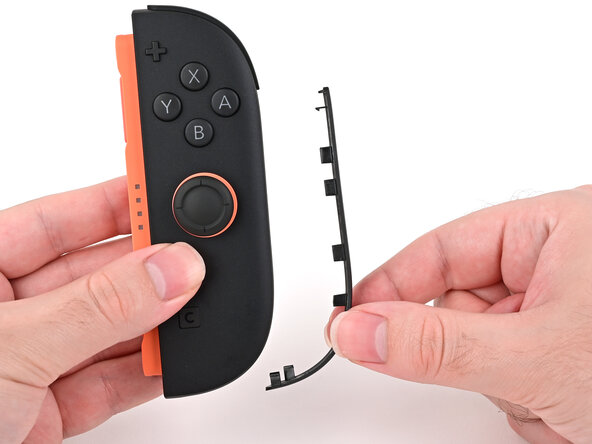
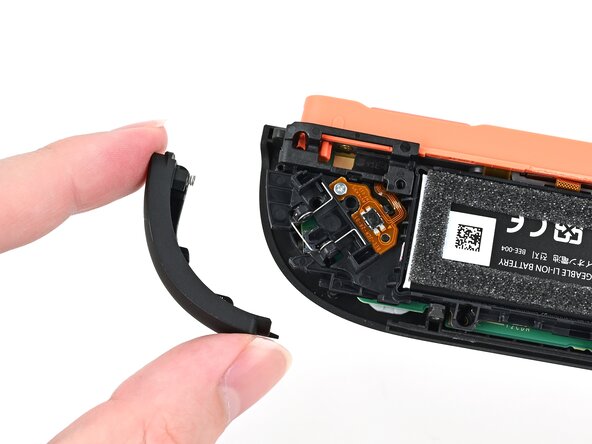
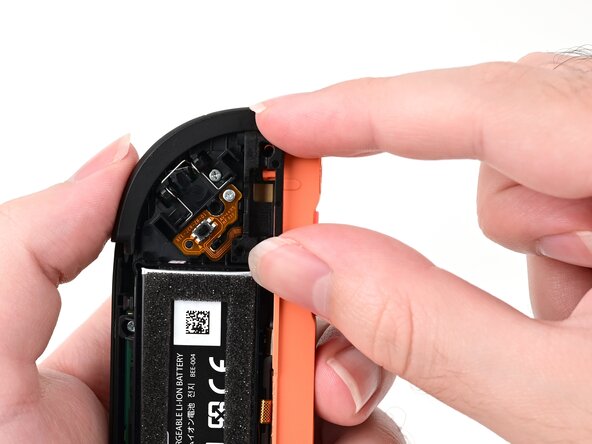
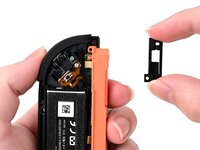
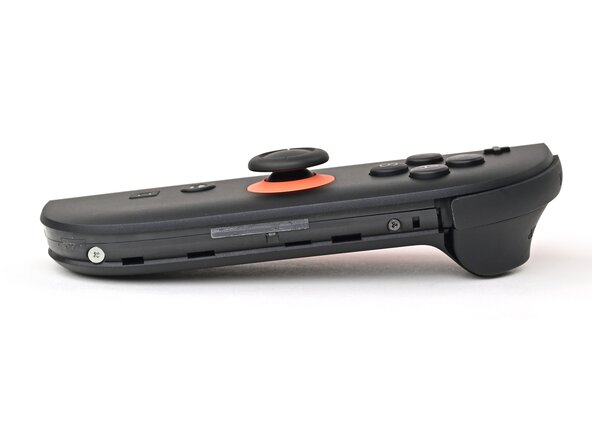
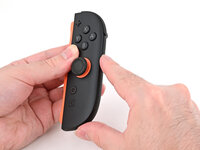
  5. Joy-Con 2 (Right) Joystick Replacement: stap 5, afbeelding 1 van 1
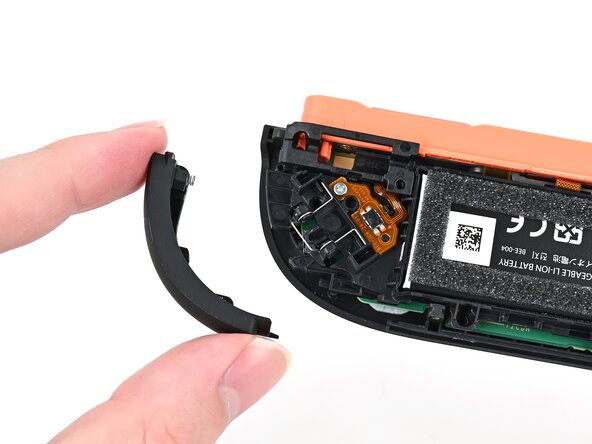
    • Remove the plastic strip.

    Vraag FixBot
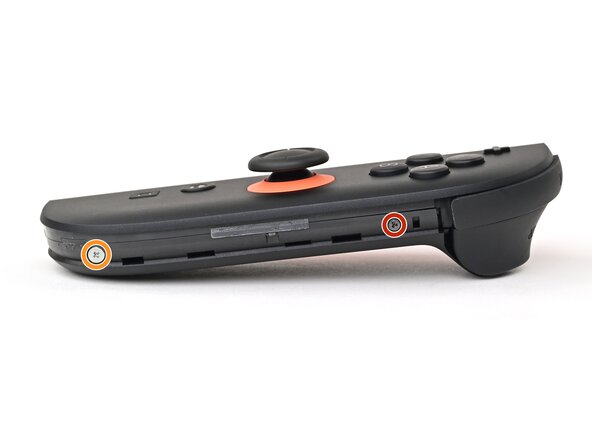
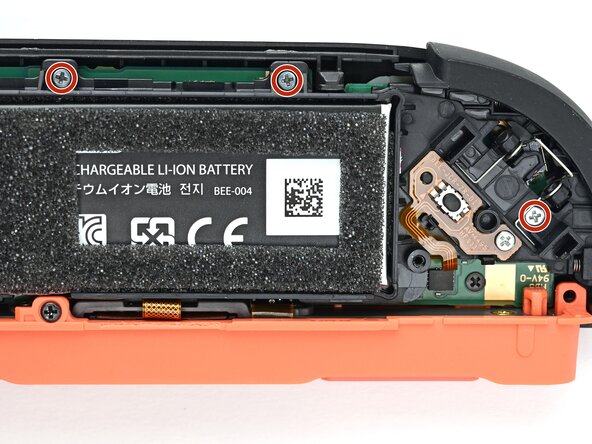
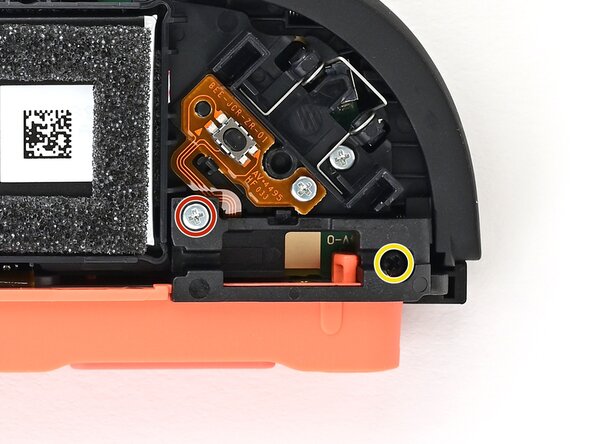
  6. Joy-Con 2 (Right) Joystick Replacement, Remove the right edge screws: stap 6, afbeelding 1 van 2 Joy-Con 2 (Right) Joystick Replacement, Remove the right edge screws: stap 6, afbeelding 2 van 2
    • Remove the two screws on the right edge of the controller:

    • One 3.1 mm‑long tri-point Y00 black screw

    • One 3.0 mm‑long JIS 00 silver screw

    • You can use a Phillips screwdriver in a pinch, but you risk damaging or stripping the screw. Push down firmly on the screwdriver and twist slowly. Often, switching drivers may help, even if they're the same size.

    Vraag FixBot
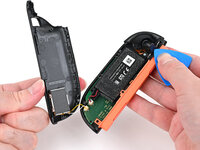
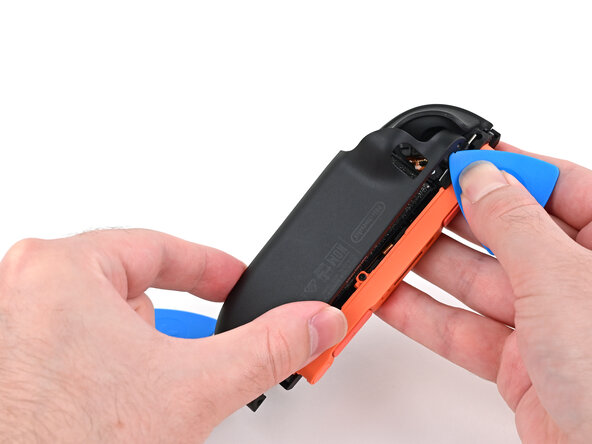
  7. Joy-Con 2 (Right) Joystick Replacement, Insert an opening pick: stap 7, afbeelding 1 van 2 Joy-Con 2 (Right) Joystick Replacement, Insert an opening pick: stap 7, afbeelding 2 van 2
    • Don't try to remove the back cover yet.

    • Insert an opening pick into the gap between the front and back halves of the controller on its right side.

    • Slide the pick down the controller to disengage the clips.

    • Leave the opening pick at the bottom of the controller's right edge, just before its curve.

    • The opening pick will fall out once the back cover is removed. If it falls out before then, put it back to keep the two halves separated.

    Vraag FixBot
  8. Joy-Con 2 (Right) Joystick Replacement, Insert a second opening pick: stap 8, afbeelding 1 van 3 Joy-Con 2 (Right) Joystick Replacement, Insert a second opening pick: stap 8, afbeelding 2 van 3 Joy-Con 2 (Right) Joystick Replacement, Insert a second opening pick: stap 8, afbeelding 3 van 3
    • Hold the controller upside-down.

    • Insert a point of another opening pick next to the release button towards the top of the controller.

    • Use the opening pick to press the release button through the gap.

    Vraag FixBot
  9. Joy-Con 2 (Right) Joystick Replacement, Release the back cover: stap 9, afbeelding 1 van 3 Joy-Con 2 (Right) Joystick Replacement, Release the back cover: stap 9, afbeelding 2 van 3 Joy-Con 2 (Right) Joystick Replacement, Release the back cover: stap 9, afbeelding 3 van 3
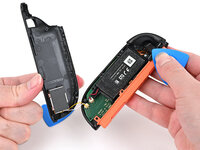
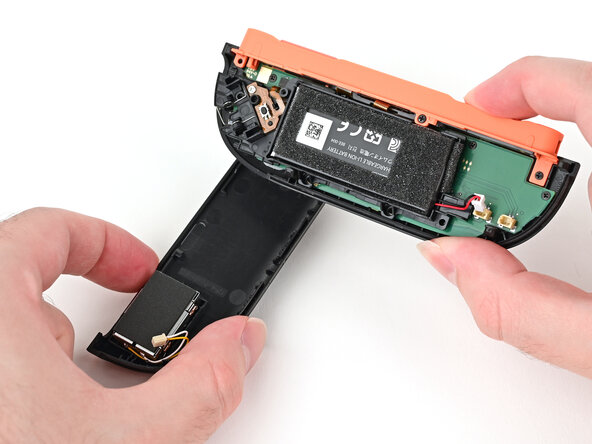
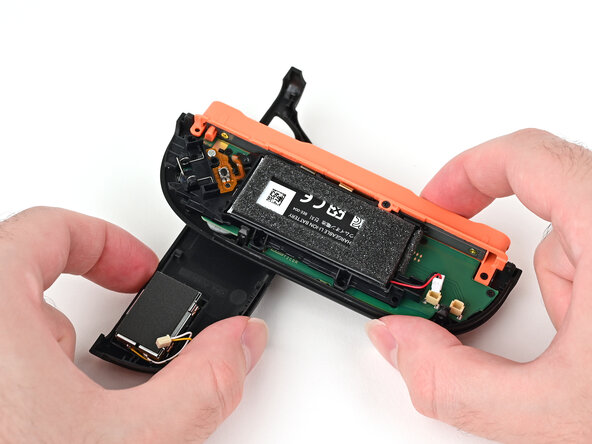
    • The back cover is connected to the controller by a cable at the bottom. Don't try to remove it completely yet.

    • While holding the release button with the opening pick, use your other hand to slide the back cover down to release the clips securing it to the controller's body.

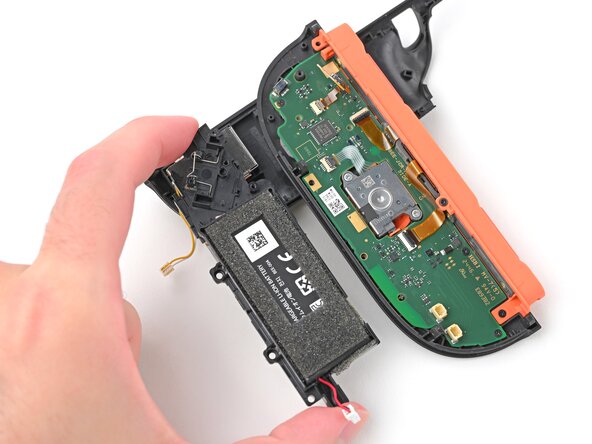
    • Open the back cover.

    Vraag FixBot
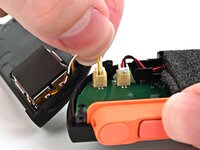
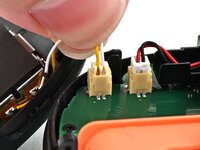
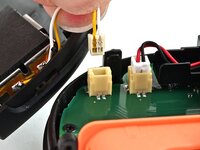
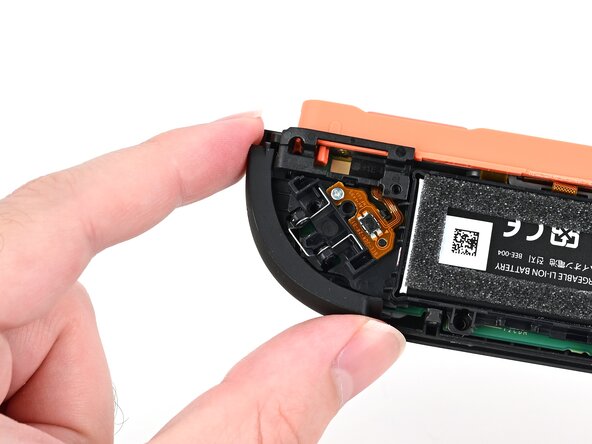
  10. Joy-Con 2 (Right) Joystick Replacement, Remove the back cover: stap 10, afbeelding 1 van 3 Joy-Con 2 (Right) Joystick Replacement, Remove the back cover: stap 10, afbeelding 2 van 3 Joy-Con 2 (Right) Joystick Replacement, Remove the back cover: stap 10, afbeelding 3 van 3
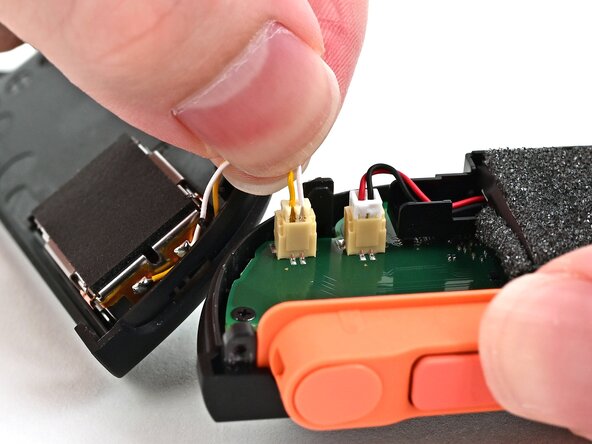
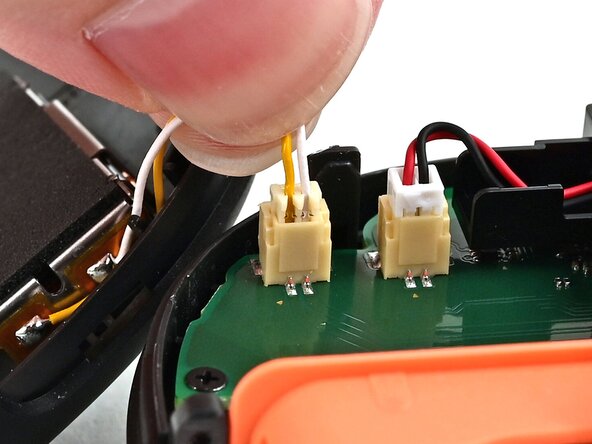
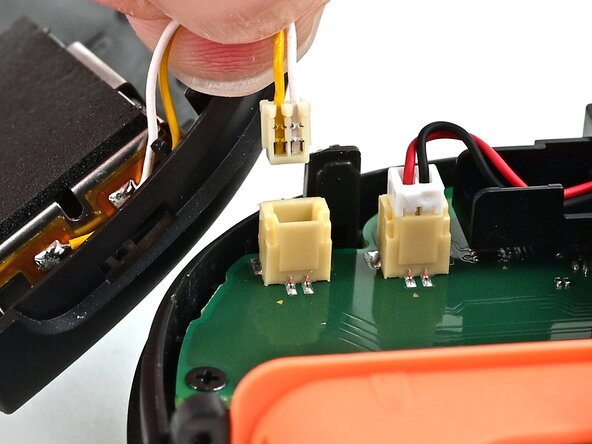
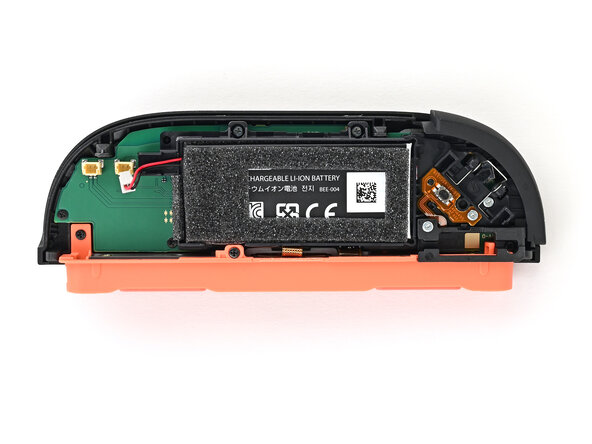
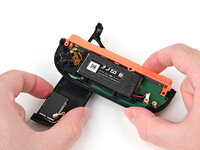
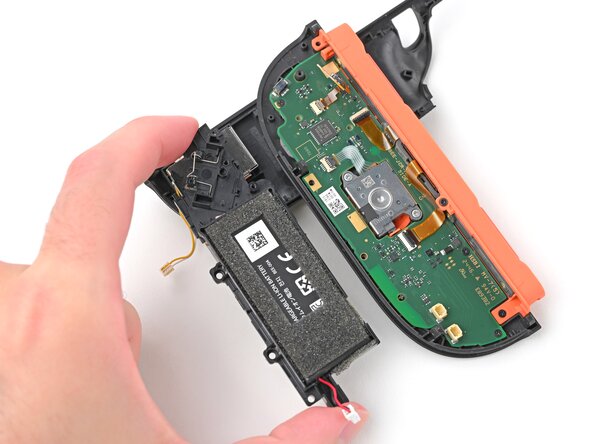
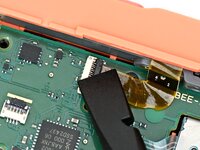
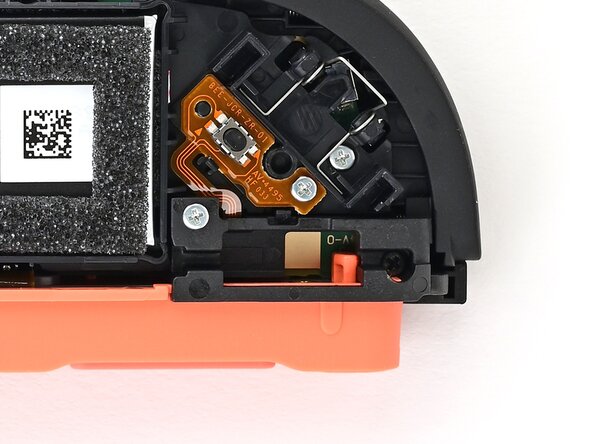
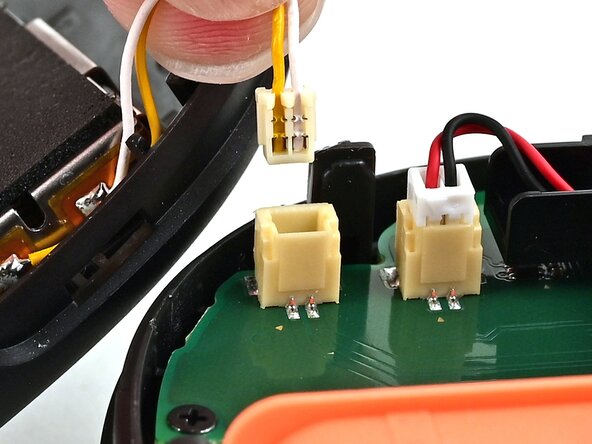
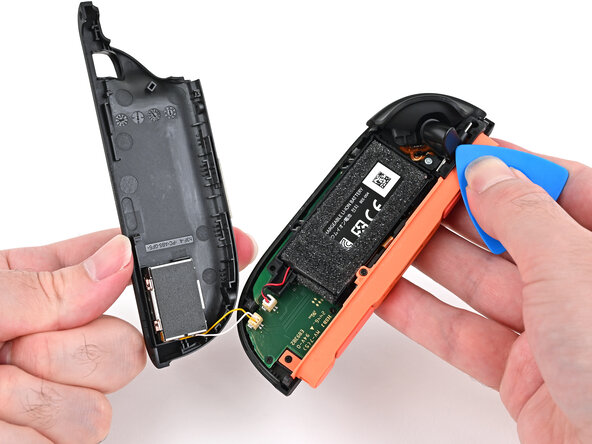
    • Firmly grasp the two wires (yellow and white) above the rumble motor connector, located at the bottom of the controller's board, and pull the beige connector out of its socket.

    • Pulling the cable won't damage it, but don't dig your nails into the plastic sheathing.

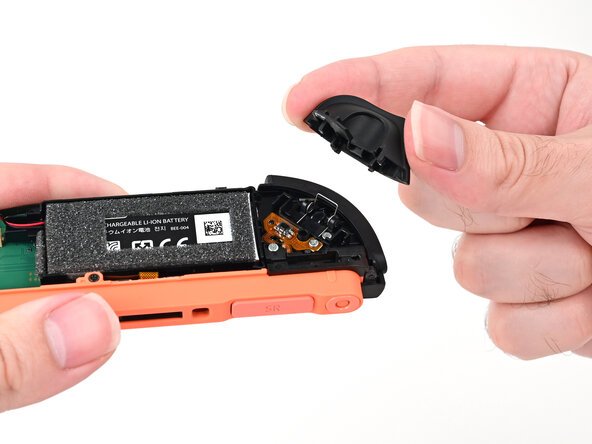
    • Remove the back cover.

    Vraag FixBot
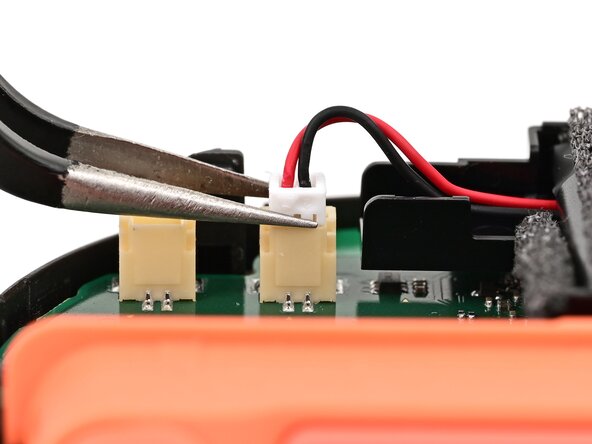
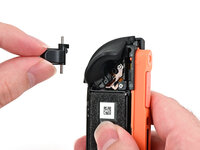
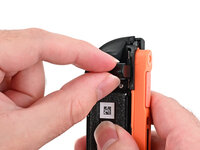
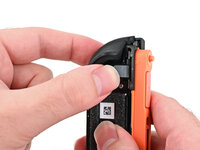
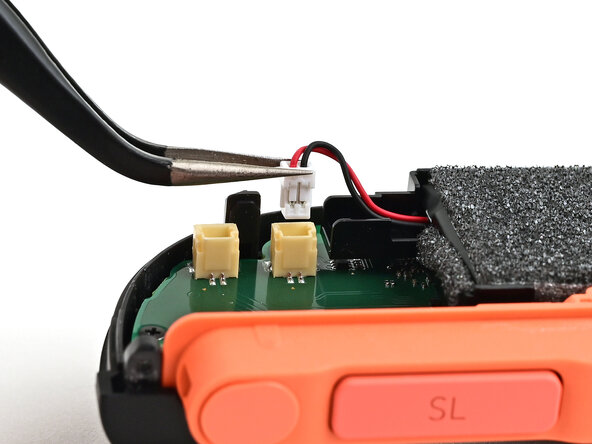
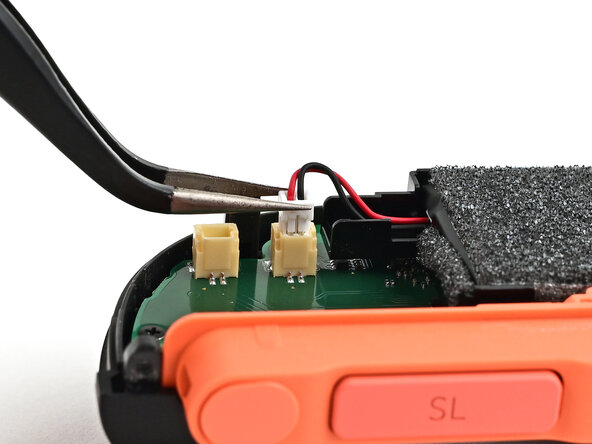
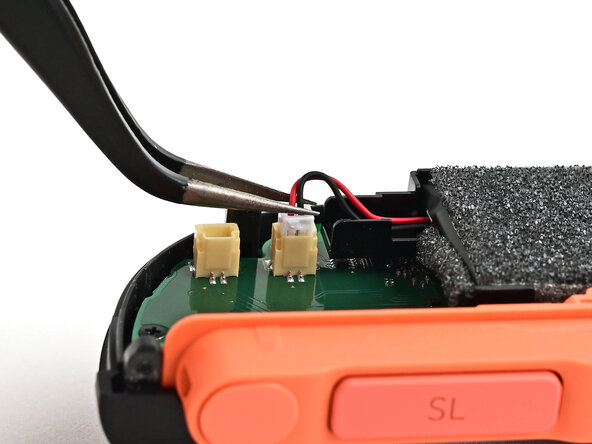
  11. Joy-Con 2 (Right) Joystick Replacement, Disconnect the battery: stap 11, afbeelding 1 van 2 Joy-Con 2 (Right) Joystick Replacement, Disconnect the battery: stap 11, afbeelding 2 van 2
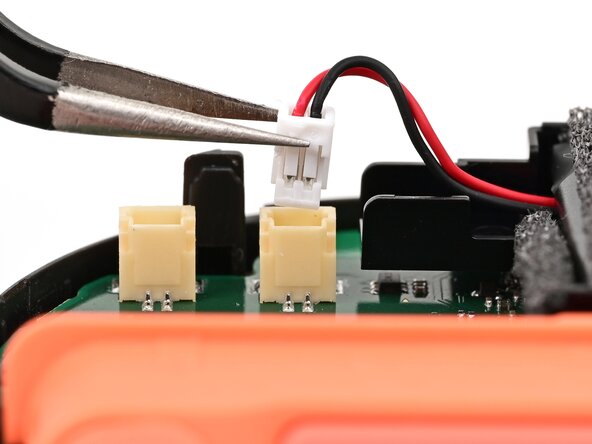
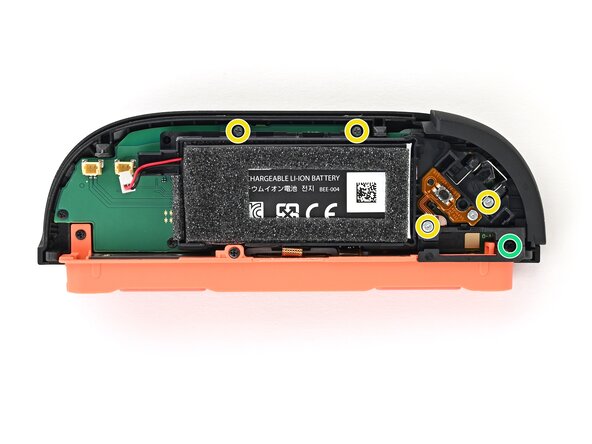
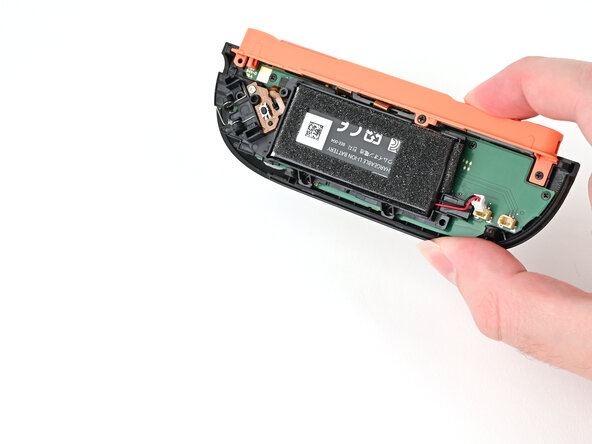
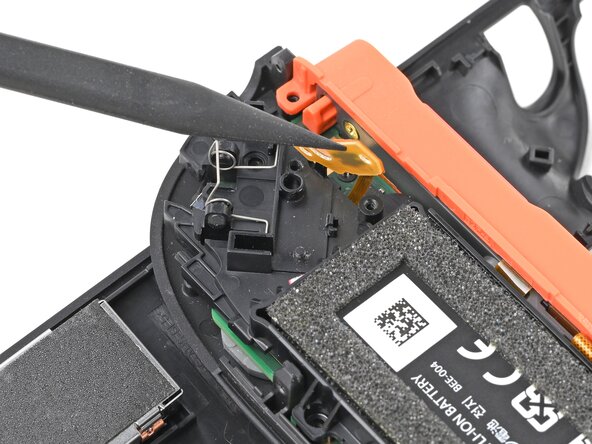
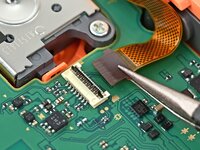
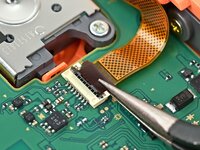
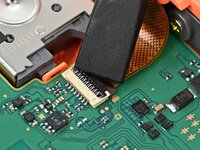
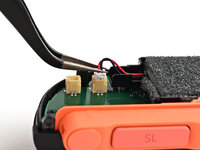
    • Use tweezers or your fingers to firmly grip the battery cable's white JST connector and pull straight away from its socket to disconnect it.

    • Once partially lifted, reposition your fingers/tweezers to beneath the connector's upper lip to increase your grip.

    Vraag FixBot
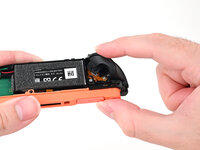
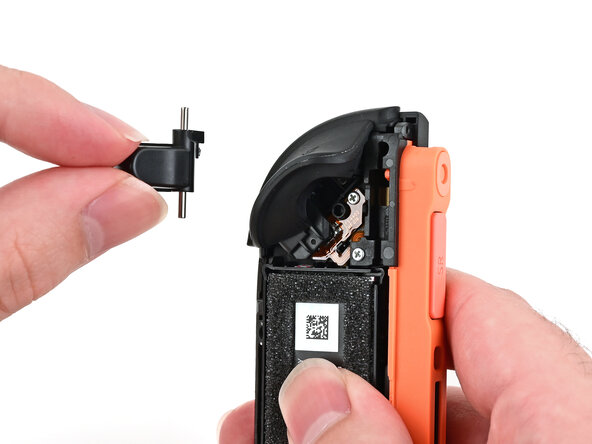
  12. Joy-Con 2 (Right) Joystick Replacement, Remove the release button: stap 12, afbeelding 1 van 2 Joy-Con 2 (Right) Joystick Replacement, Remove the release button: stap 12, afbeelding 2 van 2
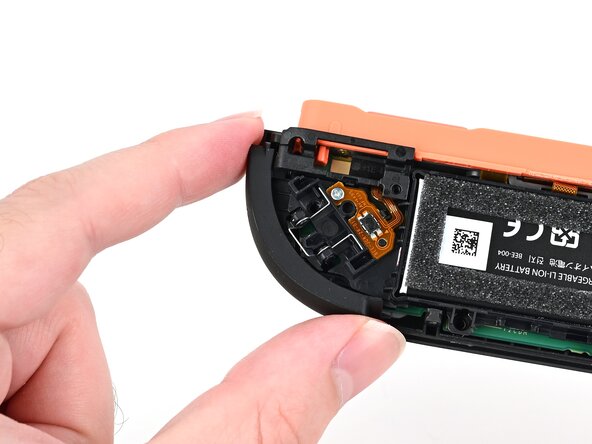
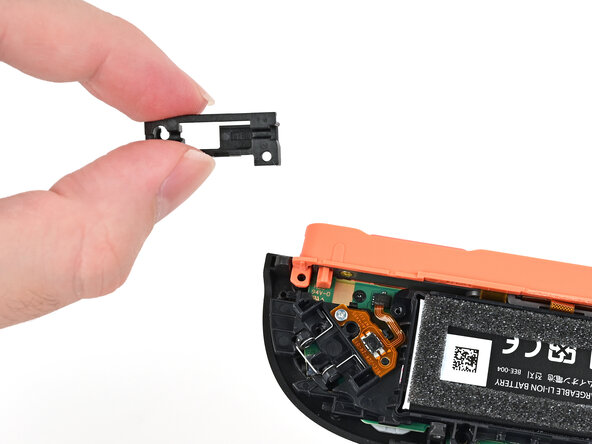
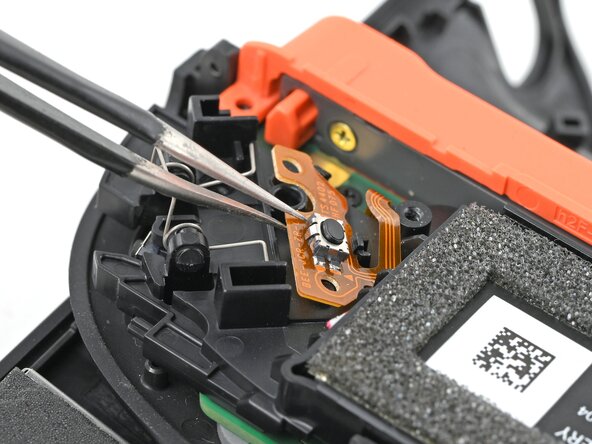
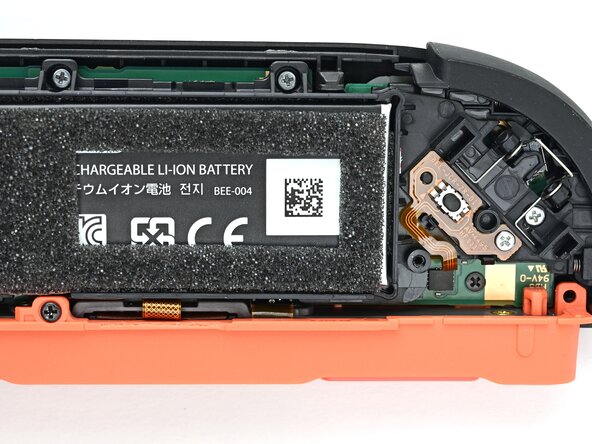
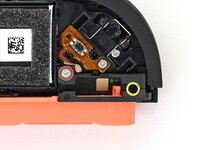
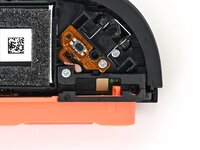
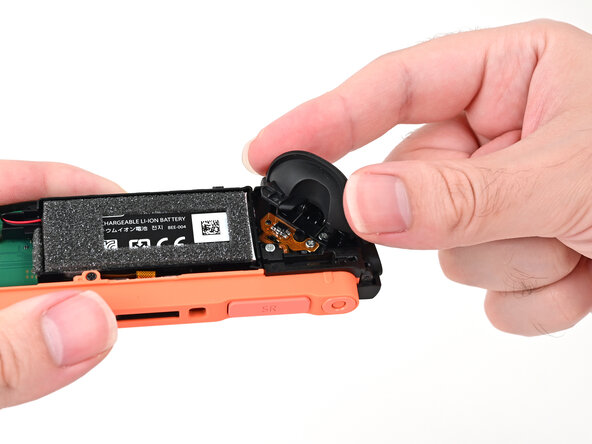
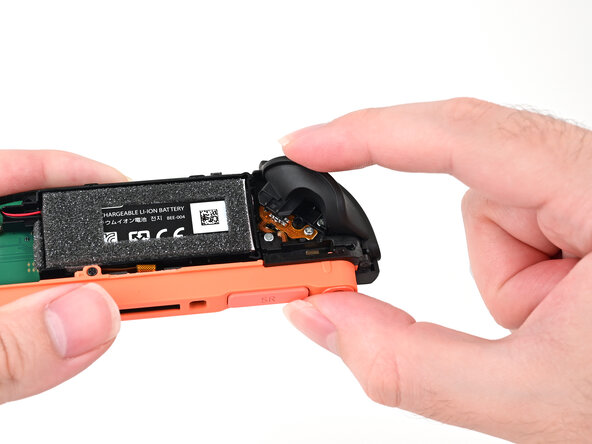
    • Pick up the release button and remove it.

    Vraag FixBot
  13. Joy-Con 2 (Right) Joystick Replacement, Remove the trigger: stap 13, afbeelding 1 van 2 Joy-Con 2 (Right) Joystick Replacement, Remove the trigger: stap 13, afbeelding 2 van 2
    • If your JIS 00 driver is able to access the screw underneath the trigger button, you may skip this step.

    • Insert an opening pick between the bumper (R) and trigger (ZR) buttons at the top of the controller.

    • Use the opening pick to pry the trigger away from the bumper until it pops off the controller.

    • You can lightly hold the ZR button with your finger to avoid launching it.

    Vraag FixBot
  14. Joy-Con 2 (Right) Joystick Replacement, Remove the screws: stap 14, afbeelding 1 van 2 Joy-Con 2 (Right) Joystick Replacement, Remove the screws: stap 14, afbeelding 2 van 2
    • Use a JIS 00 driver to remove the five screws securing the midframe:

    • Four 3.9 mm‑long silver screws

    • One 6.2 mm‑long black screw

    Vraag FixBot
  15. Joy-Con 2 (Right) Joystick Replacement, Remove the bumper: stap 15, afbeelding 1 van 2 Joy-Con 2 (Right) Joystick Replacement, Remove the bumper: stap 15, afbeelding 2 van 2
    • Hold the midframe lightly in place.

    • Pull the bumper (R) button off its mounting pegs and remove it.

    • The midframe will lift slightly when removing this button.

    Vraag FixBot
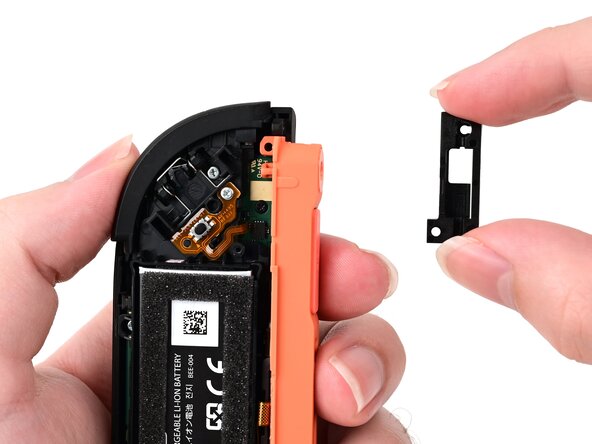
  16. Joy-Con 2 (Right) Joystick Replacement, Remove the bracket: stap 16, afbeelding 1 van 2 Joy-Con 2 (Right) Joystick Replacement, Remove the bracket: stap 16, afbeelding 2 van 2
    • Pick up the release button mounting bracket and remove it.

    Vraag FixBot
  17. Joy-Con 2 (Right) Joystick Replacement, Prop up the controller: stap 17, afbeelding 1 van 3 Joy-Con 2 (Right) Joystick Replacement, Prop up the controller: stap 17, afbeelding 2 van 3 Joy-Con 2 (Right) Joystick Replacement, Prop up the controller: stap 17, afbeelding 3 van 3
    • Use the back cover to prop up the controller while you work.

    • The buttons on the front of the controller should rest on the back cover's lip to keep it stable.

    Vraag FixBot
  18. Joy-Con 2 (Right) Joystick Replacement, Lift the trigger button board: stap 18, afbeelding 1 van 1
    • Use a JIS 00 driver to remove the 3.9 mm‑long silver screw securing the trigger button board.

    Vraag FixBot
  19. Joy-Con 2 (Right) Joystick Replacement: stap 19, afbeelding 1 van 2 Joy-Con 2 (Right) Joystick Replacement: stap 19, afbeelding 2 van 2
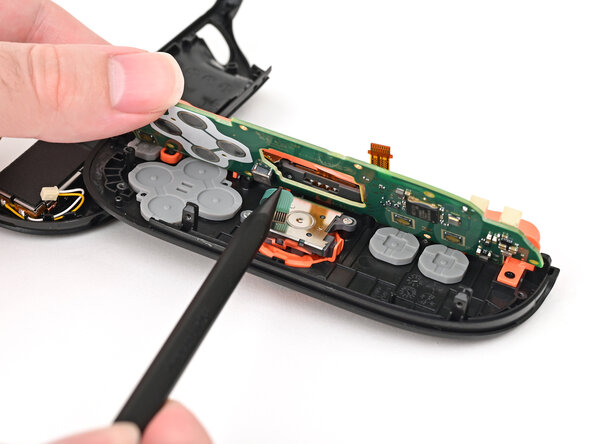
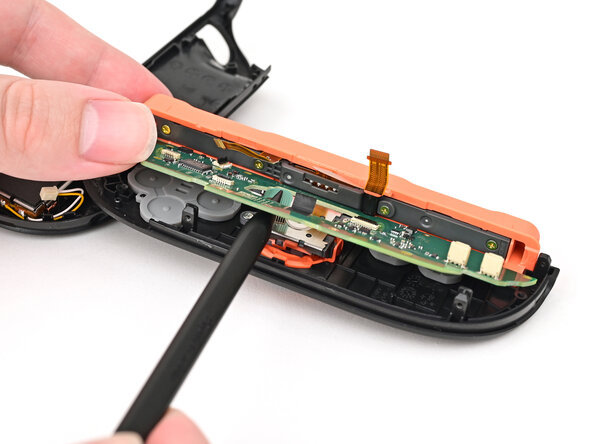
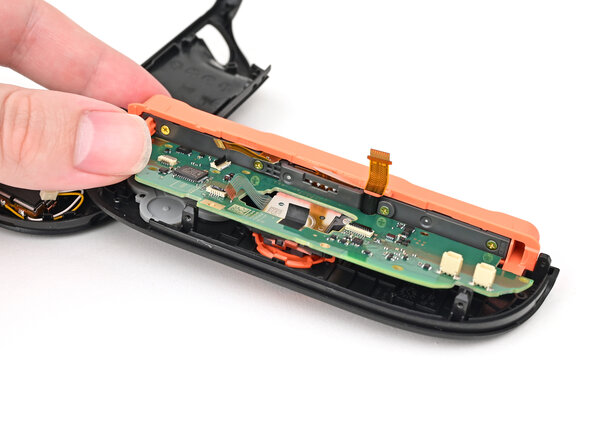
    • Insert the point of a spudger underneath the board, and lift it until it pops up.

    Vraag FixBot
  20. Joy-Con 2 (Right) Joystick Replacement, Remove the midframe: stap 20, afbeelding 1 van 2 Joy-Con 2 (Right) Joystick Replacement, Remove the midframe: stap 20, afbeelding 2 van 2
    • Pick up and remove the midframe.

    Vraag FixBot
  21. Joy-Con 2 (Right) Joystick Replacement, Disconnect the trigger board: stap 21, afbeelding 1 van 2 Joy-Con 2 (Right) Joystick Replacement, Disconnect the trigger board: stap 21, afbeelding 2 van 2
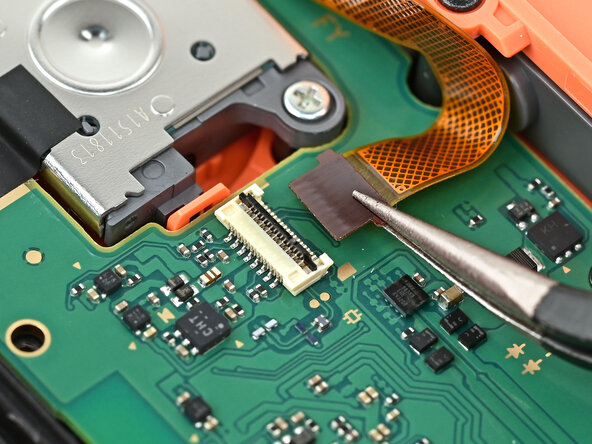
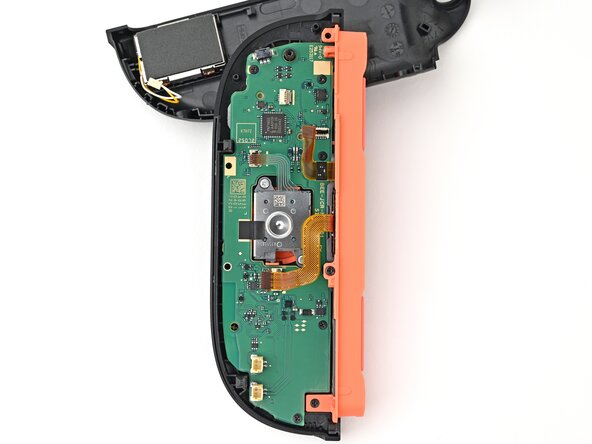
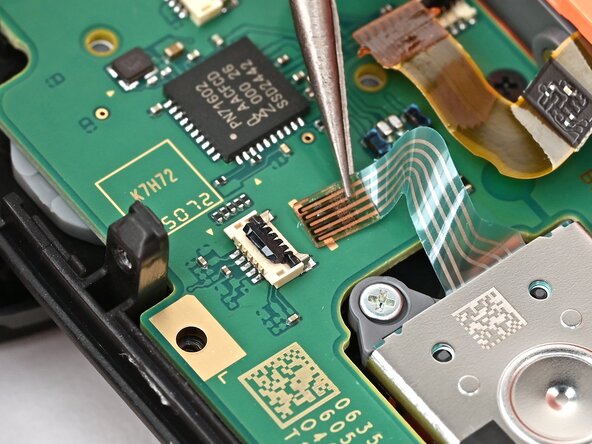
    • Use the point of a spudger to flip up the locking flap on the trigger button ZIF connector, located on the controller's board.

    Vraag FixBot
  22. Joy-Con 2 (Right) Joystick Replacement: stap 22, afbeelding 1 van 2 Joy-Con 2 (Right) Joystick Replacement: stap 22, afbeelding 2 van 2
    • Use tweezers or your fingers to gently pull the cable out of its socket.

    • Remove the trigger button board.

    Vraag FixBot
  23. Joy-Con 2 (Right) Joystick Replacement, Disconnect the board: stap 23, afbeelding 1 van 3 Joy-Con 2 (Right) Joystick Replacement, Disconnect the board: stap 23, afbeelding 2 van 3 Joy-Con 2 (Right) Joystick Replacement, Disconnect the board: stap 23, afbeelding 3 van 3
    • Repeat this procedure to disconnect the remaining three ZIF connectors on the controller's board.

    Vraag FixBot
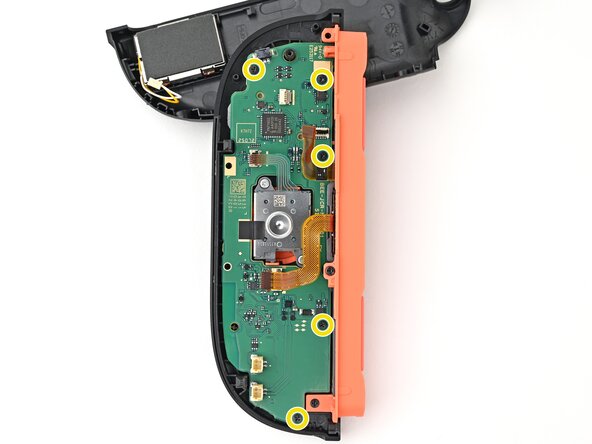
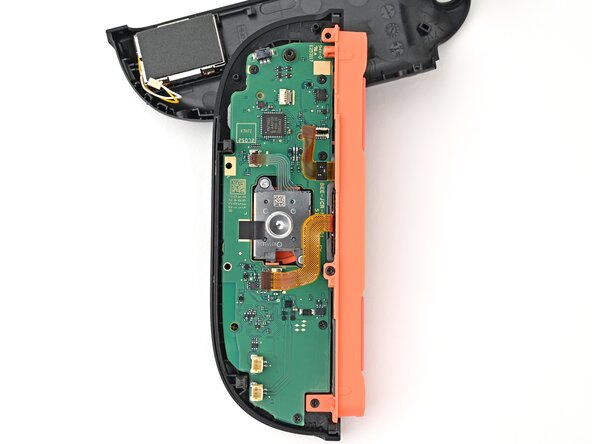
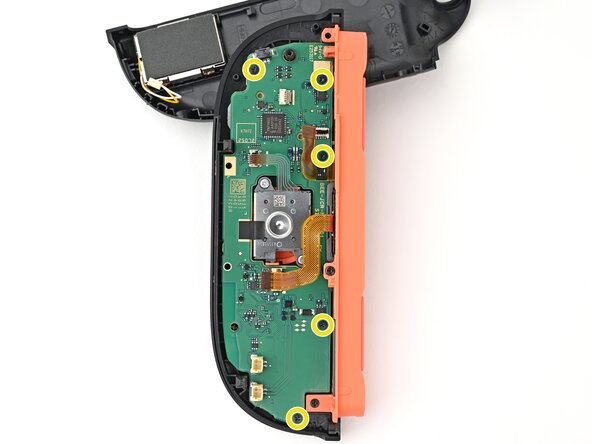
  24. Joy-Con 2 (Right) Joystick Replacement, Remove the board screws: stap 24, afbeelding 1 van 2 Joy-Con 2 (Right) Joystick Replacement, Remove the board screws: stap 24, afbeelding 2 van 2
    • Use a JIS 00 driver to remove the five 3.1 mm‑long black screws securing the board to the controller.

    Vraag FixBot
  25. Joy-Con 2 (Right) Joystick Replacement, Lift the board: stap 25, afbeelding 1 van 2 Joy-Con 2 (Right) Joystick Replacement, Lift the board: stap 25, afbeelding 2 van 2
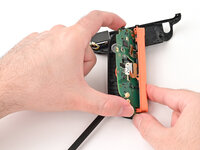
    • Insert the point of a spudger between the board and the controller, near the battery connector socket.

    • Pry up on the board enough to grasp its edge with your fingertips.

    Vraag FixBot
  26. Joy-Con 2 (Right) Joystick Replacement, Remove the board: stap 26, afbeelding 1 van 3 Joy-Con 2 (Right) Joystick Replacement, Remove the board: stap 26, afbeelding 2 van 3 Joy-Con 2 (Right) Joystick Replacement, Remove the board: stap 26, afbeelding 3 van 3
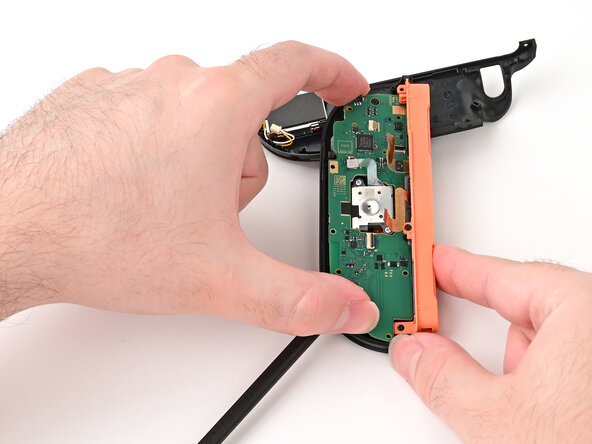
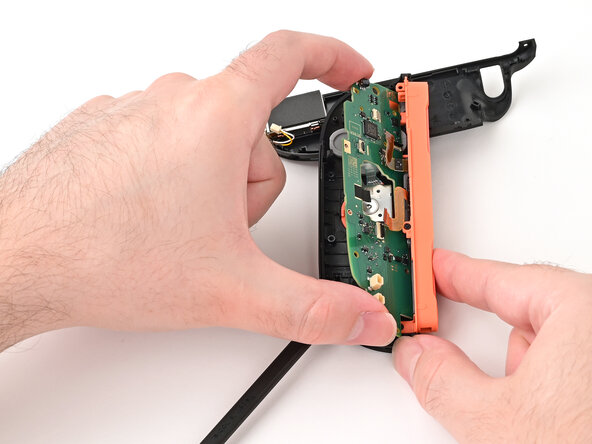
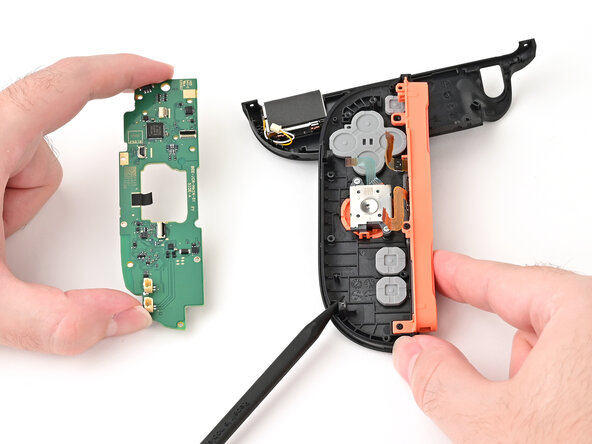
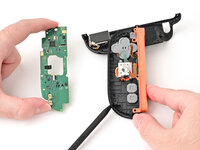
    • Lift the board by its outer edges to a roughly 45-degree angle, so it's no longer being blocked by the joystick assembly.

    • Make sure the black tape is fully lifted off the back of the joystick module. Work slowly to avoid tearing the tape.

    • Remove the board.

    Vraag FixBot
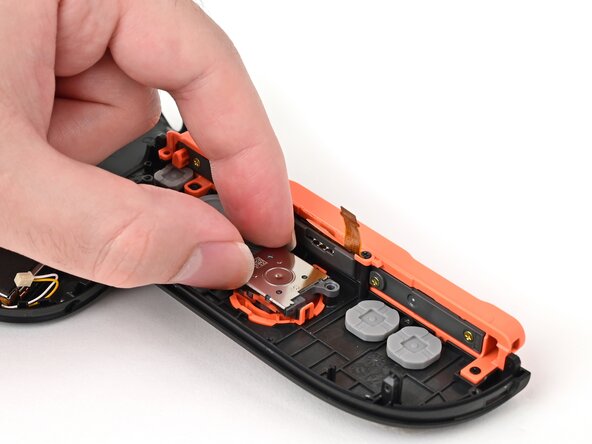
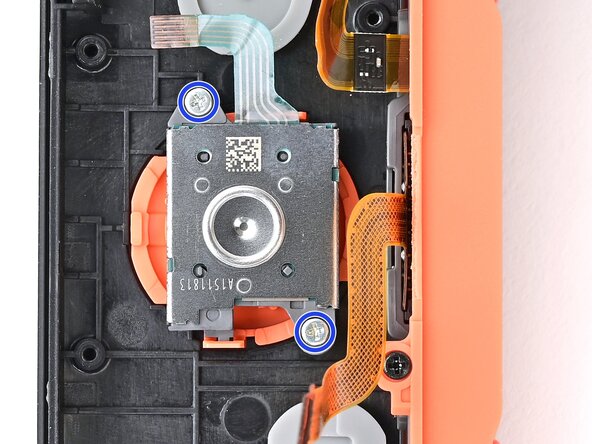
  27. Joy-Con 2 (Right) Joystick Replacement, Remove the joystick: stap 27, afbeelding 1 van 2 Joy-Con 2 (Right) Joystick Replacement, Remove the joystick: stap 27, afbeelding 2 van 2
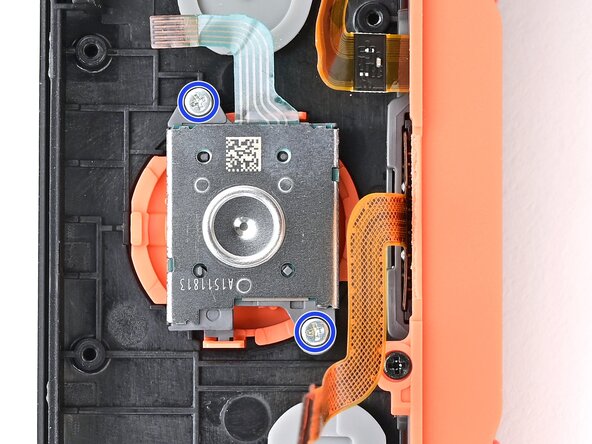
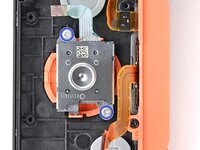
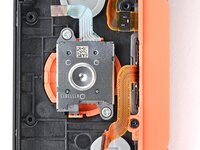
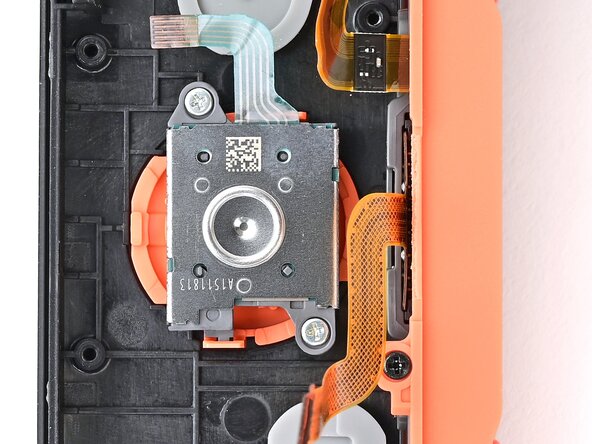
    • Use a JIS 00 driver to remove the two 3.9 mm‑long silver screws securing the joystick.

    Vraag FixBot
  28. Joy-Con 2 (Right) Joystick Replacement: stap 28, afbeelding 1 van 2 Joy-Con 2 (Right) Joystick Replacement: stap 28, afbeelding 2 van 2
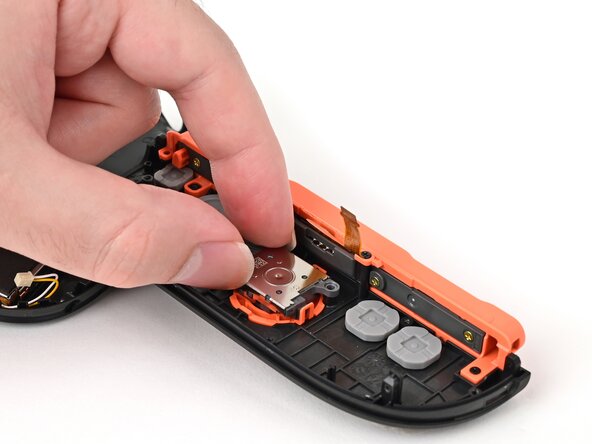
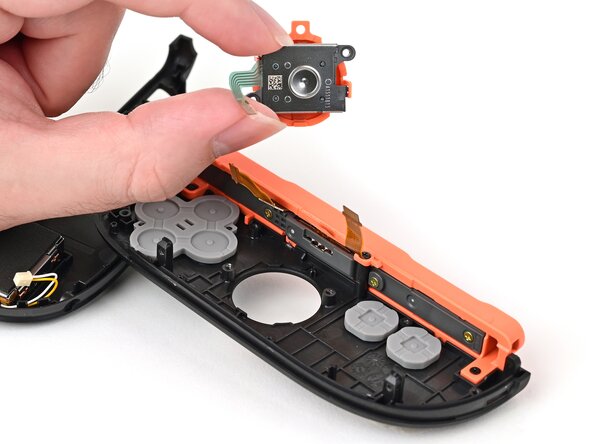
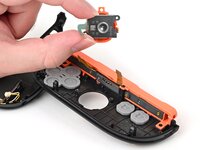
    • Pick up and remove the joystick.

    Vraag FixBot
  29. Joy-Con 2 (Right) Joystick Replacement, Disassembly complete: stap 29, afbeelding 1 van 1
    • Congratulations on completing disassembly! The remaining steps will show how to reassemble your console.

    Vraag FixBot
  30. Joy-Con 2 (Right) Joystick Replacement, Install the joystick: stap 30, afbeelding 1 van 2 Joy-Con 2 (Right) Joystick Replacement, Install the joystick: stap 30, afbeelding 2 van 2
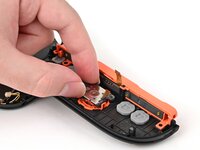
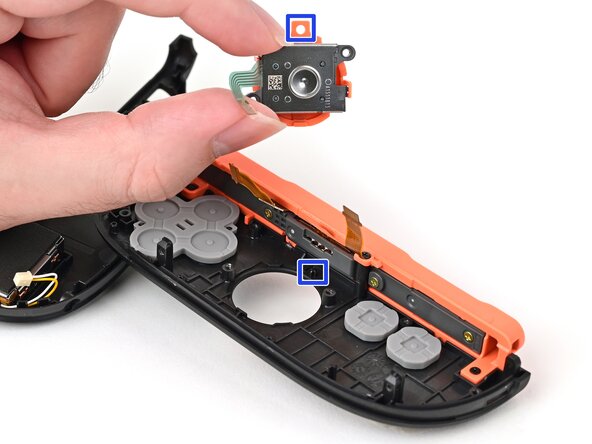
    • Align the cut-out in the joystick's plastic frame with its peg on the controller.

    • Set the joystick in the controller. Gently wiggle the joystick to ensure it's fully seated.

    Vraag FixBot
  31. Joy-Con 2 (Right) Joystick Replacement: stap 31, afbeelding 1 van 2 Joy-Con 2 (Right) Joystick Replacement: stap 31, afbeelding 2 van 2
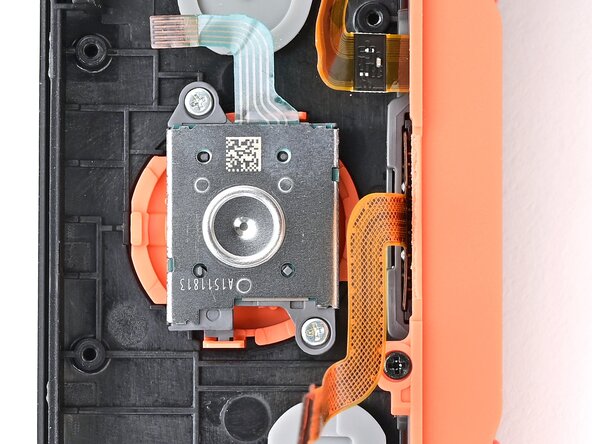
    • Use a JIS 00 driver to install the two 3.9 mm‑long silver screws securing the joystick.

    Vraag FixBot
  32. Joy-Con 2 (Right) Joystick Replacement, Install the board: stap 32, afbeelding 1 van 3 Joy-Con 2 (Right) Joystick Replacement, Install the board: stap 32, afbeelding 2 van 3 Joy-Con 2 (Right) Joystick Replacement, Install the board: stap 32, afbeelding 3 van 3
    • Lower the board's flat side into the controller at an angle.

    • Use a spudger to bend the joystick's ribbon cable so it's perpendicular with the joystick.

    • Lower the board so the joystick's ribbon cable routes through the joystick cut-out in the board. Ensure the board is sitting underneath the locking tab on the frame.

    Vraag FixBot
  33. Joy-Con 2 (Right) Joystick Replacement: stap 33, afbeelding 1 van 3 Joy-Con 2 (Right) Joystick Replacement: stap 33, afbeelding 2 van 3 Joy-Con 2 (Right) Joystick Replacement: stap 33, afbeelding 3 van 3
    • Push the board towards the controller's inner edge (the side with the shoulder buttons) to prevent it from colliding with the joystick module.

    • Lower the board into the frame.

    • Use your finger or the flat end of a spudger to press the black tape onto the back of the joystick module.

    Vraag FixBot
  34. Joy-Con 2 (Right) Joystick Replacement: stap 34, afbeelding 1 van 2 Joy-Con 2 (Right) Joystick Replacement: stap 34, afbeelding 2 van 2
    • Use a JIS 00 driver to install the five 3.1 mm‑long black screws securing the board to the controller.

    Vraag FixBot
  35. Joy-Con 2 (Right) Joystick Replacement, Connect the cables: stap 35, afbeelding 1 van 3 Joy-Con 2 (Right) Joystick Replacement, Connect the cables: stap 35, afbeelding 2 van 3 Joy-Con 2 (Right) Joystick Replacement, Connect the cables: stap 35, afbeelding 3 van 3
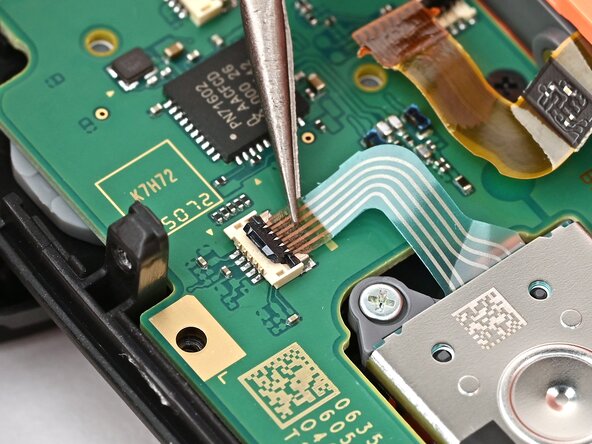
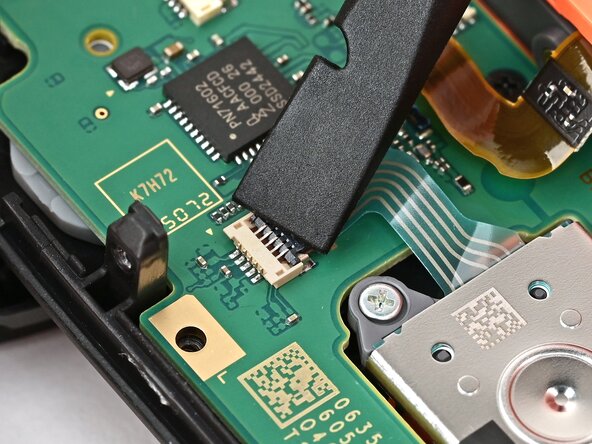
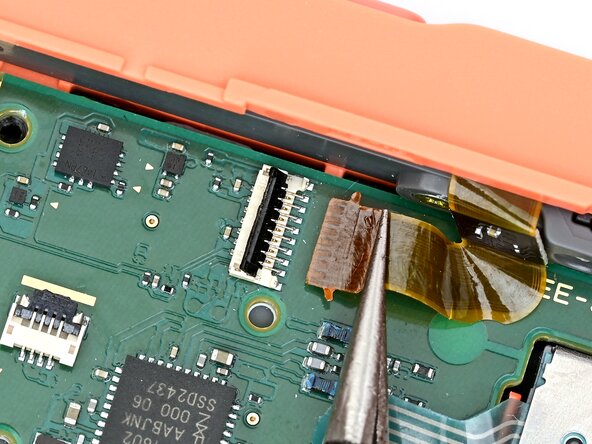
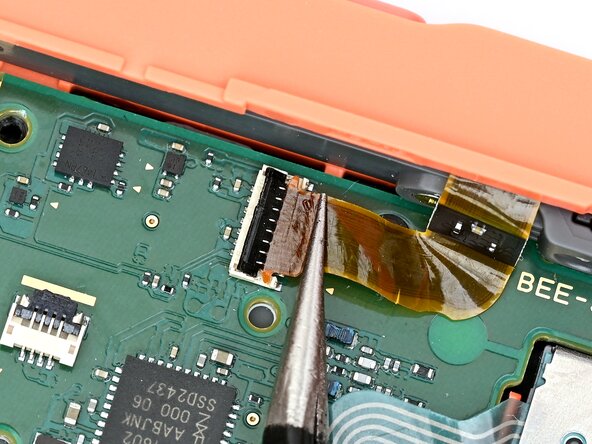
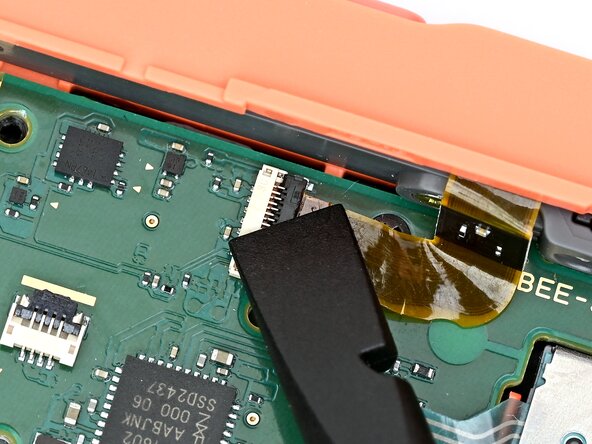
    • Make sure the locking flap is flipped up on the joystick cable ZIF connector.

    • Insert the joystick ribbon cable into its ZIF connector until it's fully seated.

    • The brown portion of the cable should end at the golden line on the board.

    • Use your finger or a spudger to flip the locking flap down to secure the cable.

    Vraag FixBot
  36. Joy-Con 2 (Right) Joystick Replacement: stap 36, afbeelding 1 van 3 Joy-Con 2 (Right) Joystick Replacement: stap 36, afbeelding 2 van 3 Joy-Con 2 (Right) Joystick Replacement: stap 36, afbeelding 3 van 3
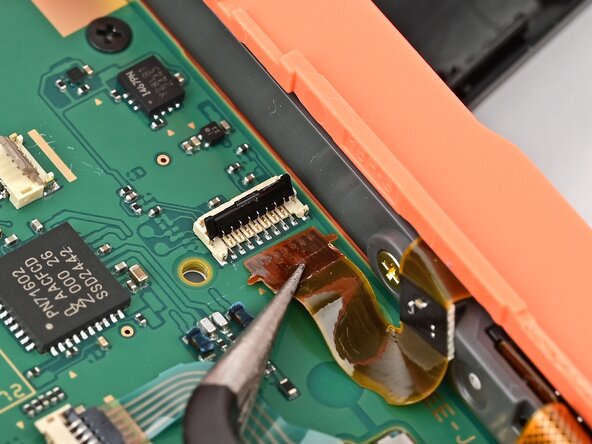
    • Make sure the locking flap is flipped up on the Joy-Con connector cable ZIF connector.

    • Insert the Joy-Con connector ribbon cable into its ZIF connector until it's fully seated.

    • Use your finger or a spudger to flip the locking flap down to secure the cable.

    Vraag FixBot
  37. Joy-Con 2 (Right) Joystick Replacement: stap 37, afbeelding 1 van 3 Joy-Con 2 (Right) Joystick Replacement: stap 37, afbeelding 2 van 3 Joy-Con 2 (Right) Joystick Replacement: stap 37, afbeelding 3 van 3
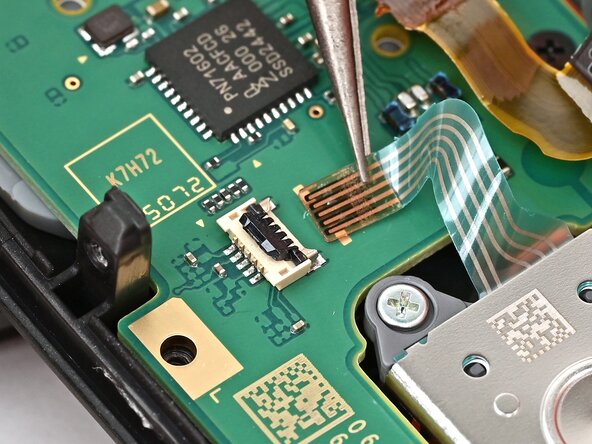
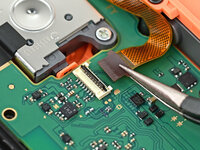
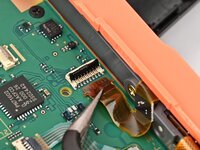
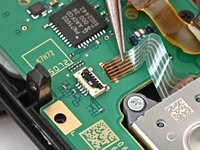
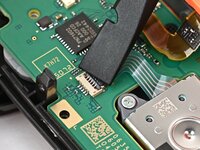
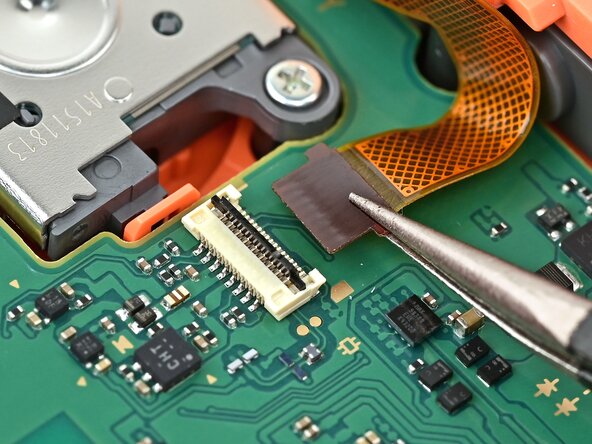
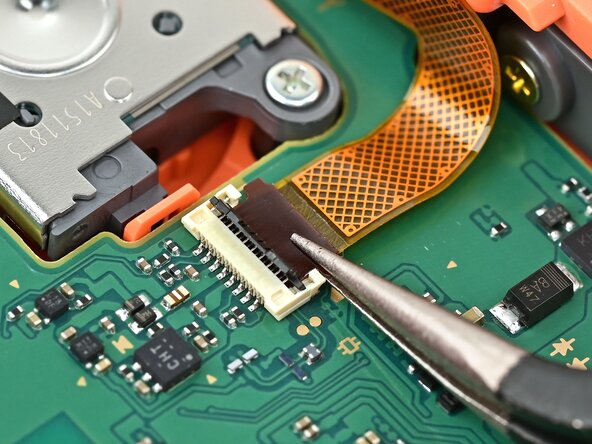
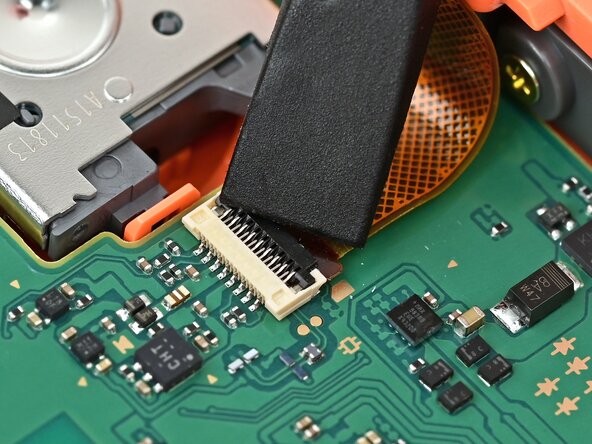
    • Repeat this procedure for the shoulder button ZIF connector. The cable is fully seated when its brown "wings" are in their slots on both sides of the connector.

    • This connector can be tricky—you may need to hold the flap open, or hold the cable in place when closing the flap.

    Vraag FixBot
  38. Joy-Con 2 (Right) Joystick Replacement, Connect the trigger button board: stap 38, afbeelding 1 van 3 Joy-Con 2 (Right) Joystick Replacement, Connect the trigger button board: stap 38, afbeelding 2 van 3 Joy-Con 2 (Right) Joystick Replacement, Connect the trigger button board: stap 38, afbeelding 3 van 3
    • Make sure the locking flap is flipped up on the trigger cable's ZIF connector.

    • Position the trigger button board so its ribbon cable is aligned with its ZIF connector on the board.

    • Use tweezers or your fingers to gently slide the ribbon cable into its ZIF connector.

    • Flip the locking flap down to secure the cable.

    Vraag FixBot
  39. Joy-Con 2 (Right) Joystick Replacement, Install the midframe: stap 39, afbeelding 1 van 2 Joy-Con 2 (Right) Joystick Replacement, Install the midframe: stap 39, afbeelding 2 van 2
    • Align the midframe with its screw holes on the outer edge of the controller and set it into place.

    Vraag FixBot
  40. Joy-Con 2 (Right) Joystick Replacement, Install the trigger button board: stap 40, afbeelding 1 van 3 Joy-Con 2 (Right) Joystick Replacement, Install the trigger button board: stap 40, afbeelding 2 van 3 Joy-Con 2 (Right) Joystick Replacement, Install the trigger button board: stap 40, afbeelding 3 van 3
    • Use tweezers or your fingers to set the bottom edge of the trigger button board underneath its tab on the midframe.

    • Press the board into place so the black peg on the midframe protrudes through the hole on the bottom corner of the board.

    Vraag FixBot
  41. Joy-Con 2 (Right) Joystick Replacement: stap 41, afbeelding 1 van 1
    • Use a JIS 00 driver to install the 3.9 mm‑long silver screw securing the trigger button board.

    Vraag FixBot
  42. Joy-Con 2 (Right) Joystick Replacement, Install the bumper: stap 42, afbeelding 1 van 2 Joy-Con 2 (Right) Joystick Replacement, Install the bumper: stap 42, afbeelding 2 van 2
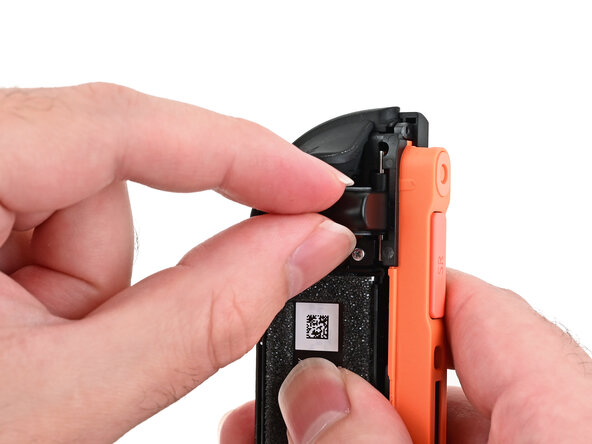
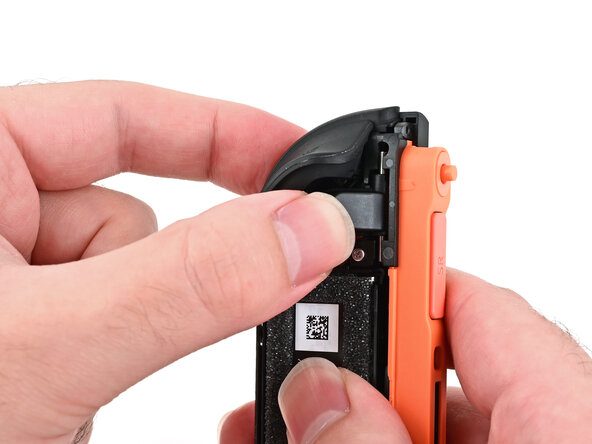
    • Align the two springs on the bumper with their two posts on the midframe, and press it into place.

    • The bumper is held in place by the front shell of the controller. If it falls out, ensure it is fully seated in the shell.

    Vraag FixBot
  43. Joy-Con 2 (Right) Joystick Replacement, Install the midframe screws: stap 43, afbeelding 1 van 2 Joy-Con 2 (Right) Joystick Replacement, Install the midframe screws: stap 43, afbeelding 2 van 2
    • Use a JIS 00 driver to install the three 3.9 mm‑long silver screws securing the midframe.

    Vraag FixBot
  44. Joy-Con 2 (Right) Joystick Replacement, Install the bracket: stap 44, afbeelding 1 van 2 Joy-Con 2 (Right) Joystick Replacement, Install the bracket: stap 44, afbeelding 2 van 2
    • Align the release button mounting bracket with its screw holes and press it in the frame so it snaps into place.

    • The corner with the protruding square should be facing the battery.

    Vraag FixBot
  45. Joy-Con 2 (Right) Joystick Replacement: stap 45, afbeelding 1 van 2 Joy-Con 2 (Right) Joystick Replacement: stap 45, afbeelding 2 van 2
    • Use a JIS 00 driver to install the two screws securing the release button bracket.

    • One 3.9 mm‑long silver screw

    • One 6.2 mm‑long black screw

    Vraag FixBot
  46. Joy-Con 2 (Right) Joystick Replacement, Install the buttons: stap 46, afbeelding 1 van 3 Joy-Con 2 (Right) Joystick Replacement, Install the buttons: stap 46, afbeelding 2 van 3 Joy-Con 2 (Right) Joystick Replacement, Install the buttons: stap 46, afbeelding 3 van 3
    • If you left the trigger button in place, skip this step.

    • Align the trigger button with the top of the controller, with the "ZR" engraving facing out.

    • Set the trigger button onto its metal spring. Ensure the legs of the spring are seated properly in their channels on the midframe.

    • Press firmly on the trigger button to snap it into place.

    • Check that the metal spring didn't fall out of position. If it did, remove the trigger, place it back into position, and try again.

    Vraag FixBot
  47. Joy-Con 2 (Right) Joystick Replacement: stap 47, afbeelding 1 van 3 Joy-Con 2 (Right) Joystick Replacement: stap 47, afbeelding 2 van 3 Joy-Con 2 (Right) Joystick Replacement: stap 47, afbeelding 3 van 3
    • Hold the release button so its smooth face is perpendicular to the controller.

    • Insert the release button into its bracket.

    • If the release pin doesn't stick out of the controller when the button is pressed, the button isn't installed correctly. Re-insert or flip the button and try again.

    Vraag FixBot
  48. Joy-Con 2 (Right) Joystick Replacement, Connect the battery: stap 48, afbeelding 1 van 3 Joy-Con 2 (Right) Joystick Replacement, Connect the battery: stap 48, afbeelding 2 van 3 Joy-Con 2 (Right) Joystick Replacement, Connect the battery: stap 48, afbeelding 3 van 3
    • Align the battery connector with its socket on the board.

    • Press down on the connector until it's fully seated.

    Vraag FixBot
  49. Joy-Con 2 (Right) Joystick Replacement, Connect the rumble motor: stap 49, afbeelding 1 van 3 Joy-Con 2 (Right) Joystick Replacement, Connect the rumble motor: stap 49, afbeelding 2 van 3 Joy-Con 2 (Right) Joystick Replacement, Connect the rumble motor: stap 49, afbeelding 3 van 3
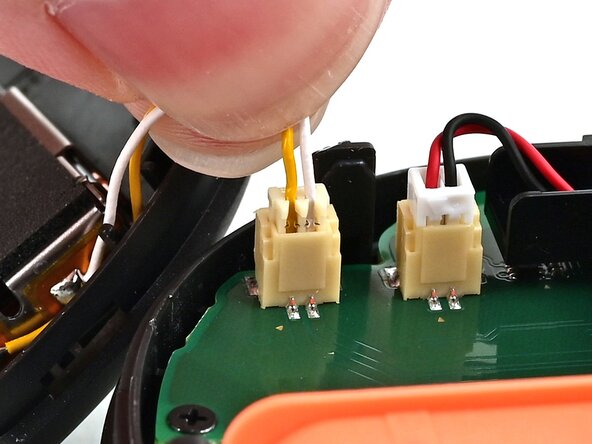
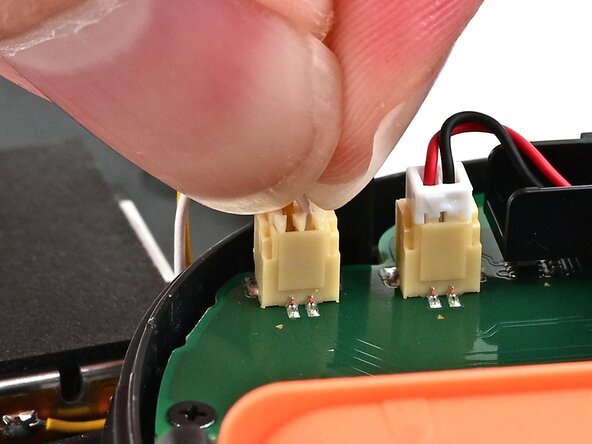
    • Align the rumble motor connector to its socket on the bottom edge of the board, and push down until it's fully seated to connect it.

    Vraag FixBot
  50. Joy-Con 2 (Right) Joystick Replacement, Install the back cover: stap 50, afbeelding 1 van 3 Joy-Con 2 (Right) Joystick Replacement, Install the back cover: stap 50, afbeelding 2 van 3 Joy-Con 2 (Right) Joystick Replacement, Install the back cover: stap 50, afbeelding 3 van 3
    • Use an opening pick to press and hold the release button.

    • Place the back cover over the controller body so the release button cutout is slightly below the release button.

    • The release button is held down when the release pin is protruding from the frame. If the release button falls out of position, put it back and try again.

    • Press and slide the back cover up until the cut-out for the release button is aligned with the button itself.

    • Ensure the rumble motor wires (yellow & white) are fully within the frame.

    Vraag FixBot
  51. Joy-Con 2 (Right) Joystick Replacement: stap 51, afbeelding 1 van 2 Joy-Con 2 (Right) Joystick Replacement: stap 51, afbeelding 2 van 2
    • Remove the opening pick.

    Vraag FixBot
  52. Joy-Con 2 (Right) Joystick Replacement, Install the right edge screws: stap 52, afbeelding 1 van 2 Joy-Con 2 (Right) Joystick Replacement, Install the right edge screws: stap 52, afbeelding 2 van 2
    • Install the two screws on the right edge of the controller:

    • One 3.1 mm‑long tri-point Y00 black screw

    • One 3.0 mm‑long JIS 00 silver screw

    Vraag FixBot
  53. Joy-Con 2 (Right) Joystick Replacement, Install the plastic strip: stap 53, afbeelding 1 van 3 Joy-Con 2 (Right) Joystick Replacement, Install the plastic strip: stap 53, afbeelding 2 van 3 Joy-Con 2 (Right) Joystick Replacement, Install the plastic strip: stap 53, afbeelding 3 van 3
    • Align the clips on the plastic strip with their cut-outs on the right edge of the controller body.

    • Insert the clips on the bottom edge first, then insert the rest so the plastic strip sits flush.

    Vraag FixBot
  54. Joy-Con 2 (Right) Joystick Replacement, Install the left edge screws: stap 54, afbeelding 1 van 2 Joy-Con 2 (Right) Joystick Replacement, Install the left edge screws: stap 54, afbeelding 2 van 2
    • Use a tri-point Y00 driver to install the two 3.1 mm‑long black screws on the left edge of the controller.

    Vraag FixBot
Conclusie

You finished fixing your Joy-Con 2!

Take your e-waste to an R2 or e-Stewards certified recycler.

Repair didn’t go as planned? Try some basic troubleshooting, or ask our Joy-Con 2 Answers Community for help.

8 andere personen hebben deze handleiding voltooid.

Nick Schultz

Lid sinds: 03/24/24

53.934 Reputatie

305 handleidingen geschreven

3Gids Commentaar

Hello Reader!

I recently broke my right Nintendo Switch 2 joy-con when it fell off of my bed, and the joystick stem just snapped completely off. I thought all hope was lost, but then I found this guide and bought a repair kit (with proper screwdrivers, pliers, sticks, and smudger; can literally get it off of Amazon, if not from this website).

The steps were super thorough, and the pictures were amazingly accurate. I am a 19-year-old with no mechanical or technological experience, yet I was able to completely repair my joy-con in around an hour (maybe less), and now I don't have to buy new ones!

Please follow this guide if you need to fix your joy-con!! It works!!

Josh Driver - Antwoord Deel
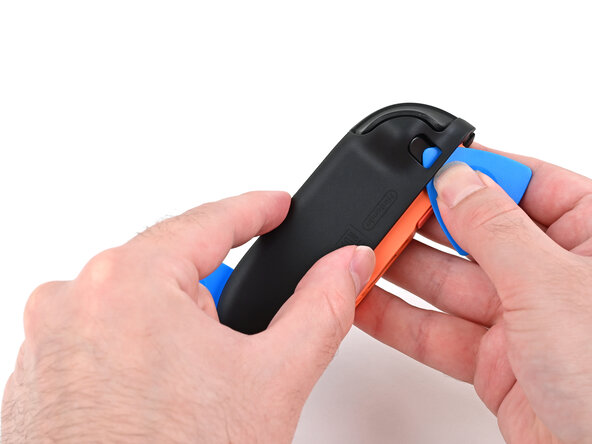
Thanks Nick. Great guide. I had the same issue as Josh above and was able to swap out the joystick rather than replace the whole joycon.

Sam - Antwoord Deel
My daughter drop her switch 2 and broke right side joy stick red The guide was amazing, the disassemble process and reassemble easy.. fyi make sure the led tab on step 37 can be a pain, I recommend that you reconnect the battery before going any further if not you will have to take the hole assembly apart again if that cable is not properly seated..

Ernie Romano - Antwoord Deel
Voeg opmerking toe

Weergavestatistieken:

Afgelopen 24 uren: 33

Afgelopen 7 dagen: 345

Afgelopen 30 dagen: 2,041

Altijd: 10,816