Ga door naar hoofdinhoud

InFocus Screenplay 4805 Light Tunnel Replacement

Wat je nodig hebt

  1. InFocus Screenplay 4805 Light Tunnel Replacement, Top Panel: stap 1, afbeelding 1 van 3 InFocus Screenplay 4805 Light Tunnel Replacement, Top Panel: stap 1, afbeelding 2 van 3 InFocus Screenplay 4805 Light Tunnel Replacement, Top Panel: stap 1, afbeelding 3 van 3
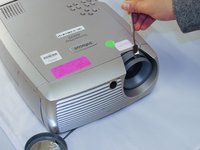
    • Flip the projector on its back.

    • Use the Phillips #2 screwdriver to remove the (4) four 2 cm gold screws.

    • Use the Phillips #2 screwdriver to remove the (3) three 1 cm silver screws.

  2. InFocus Screenplay 4805 Light Tunnel Replacement: stap 2, afbeelding 1 van 2 InFocus Screenplay 4805 Light Tunnel Replacement: stap 2, afbeelding 2 van 2
    • Turn the projector, facing the back cable board towards you.

    • Using the Phillips #0 screwdriver, remove the (3) three 1.0 cm silver screws on the back panel.

    • Gently take off back cable panel.

  3. InFocus Screenplay 4805 Light Tunnel Replacement: stap 3, afbeelding 1 van 3 InFocus Screenplay 4805 Light Tunnel Replacement: stap 3, afbeelding 2 van 3 InFocus Screenplay 4805 Light Tunnel Replacement: stap 3, afbeelding 3 van 3
    • Turn the projector so the front side with the lens is facing you.

    • Gently pry the both of the grey lens rings using the metal spudger.

  4. InFocus Screenplay 4805 Light Tunnel Replacement: stap 4, afbeelding 1 van 1
    • Now that the screws have been removed, proceed with the removal of the outer panel.

    • Gently remove the front lens panel.

    • Be forewarned, the panel will resist. Be careful not to break the lens.

  5. InFocus Screenplay 4805 Light Tunnel Replacement: stap 5, afbeelding 1 van 1
    • Being careful not to pull the wires inside the projector, gently lift the top panel off the projector.

    • Rest the lid behind the projector so the insides are exposed and undamaged.

  6. InFocus Screenplay 4805 Light Tunnel Replacement, Light Tunnel: stap 6, afbeelding 1 van 3 InFocus Screenplay 4805 Light Tunnel Replacement, Light Tunnel: stap 6, afbeelding 2 van 3 InFocus Screenplay 4805 Light Tunnel Replacement, Light Tunnel: stap 6, afbeelding 3 van 3
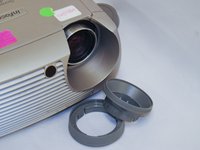
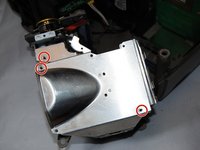
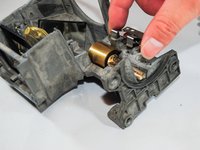
    • With the lens facing you, remove the following screws:

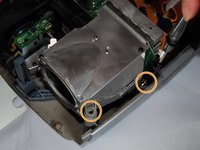
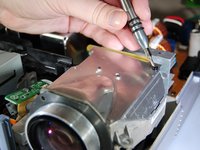
    • Using the Phillips #1 screwdriver, remove the (3) three 1.25 cm gold screws holding the metal grate between the color wheel unit and the bulb.

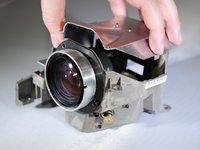
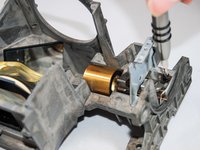
    • Using the Phillips #1 screwdriver, remove the (2) two 2 cm gold screws on the right side of the lens house.

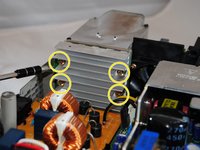
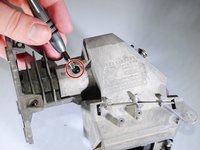
    • Using the Phillips #1 screwdriver and a bent driver, remove the (4) four 2 cm screws on the back of the lens house.

  7. InFocus Screenplay 4805 Light Tunnel Replacement: stap 7, afbeelding 1 van 3 InFocus Screenplay 4805 Light Tunnel Replacement: stap 7, afbeelding 2 van 3 InFocus Screenplay 4805 Light Tunnel Replacement: stap 7, afbeelding 3 van 3
    • Using a Phillips #0 screwdriver remove the three 1 cm black screws from the lens house.

    • Remove the lens unit.

  8. InFocus Screenplay 4805 Light Tunnel Replacement: stap 8, afbeelding 1 van 3 InFocus Screenplay 4805 Light Tunnel Replacement: stap 8, afbeelding 2 van 3 InFocus Screenplay 4805 Light Tunnel Replacement: stap 8, afbeelding 3 van 3
    • Using the Phillips #0 head, unscrew the four 1 cm black screws.

    • Remove the metal casings holding the tunnel in place.

  9. InFocus Screenplay 4805 Light Tunnel Replacement: stap 9, afbeelding 1 van 2 InFocus Screenplay 4805 Light Tunnel Replacement: stap 9, afbeelding 2 van 2
    • Using the Phillips #0 head, unscrew the black 0.5 cm screw on the bottom of the lens house.

    • Remove the light tunnel.

Conclusie

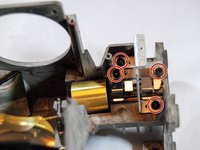
To reassemble the device, follow these instructions in reverse order.

0 opmerkingen

Voeg opmerking toe

Weergavestatistieken:

Afgelopen 24 uren: 0

Afgelopen 7 dagen: 0

Afgelopen 30 dagen: 12

Altijd: 822