How to JBL L40
Inleiding
Ga naar stap 1The JBL L40s are excellent speakers and I would pick them up if you happen to find them at a garage sale. The one problem with these speakers is that the foam surrounding the speaker cones will most likely be crumbling apart due to age.
Luckily, it is an easy fix. With a new set of foam surrounds and a bit of patience you can have these speakers booming in no time!
Wat je nodig hebt
Onderdelen
Gereedschap


Toon meer…
-
-
To remove the speaker from the cabinet, unscrew the 4 screws being careful not to slip and pierce the paper cone.
-
Once the screws are removed gently pull the speaker out of the cabinet.
-
-
-
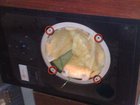
Here is the speaker removed from the cabinet, you can clearly see the degraded state of the foam surround. Luckily this makes it very easy to remove it.
-
These next steps require careful attention to detail. Work slowly and carefully. You do not want to puncture/tear/rip the paper cone or any other components.
-
-
-
Remove the black foam ring.
-
Carefully run your knife between the ring and the outer metal edge.
-
Now using your hands and knife when needed remove the black ring from the speaker frame. Prying slowly. Take care not to tear it.
-
Once the ring is removed rub all of the old foam surround off and set aside for reassembly
-


To reassemble your device, follow these instructions in reverse order.
To reassemble your device, follow these instructions in reverse order.
Annuleren: ik heb deze handleiding niet afgemaakt.
4 andere personen hebben deze handleiding voltooid.
Bereid je voor op toekomstige reparaties
Winkelen


