
HP Pavilion Wave 600-a014 Hard Drive Replacement
Inleiding
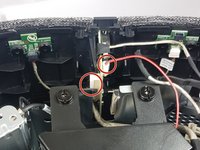
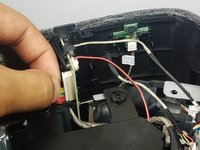
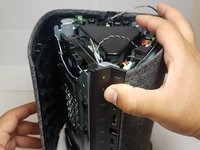
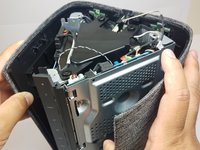
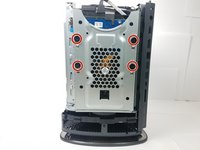
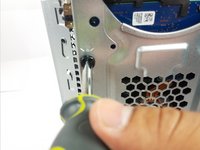
Ga naar stap 1This guide will walk you through the steps required to obtain access to the hard drive and how to remove and install a replacement drive. Before starting make sure to have a pry tool, and a Philips screw driver handy. Make sure the device is completely powered off and disconnected from any power sources. Additionally remove any devices connected to the computer.
Wat je nodig hebt
Gereedschap


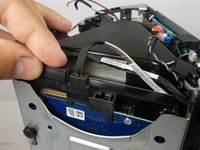

To reassemble your device, follow these instructions in reverse order.
To reassemble your device, follow these instructions in reverse order.
Annuleren: ik heb deze handleiding niet afgemaakt.
4 andere personen hebben deze handleiding voltooid.
Team

Cal Poly, Team S8-G4, Banghart Fall 2017 Lid van Cal Poly, Team S8-G4, Banghart Fall 2017
CPSU-BANGHART-F17S8G4
4 Leden
5 handleidingen geschreven
2Gids Commentaar
Hi there, can you advise whether this was the 128gb SSD or the other 2gb drive?
This model comes with a 3.5" 1TB HDD standard.