
HP Envy 15-u001dx Chassis Replacement
Inleiding
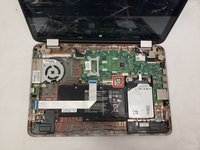
Ga naar stap 1If your HP envy 15 laptop (model u001dx) has a broken or displaced chassis, use this guide to replace the chassis (also known as frame).
The chassis is a metal case that houses the circuit boards and wiring.
Before beginning, make sure to power off your laptop completely and disconnect any external power source. Finally, as you go through the steps in this guide, do so carefully, because electronic components are semi-fragile.
Wat je nodig hebt


-
-
Flip the device over so the bottom is is facing up.
-
Peel up the two rubber feet closest to the hinge using the metal spudger to reveal two 6.6 mm Phillips #0 screws.
-
-
-
-
Remove the three 4mm Phillips #0 screws that attach the battery to the chassis.
-
Once all three 4mm Phillips #0 screws are out, lift the battery out of the chassis.
-


To reassemble your device, follow these instructions in reverse order.
To reassemble your device, follow these instructions in reverse order.
Team

IUPUI, Team S1-G1, Henning Fall 2019 Lid van IUPUI, Team S1-G1, Henning Fall 2019
IUPUI-HENNING-F19S1G1
3 Leden
3 handleidingen geschreven