Inleiding
This repair guide was authored by the iFixit staff and hasn’t been endorsed by Google. Learn more about our repair guides here.
This guide will show you how to replace the headphone jack in a Google Pixel 3a XL.
The Pixel 3a XL’s display panel is fragile. If you plan to reuse your screen after this repair, be sure to pay special attention to the warnings in the opening procedure.
Wat je nodig hebt
-
-
For reference, the backside of the screen is shown in this step.
-
Note the narrow clearance between the edge of the screen and the OLED panel under the glass. If you plan to re-use your screen, be sure to follow the instructions below closely.
-
Also note the two different seams between the body of the phone and the screen:
-
The screen seam: where the screen meets the rest of the phone. This is where the screen will separate, and where you should pry.
-
The midframe seam: where the midframe meets the body of the phone. This part is held down by screws. Do not pry at this seam.
-
-
-
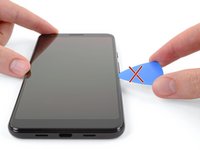
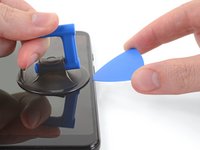
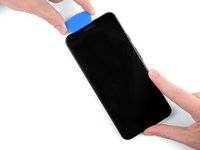
If you aren't careful, the plastic opening tool can damage the fragile OLED display panel underneath the glass.
-
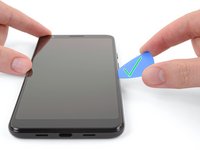
If you want to re-use your phone's screen, make sure you insert your pick at a downward angle, as shown in the second photo of this step.
-
This will ensure the opening pick slides under the OLED panel rather than between the glass and the panel, which will ruin the screen.
-
-
-
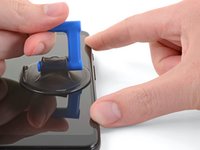
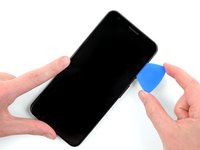
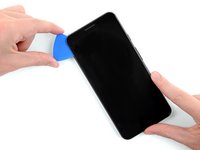
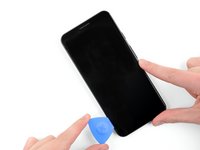
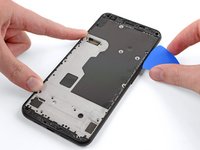
Pull up on the suction cup with a strong, steady force to create a gap between the screen and the phone.
-
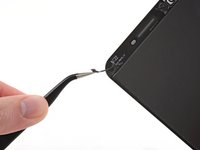
Insert your opening pick into the gap.
-
Stop if you feel the tip of the pick hitting against something. The pick may be pressing against the edge of the OLED panel. Angle the pick downward and try again.
-
-
-
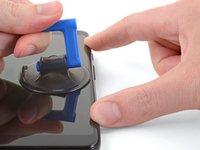
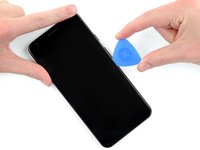
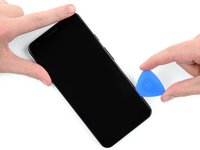
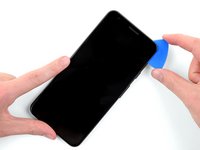
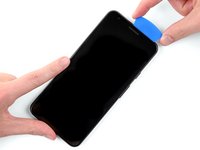
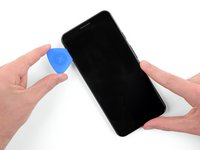
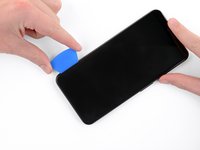
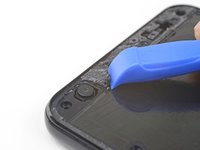
Carefully slide your opening pick around the upper-right-hand corner of the screen.
-
If you plan to reuse your screen, take special care in this step to either keep your pick deep in the phone under the OLED display (as shown in this step's photos), or only insert it 5 mm into the device to avoid coming into contact with the display under the glass.
-
-
-
-
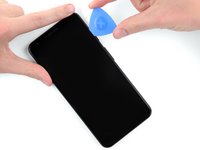
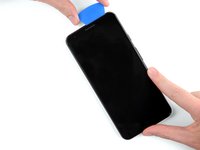
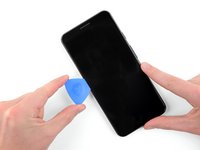
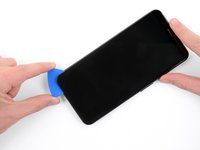
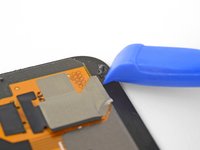
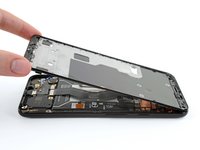
Slide your opening pick along the bottom edge of the phone to separate the last of the adhesive holding the screen in place.
-
If you plan to reuse your screen, take special care in this step to either keep your pick deep in the phone under the OLED display (as shown in this step's photos), or only insert it 5 mm into the device to avoid coming into contact with the display under the glass.
-
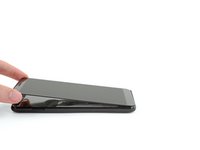
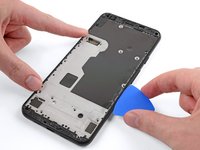
Don't try to remove the screen yet! It is still connected to the phone by a display cable.
-
-
Gereedschap gebruikt in deze stap:Tesa 61395 Tape$5.99
-
Use tweezers or an opening tool to remove all traces of adhesive from the phone frame. You can use high concentration isopropyl alcohol to help with the cleaning.
-
If you plan to re-use the screen, be sure to remove all adhesive residue from the screen. Be careful with metal tools to avoid scratching the screen.
-
Apply pre-cut adhesive or double-sided tape (such as Tesa tape) to re-attach the screen to the frame.
-
-
Gereedschap gebruikt in deze stap:Magnetic Project Mat$19.95
-
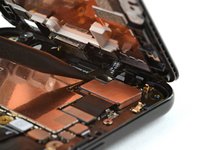
Remove the following 4.3mm screws:
-
14 silver T3 Torx screws
-
2 black T3 Torx screws
-
-
-
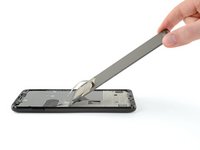
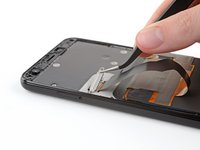
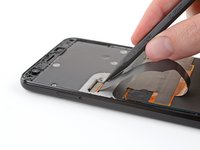
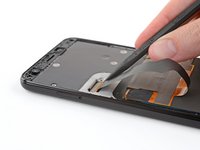
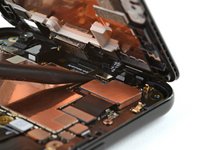
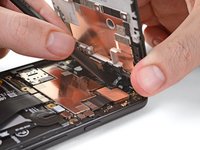
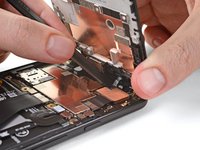
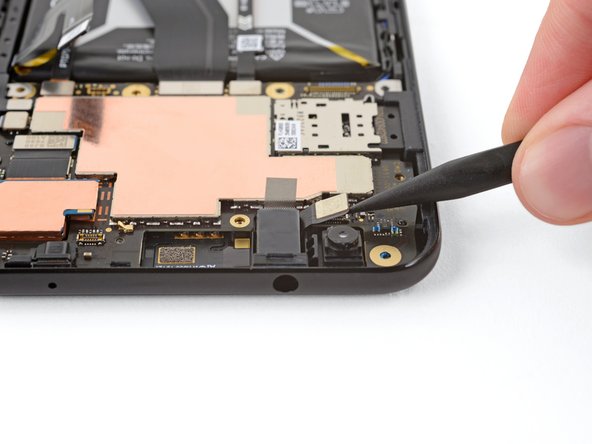
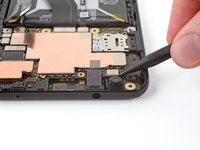
Use the pointy end of a spudger to pry up and disconnect the headphone jack's motherboard connector.
-


To reassemble your device, follow these instructions in reverse order.
Take your e-waste to an R2 or e-Stewards certified recycler.
Repair didn’t go as planned? Check out our Google Pixel 3a XL Answers community for troubleshooting help.
To reassemble your device, follow these instructions in reverse order.
Take your e-waste to an R2 or e-Stewards certified recycler.
Repair didn’t go as planned? Check out our Google Pixel 3a XL Answers community for troubleshooting help.
Annuleren: ik heb deze handleiding niet afgemaakt.
3 andere personen hebben deze handleiding voltooid.
