
Game Boy Advance Buttons Replacement
Inleiding
Ga naar stap 1Use this guide to remove the buttons in your Game Boy Advance
Wat je nodig hebt


-
-
Take the battery cover off by releasing the locking tab and hinging the cover away. Remove the batteries inside the cover
-
-
-
Remove the six back panel screws using a Tri-wing Screwdriver.
-
Remove bottom back panel screw with a Phillips #1 screw driver. (Image #2)
-
-
-
Remove the back panel by pulling away with one hand and the front secured in the other hand.
-
-
-
-
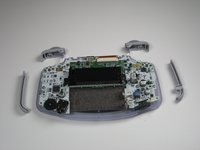
Remove left and right triggers by lifting and pulling them away from the system.
-
Do the same for side panels
-
-
-
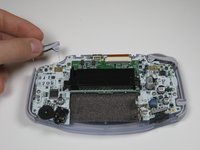
Remove the gray On/Off Switch by pulling up and away from the unit. Replace with another switch if necessary.
-
-
-
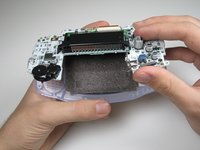
Remove the three screws on the circuit board with a Phillips #1 screw driver.
-
-
Gereedschap gebruikt in deze stap:Tweezers$4.99
-
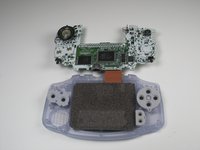
Remove the rubber button pads from their pockets.
-
Remove the plastic buttons and the D-pad from beneath the rubber pads with tweezers or by hand.
-


Annuleren: ik heb deze handleiding niet afgemaakt.
14 andere personen hebben deze handleiding voltooid.
Team

Cal Poly, Team 16-29, Maness Winter 2010 Lid van Cal Poly, Team 16-29, Maness Winter 2010
CPSU-MANESS-W10S16G29
5 Leden
62 handleidingen geschreven