
Epson Stylus C84 Ink Cartridge Replacement
-
-
When the red light is flashing, one or more ink cartridges are low. When the red ink light stays on, at least one cartridge needs to be replaced.
-
Turn off the printer. The power light should be on, but not flashing. Make sure the output tray is lowered. Then open the printer cover.
-
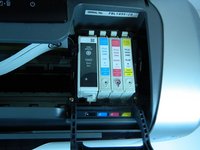
Open the printer and move the carriage with the ink cartridges to the left so you have access to them.
-
-
-
-
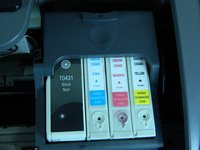
Shake the new cartridge inside the packaging four or five times before installing it. This will keep your hands clean and loosen the ink.
-
Turn off the printer. The power light should be on, but not flashing. Make sure the output tray is lowered. Then open the printer cover.
-
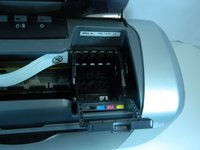
Press the ink button for one second. The print head moves to the left, and the cartridge that needs to be replaced stops under the need ink mark. The power light also begins to flash.
-
-
-
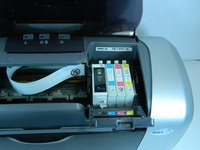
Place the cartridge into the cartridge holder. Push down gently until the cartridge is firmly seated. You will hear a click.
-
Close the cartridge cover.
-
Close the printer cover and press the ink button for one second. The printer head will move as the new ink system is formatted.
-
The green power light will flash and the printer will make noise. It will take about a minute and once finished, the power light will stop flashing.
-


To reassemble your device, follow these instructions in reverse order.
To reassemble your device, follow these instructions in reverse order.
Annuleren: ik heb deze handleiding niet afgemaakt.
Één andere persoon heeft deze handleiding voltooid.
Team

UMass Dartmouth, Team 1-3, Gulbrandsen Fall 2012 Lid van UMass Dartmouth, Team 1-3, Gulbrandsen Fall 2012
UMASSD-GULBRANDSEN-F12S1G3
1 Lid
4 handleidingen geschreven