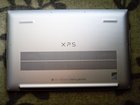
Dell XPS 9720 Fan Replacement

6 minuten
Gemiddeld
Opsommingstekens!
Door de gemeenschap gemaakte handleiding
Wat je nodig hebt


-
-
Unscrew 8 T5 screws. Use an opening tool to pop open the plastic tabs holding the aluminum and carbon fiber shells together.
-
-
-
-
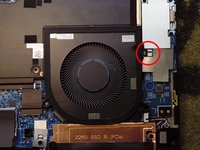
Insert finger into plastic loop and pull firmly away from motherboard.
-
-
-
Gently unplug the fan connector.
-
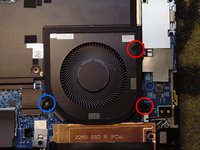
Remove the two PH1 (red) and single PH00 (blue) screws.
-
The fan may now be lifted from the chassis. Reverse these steps to install the new fan.
-


Bijna klaar!
To reassemble your device, follow these instructions in reverse order.
Conclusie
To reassemble your device, follow these instructions in reverse order.
