Ga door naar hoofdinhoud
Dell Precision M3800 Fan Replacement

Dell Precision M3800 Fan Replacement

Brianna Hitchcock

Brianna Hitchcock en 3 andere bijdragers

Voor het laatst geüpdatet op December 6, 2019

5 - 10 minuten
Gemiddeld

If the Dell Precision M3800 fans are nonfunctional and the computer is overheating, use this guide to replace the fan(s).

The fans run to prevent the computer from overheating and continue normal function. Faulty fan(s) will fail at cooling down the laptop and can be an obstacle to normal functions.

Before using this guide, check faulty fan(s) for foreign objects that cause underperformance. You may be able to fix his issue by dislodging said objects with an ESD-safe brush or small dust blower, instead of replacing the equipment. Be sure to isolate fan(s) that are nonfunctional as a replacement of only one fan may be needed.

Before beginning, be sure to power down the laptop, and unplug from the external power source(s).

Wat je nodig hebt

Gereedschap

Toon meer…

  1. Dell Precision M3800 Fan Replacement, Back Cover: stap 1, afbeelding 1 van 2 Dell Precision M3800 Fan Replacement, Back Cover: stap 1, afbeelding 2 van 2
    • Be sure to power off and unplug your device before you begin your repair.

    • Use a T5 Torx screwdriver to unscrew the ten 3mm screws on the laptop back cover.

    • iFixit’s magnetic project mat is great for keeping the screws in one place.

    • Lift up the silver cover from the back panel to reveal two screws.

    • Use a Phillips screwdriver to remove the two screws underneath the silver cover.

  2. Dell Precision M3800 Fan Replacement: stap 2, afbeelding 1 van 1
    • Use an opening tool to pry around the edges of the back panel to loosen the panel.

    • Remove the back panel.

  3. Dell Precision M3800 Fan Replacement, Fan: stap 3, afbeelding 1 van 2 Dell Precision M3800 Fan Replacement, Fan: stap 3, afbeelding 2 van 2
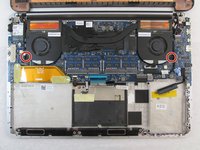
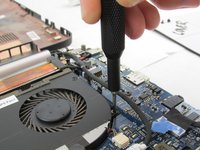
    • Use a Phillips #00 screwdriver to unscrew the two 3.5mm screws that are holding the fans in place.

  4. Dell Precision M3800 Fan Replacement: stap 4, afbeelding 1 van 3 Dell Precision M3800 Fan Replacement: stap 4, afbeelding 2 van 3 Dell Precision M3800 Fan Replacement: stap 4, afbeelding 3 van 3
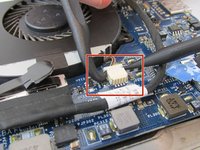
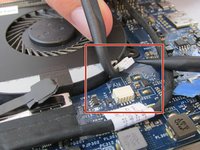
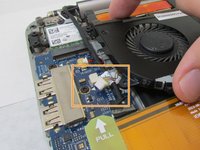
    • Using a nonmetal prying tool, unplug the cord connecting the fan to the motherboard.

    • If replacing the right fan, this cord is located underneath the fan.

    • If replacing the left fan, this cord is located on the left of the fan.

  5. Dell Precision M3800 Fan Replacement: stap 5, afbeelding 1 van 2 Dell Precision M3800 Fan Replacement: stap 5, afbeelding 2 van 2
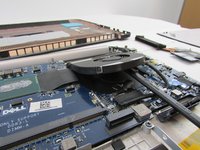
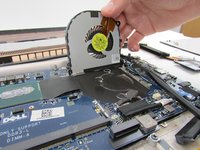
    • Use nonmetal prying tool to lift the bottom of the fan from the laptop body (this will require some force and you will hear an adhesive pulling sound).

    • Repeat the steps for the second fan if needed .

Conclusie

To reassemble your device, follow these instructions in reverse order.

3 andere personen hebben deze handleiding voltooid.

0 opmerkingen

Voeg opmerking toe

Weergavestatistieken:

Afgelopen 24 uren: 0

Afgelopen 7 dagen: 14

Afgelopen 30 dagen: 25

Altijd: 1,441