
Dell OptiPlex GX260 Motherboard Replacement
Wat je nodig hebt


-
-
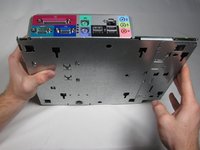
Lay the Dell Optiplex GX260 down on a clean flat surface with the rear towards you.
-
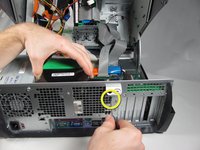
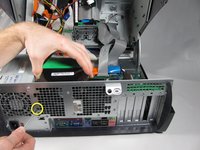
Push the oval shaped buttons located on the top and bottom of the PC simultaneously and lift the case straight up.
-
-
-
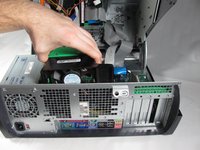
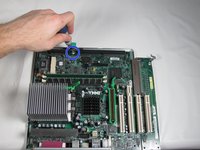
Push out on the cream colored tabs on each side of each RAM module until it pops up and out of its slot and remove the RAM.
-
-
-
-
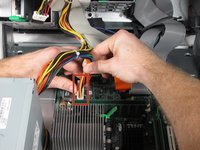
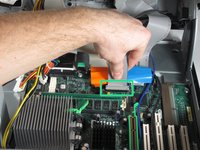
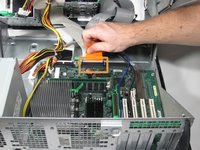
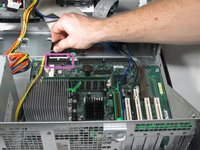
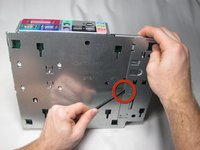
Disconnect the ATX power cable to the motherboard.
-
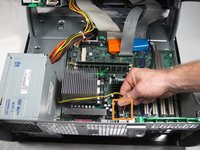
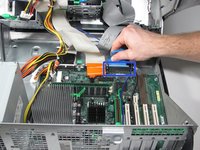
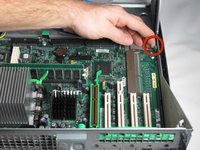
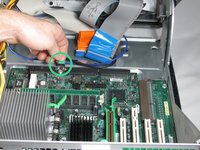
Disconnect the P4 12V(4x2) power cable from the motherboard.
-


To reassemble your device, follow these instructions in reverse order.
To reassemble your device, follow these instructions in reverse order.
Annuleren: ik heb deze handleiding niet afgemaakt.
15 andere personen hebben deze handleiding voltooid.
Team

Cal Poly, Team 4-48, Amido Fall 2010 Lid van Cal Poly, Team 4-48, Amido Fall 2010
CPSU-AMIDO-F10S4G48
4 Leden
27 handleidingen geschreven
4 opmerkingen
Mines stuck for some reason I almost bent the frame from pushing the ports in while lifting and pulling the tray tab away
make sure you doing it the correct side!
muy bueno gracias bro
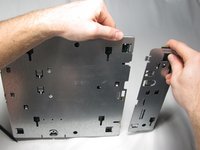
Mine did not have the big green fan in back. Rest of the disassembly was similar, until I got to actually removing the PCB from the metal back plate. This says to simply slide it forward while holding the plate in place. Yeah… well, in theory. It actually took a fair amount of gentle prying to get the PCB to slide forward. The key is the little metal grounding clips in the corners. The fingers do not actually present much pressure. However, the vertical metal to which they press is an overhang. So the trick is to gently FORCE the PCB forward at each rear corner until such time as the overhang no longer exists. At this point the vertical metal tab will be full back against their respective slots. The PCB will simply lift out then.