
Dell Inspiron 1545 USB Port Replacement

Inleiding
Ga naar stap 1This guide will most likely be utilized if one of the USB ports or auxiliary ports are unresponsive. This will cover removing the boards so the entire board can be replaced rather than unsoldering each individual port.
Wat je nodig hebt
Onderdelen

Gereedschap


Toon meer…
-
-
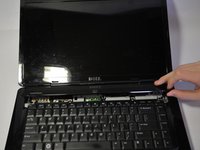
After removing the battery, remove the two screws (3mm Phillips #1) beneath it. These screws hold the Center Control Cover in place.
-
-
-
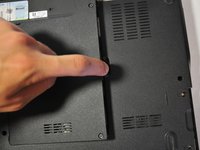
Unscrew the four screws (3mm Phillips #1) that hold the base cover in place.
-
-
-
Loosen the 5 screws (4mm, Phillips #1) that secure the CPU Heat Sink to the motherboard.
-
-
-
-
Flip the laptop to its back side.
-
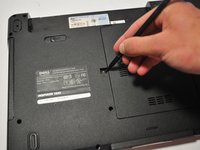
Remove the screw (5mm Phillips #1) that secures the Optical Disk Drive on the back of the laptop.
-
-
-
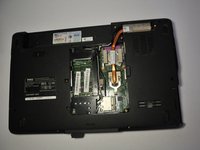
Remove the 11 screws (5mm Phillips #1) from the back of the laptop as marked. One screw is in the middle, by the RAM.
-
-
-
Disconnect the Bluetooth card cable, Wed cable, Camera1 cable, power cable, and touchpad cable from the respective Motherboard connectors as marked. For the Bluetooth cable and Camera1 cable, pull the plugs towards the screen. For the touchpad and power cable, lift the black tab and then pull them out. For the Wed cable, pull the blue tab up.
-
Unsecure the wires from the routing guides so they are loose.
-
-
-
Remove the 3 screws (3mm Phillips #1) that secure the daughter board to the motherboard.
-
Lift the daughter board away from the laptop.
-
-
-
Remove the two screws (3mm, Phillips #1) on the left and the two screws (5mm, Phillips #1) on the right that secure the Motherboard to the laptop.
-
-
-
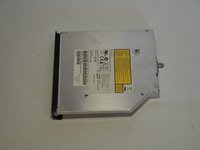
Remove the two screws (5mm, Phillips #1) in order to remove the main auxiliary board containing USB ports, and audio/microphone ports.
-


To reassemble your device, follow these instructions in reverse order.
To reassemble your device, follow these instructions in reverse order.
Annuleren: ik heb deze handleiding niet afgemaakt.
6 andere personen hebben deze handleiding voltooid.

Team

Cal Poly, Team 9-14, Regan Spring 2014 Lid van Cal Poly, Team 9-14, Regan Spring 2014
CPSU-REGAN-S14S9G14
4 Leden
15 handleidingen geschreven