Ga door naar hoofdinhoud
Dell AC511 USB Cable Replacement

Dell AC511 USB Cable Replacement

William Cook

William Cook en een andere bijdrager

Voor het laatst geüpdatet op June 25, 2024

10 - 30 minuten
Moeilijk
Toeristische route
Betere introductie

Replacing the USB cable requires a near-total breakdown of the soundbar, so we only recommend it as a last resort.

Wat je nodig hebt

Gereedschap

Toon meer…

iFixit krijgt commissie als je dingen koopt via deze links.
  1. Dell AC511 USB Cable Replacement, Front Panel: stap 1, afbeelding 1 van 3 Dell AC511 USB Cable Replacement, Front Panel: stap 1, afbeelding 2 van 3 Dell AC511 USB Cable Replacement, Front Panel: stap 1, afbeelding 3 van 3
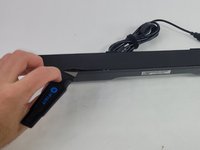
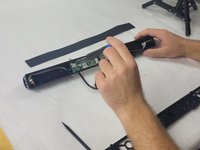
    • Use a Jimmy to peel off the screen stuck to the front of the speaker.

    • Start from any corner and use the Jimmy to get under the screen. Once one side lifts up, you can use your fingers to peel the rest off.

    • Be careful to avoid damage to the rest of the speaker and especially to yourself.

    • Don't worry if it tears; use the Jimmy again to peel off the rest.

  2. Dell AC511 USB Cable Replacement: stap 2, afbeelding 1 van 2 Dell AC511 USB Cable Replacement: stap 2, afbeelding 2 van 2
    • Remove ten 6 mm screws using a Phillips #1 screwdriver.

  3. Dell AC511 USB Cable Replacement: stap 3, afbeelding 1 van 2 Dell AC511 USB Cable Replacement: stap 3, afbeelding 2 van 2
    • Lift the front panel off of the rest of the device.

    • The speakers will still be attached to the front panel. Being too rough could damage them.

    • Remove the 4 mm screws from the speakers using a JIS #1 screwdriver.

    • Remove the front panel from the device.

  4. Dell AC511 USB Cable Replacement, Speaker: stap 4, afbeelding 1 van 2 Dell AC511 USB Cable Replacement, Speaker: stap 4, afbeelding 2 van 2
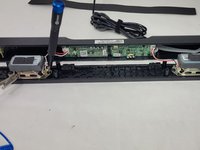
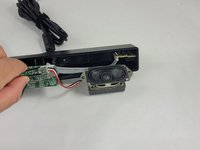
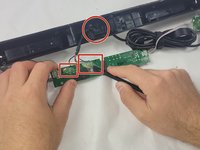
    • Follow the three wires connected to the speaker to find where they connect to the circuit board.

    • Use tweezers to gently rock the end of the wires back and forth until they disconnect from the board.

  5. Dell AC511 USB Cable Replacement, USB Cable: stap 5, afbeelding 1 van 2 Dell AC511 USB Cable Replacement, USB Cable: stap 5, afbeelding 2 van 2
    • Depending on where the soundbar is damaged, there are two different ways to remove the USB cable. This guide will cover both scenarios.

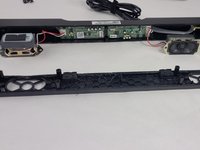
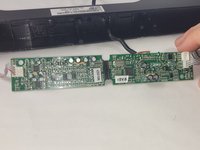
    • Remove the 6 mm screws connecting the circuit board to the rear panel using a Phillips #1 screwdriver.

  6. Dell AC511 USB Cable Replacement: stap 6, afbeelding 1 van 2 Dell AC511 USB Cable Replacement: stap 6, afbeelding 2 van 2
    • If the small wires coming from the USB cable are disconnected from the board, you'll have to solder them on. We recommend not letting that happen if you can help it.

    • The small wires may be glued to the circuit board. Pry off the glue with the Halberd Spudger.

  7. Dell AC511 USB Cable Replacement: stap 7, afbeelding 1 van 1
    • Follow this step if the wires are still connected. If they aren't, skip to the next step.

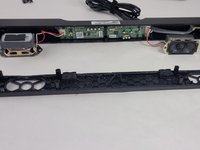
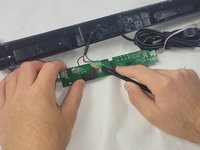
    • If the wiring to the circuit board seems fine, use a razor or wire strippers to clear the rubber insulation away from the USB.

    • Keep track of the colors! If you connect the wrong wires together, the speaker won't work, and you could ruin the board!

    • After removing the rubber insulation from the smaller wires, remove the access USB.

    • Splice in the new USB and wrap the connection with the colored wires in electrical tape.

    • If you end up with reduced sound quality, you may need to solder after all. Continue to the next step in that case.

  8. Dell AC511 USB Cable Replacement: stap 8, afbeelding 1 van 1
    • Follow this step if the wires are not connected.

    • Remove the old USB wiring as best as possible from the circuit board.

    • Try to not be too rough. If needed, use wire strippers to remove the wires.

    • Remember the locations of the color coded USB wires and solder each into their respective places.

    • Take your time. Do not add too much solder; you could potentially fry the board if you do.

Conclusie

To reassemble your device, follow these instructions in reverse order.

William Cook

Lid sinds: 03/19/24

617 Reputatie

6 handleidingen geschreven

Team

UMass Dartmouth, Team 4-6, Shaddix Spring 2024 Lid van UMass Dartmouth, Team 4-6, Shaddix Spring 2024

UMASSD-SHADDIX-S24S4G6

4 Leden

6 handleidingen geschreven

0 opmerkingen

Voeg opmerking toe

Weergavestatistieken:

Afgelopen 24 uren: 3

Afgelopen 7 dagen: 7

Afgelopen 30 dagen: 27

Altijd: 125