Ga door naar hoofdinhoud

Bose SoundLink Mini II Speaker Replacement

Wat je nodig hebt

  1. Bose SoundLink Mini II Speaker Replacement, Battery: stap 1, afbeelding 1 van 2 Bose SoundLink Mini II Speaker Replacement, Battery: stap 1, afbeelding 2 van 2
    • Flip the speaker over onto its back.

  2. Bose SoundLink Mini II Speaker Replacement, Remove the rubber base: stap 2, afbeelding 1 van 2 Bose SoundLink Mini II Speaker Replacement, Remove the rubber base: stap 2, afbeelding 2 van 2
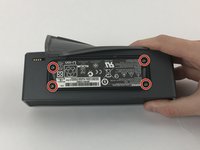
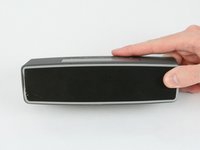
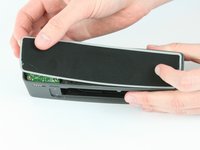
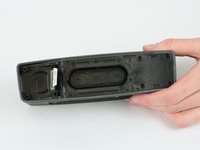
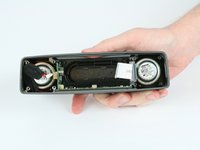
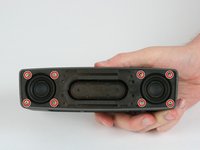
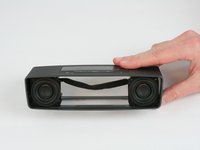
    • Gently remove the rubber base from speaker by pulling around the edges.

  3. Bose SoundLink Mini II Speaker Replacement: stap 3, afbeelding 1 van 2 Bose SoundLink Mini II Speaker Replacement: stap 3, afbeelding 2 van 2
    • Remove the four 6mm T9 Torx bit screws from the corners of the battery.

  4. Bose SoundLink Mini II Speaker Replacement: stap 4, afbeelding 1 van 3 Bose SoundLink Mini II Speaker Replacement: stap 4, afbeelding 2 van 3 Bose SoundLink Mini II Speaker Replacement: stap 4, afbeelding 3 van 3
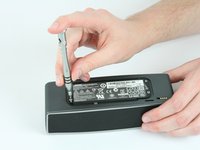
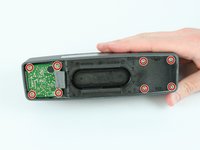
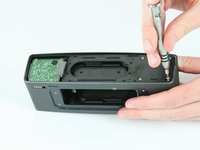
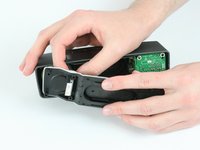
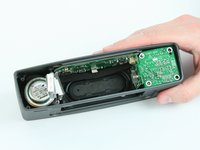
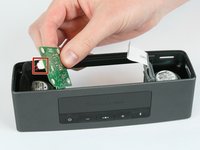
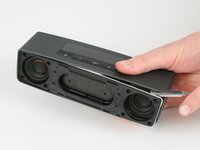
    • Carefully lift the battery from the side nearest the four gold contact pins, but don't try to fully remove it yet.

    • At this point, the battery remains connected via four wires to the power supply board.

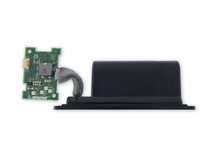
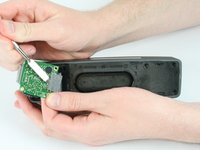
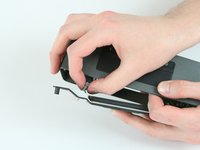
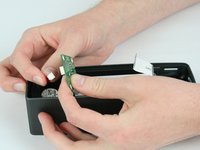
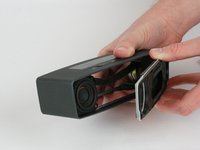
    • Carefully desolder the four wires from the power supply board in order to completely detach the battery. There is very little room for the soldering iron without damaging the case or the board; you may want to remove the board first.

    • For help with soldering, see the soldering guide.

    • Alternatively, you may remove the battery and power supply board together, without any soldering, but access requires some additional disassembly while carefully leaving the battery connected via the wires the entire time.

  5. Bose SoundLink Mini II Speaker Replacement, Bose Technicians' Instruction Manual: stap 5, afbeelding 1 van 1
  6. Bose SoundLink Mini II Speaker Replacement, Speaker: stap 6, afbeelding 1 van 2 Bose SoundLink Mini II Speaker Replacement, Speaker: stap 6, afbeelding 2 van 2
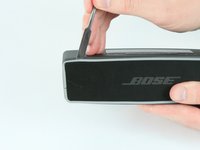
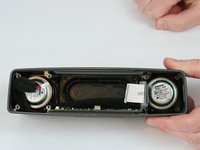
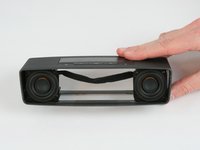
    • Removing the device front grille with a metal spudger, starting in one corner and working around the border.

    • The grille is easily bent and deformed.

  7. Bose SoundLink Mini II Speaker Replacement: stap 7, afbeelding 1 van 3 Bose SoundLink Mini II Speaker Replacement: stap 7, afbeelding 2 van 3 Bose SoundLink Mini II Speaker Replacement: stap 7, afbeelding 3 van 3
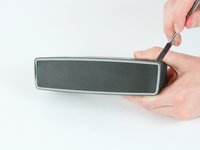
    • Remove the rear grille with a metal spudger, starting in one corner and working around the border.

    • The grille is easily bent and deformed.

  8. Bose SoundLink Mini II Speaker Replacement: stap 8, afbeelding 1 van 2 Bose SoundLink Mini II Speaker Replacement: stap 8, afbeelding 2 van 2
    • Remove the eight 9mm T9 screws.

  9. Bose SoundLink Mini II Speaker Replacement: stap 9, afbeelding 1 van 2 Bose SoundLink Mini II Speaker Replacement: stap 9, afbeelding 2 van 2
    • Use the metal spudger to release ribbon cable retainer.

    • Detach the ribbon cable from the circuit board by sliding out from board connector.

  10. Bose SoundLink Mini II Speaker Replacement: stap 10, afbeelding 1 van 3 Bose SoundLink Mini II Speaker Replacement: stap 10, afbeelding 2 van 3 Bose SoundLink Mini II Speaker Replacement: stap 10, afbeelding 3 van 3
    • Pull the ribbon cable through the rear case wall.

  11. Bose SoundLink Mini II Speaker Replacement: stap 11, afbeelding 1 van 3 Bose SoundLink Mini II Speaker Replacement: stap 11, afbeelding 2 van 3 Bose SoundLink Mini II Speaker Replacement: stap 11, afbeelding 3 van 3
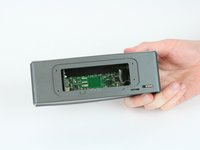
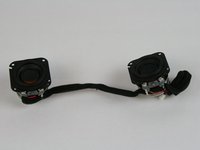
    • Remove the top circuit board by lifting up.

    • Disconnect the wired pair from board upon removal.

    • There is a non latched connector connecting the top board to side board. Be careful to not damage this connector during the removal process.

  12. Bose SoundLink Mini II Speaker Replacement: stap 12, afbeelding 1 van 2 Bose SoundLink Mini II Speaker Replacement: stap 12, afbeelding 2 van 2
    • Remove the power supply board by sliding it outward from the device.

    • This is the board that was previously soldered to the battery.

    • There is a non latched connector connecting the side board to button board. Be careful to not damage this connector during the removal process.

  13. Bose SoundLink Mini II Speaker Replacement: stap 13, afbeelding 1 van 2 Bose SoundLink Mini II Speaker Replacement: stap 13, afbeelding 2 van 2
    • Remove the eight 9mm T9 Torx screws from the front of the device.

  14. Bose SoundLink Mini II Speaker Replacement: stap 14, afbeelding 1 van 3 Bose SoundLink Mini II Speaker Replacement: stap 14, afbeelding 2 van 3 Bose SoundLink Mini II Speaker Replacement: stap 14, afbeelding 3 van 3
    • Use the metal spudger to remove the front case panel.

  15. Bose SoundLink Mini II Speaker Replacement: stap 15, afbeelding 1 van 2 Bose SoundLink Mini II Speaker Replacement: stap 15, afbeelding 2 van 2
    • Remove the speakers from the case.

Conclusie

To reassemble your device, follow these instructions in reverse order.

18 andere personen hebben deze handleiding voltooid.

Tyler Roessler

Lid sinds: 02/15/17

1.456 Reputatie

1 Handleiding geschreven

Team

USF Tampa, Team 5-2, Passmore Spring 2017 Lid van USF Tampa, Team 5-2, Passmore Spring 2017

USFT-PASSMORE-S17S5G2

4 Leden

19 handleidingen geschreven

10 opmerkingen

Anyone know where to find the speaker for replacement?

Matthew - Antwoord

Die Anleitung ist Fehlerhaft! Der Akku ist im SLM2 Festgelötet, in der Anleitung kein Wort davon und auch die Bilder sind damit Falsch.

Robert - Antwoord

(englisch version below)

Scheinbar eine Verwirrung, es gibt verschiedene Ausführungen des selben Models. Es scheint als sie im amerikanischen die Soundlink mini 2 mit steckbaren Akku verkauft worden und die gelötete in Europa.

It seems there is some confusion ongoing, there are different versions of the same model. It seems likely in Amerika the Soundlink mini 2s battery is unplugable, as the european version is soldered.

Raphael Krug -

Nachtrag! Das ist die Anleitung vom Mini 1 und somit Falsch Deklariert.

Robert - Antwoord

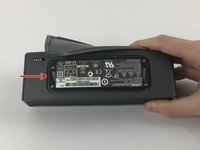
The German guy (Robert) seems incorrect. He claims this teardown is for the original Bose MiniSoundlink I. I just confirmed it is indeed a teardown for Bose Mini Soundlink II by checking the model number of my own Soundlink II with the teardown photos showing the model number (in steps 3 & 4). Both show model number 088796., confirming this is Soundlink II.

Jason - Antwoord

Voeg opmerking toe

Weergavestatistieken:

Afgelopen 24 uren: 15

Afgelopen 7 dagen: 132

Afgelopen 30 dagen: 509

Altijd: 48,825