Ga door naar hoofdinhoud
Word lid van de reparatiegemeenschap - Account aanmaken

Beats Studio 2 Wireless Speaker Replacement

Wat je nodig hebt

    1. Beats Studio 2 Wireless Speaker Replacement, Ear Cushion: stap 1, afbeelding 1 van 2 Beats Studio 2 Wireless Speaker Replacement, Ear Cushion: stap 1, afbeelding 2 van 2
      • Insert a spudger between the plastic part of the left headphone and the ear cushion.

      • Work the spudger around the periphery of the base of the cushion and gently pry it off the head phone.

      Vraag FixBot

      Voeg opmerking toe

    2. Beats Studio 2 Wireless Speaker Replacement: stap 2, afbeelding 1 van 3 Beats Studio 2 Wireless Speaker Replacement: stap 2, afbeelding 2 van 3 Beats Studio 2 Wireless Speaker Replacement: stap 2, afbeelding 3 van 3
      • Pull the rest of the cushion away from the adhesive with your hands.

      Vraag FixBot

      Voeg opmerking toe

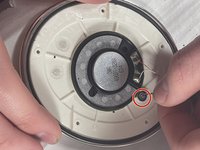
    1. Beats Studio 2 Wireless Speaker Replacement, Speaker: stap 3, afbeelding 1 van 2 Beats Studio 2 Wireless Speaker Replacement, Speaker: stap 3, afbeelding 2 van 2
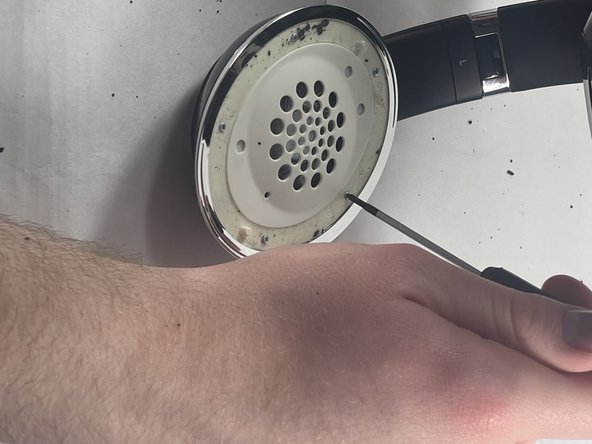
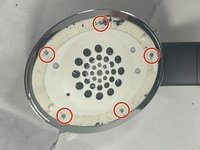
      • Using the Phillips #00 screwdriver, remove the screws holding the speaker in place.

      • If the speaker is on the side with the charging port be sure to keep the two screws holding the charging port separate.

      Vraag FixBot

      Voeg opmerking toe

    2. Beats Studio 2 Wireless Speaker Replacement: stap 4, afbeelding 1 van 1
      • Gently separate the speaker from the headphones.

      • Don't pull or yank the speaker from the headphones. They are connected together by wires that might be damaged.

      Vraag FixBot

      Voeg opmerking toe

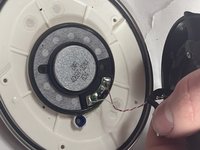
    3. Beats Studio 2 Wireless Speaker Replacement: stap 5, afbeelding 1 van 2 Beats Studio 2 Wireless Speaker Replacement: stap 5, afbeelding 2 van 2
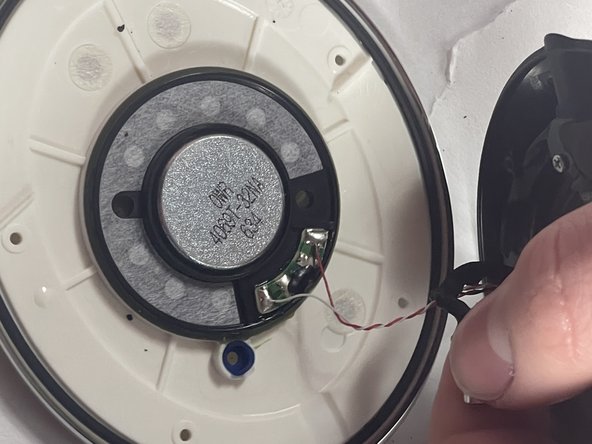
      • Gently pull the wire with rubber connectors off of the speaker.

      Vraag FixBot

      Voeg opmerking toe

    4. Beats Studio 2 Wireless Speaker Replacement: stap 6, afbeelding 1 van 1
      • Use a soldering iron to desolder the two connections.

      • For details on how to solder and desolder, refer to the How to Solder and Desolder Connections guide.

      • A soldering iron can produce very high temperatures, and can burn skin. Use with caution.

      • Note the position of the speaker in its housing, then carefully remove the faulty speaker.

      Vraag FixBot

      Voeg opmerking toe

Conclusie

After soldering the new speaker, reassemble your device by following the steps in reverse order.

Annuleren: ik heb deze handleiding niet afgemaakt.

4 andere personen hebben deze handleiding voltooid.

Mike Rosiello

Lid sinds: 03/20/23

325 Reputatie

2 handleidingen geschreven

Team

UMass Dartmouth, Team 5-3, Ramos Spring 2023 Lid van UMass Dartmouth, Team 5-3, Ramos Spring 2023

UMASSD-RAMOS-S23S5G3

3 Leden

16 handleidingen geschreven

1Gids Commentaar

I didn't need to replace a speaker but just touch up the solder joints, this was a great guide! Thank you!

William Pryor - Antwoord Deel

Voeg opmerking toe

Weergavestatistieken:

Afgelopen 24 uren: 2

Afgelopen 7 dagen: 7

Afgelopen 30 dagen: 34

Altijd: 1,107