Ga door naar hoofdinhoud
Asus X751MA-DH01TQ Touchpad Replacement

Asus X751MA-DH01TQ Touchpad Replacement

Joshua Kramer

Joshua Kramer en 2 andere bijdragers

Voor het laatst geüpdatet op August 5, 2019

5 minuten
Eenvoudig

If you try to get your touchpad to respond but it won't, it may need to be replaced. This guide will take you through the replacement process of the touchpad.

Wat je nodig hebt

Gereedschap

  1. Asus X751MA-DH01TQ Touchpad Replacement, Touchpad: stap 1, afbeelding 1 van 2 Asus X751MA-DH01TQ Touchpad Replacement, Touchpad: stap 1, afbeelding 2 van 2
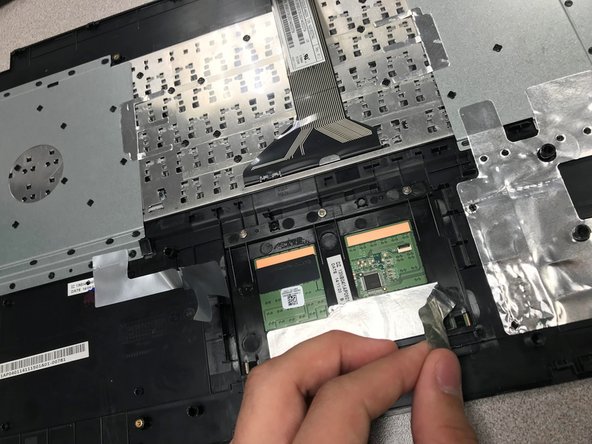
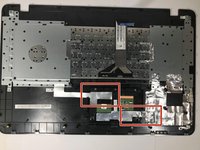
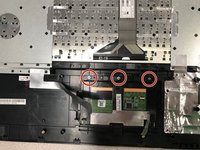
    • Turn the laptop upside down

    • Unscrew the ten screws on the bottom with the PH00 screwdriver bit.

  2. Asus X751MA-DH01TQ Touchpad Replacement: stap 2, afbeelding 1 van 3 Asus X751MA-DH01TQ Touchpad Replacement: stap 2, afbeelding 2 van 3 Asus X751MA-DH01TQ Touchpad Replacement: stap 2, afbeelding 3 van 3
    • Open up the laptop.

    • Using the plastic opening tool, open up and disconnect the keyboard from the base.

    • Take the keyboard off and put it upside down.

  3. Asus X751MA-DH01TQ Touchpad Replacement: stap 3, afbeelding 1 van 3 Asus X751MA-DH01TQ Touchpad Replacement: stap 3, afbeelding 2 van 3 Asus X751MA-DH01TQ Touchpad Replacement: stap 3, afbeelding 3 van 3
    • Peel off the silver stickers that are attaching the touch pad to the back part of the keyboard.

  4. Asus X751MA-DH01TQ Touchpad Replacement: stap 4, afbeelding 1 van 2 Asus X751MA-DH01TQ Touchpad Replacement: stap 4, afbeelding 2 van 2
    • Unscrew the three 4mm screws on the touch pad with a PH00 screwdriver.

  5. Asus X751MA-DH01TQ Touchpad Replacement: stap 5, afbeelding 1 van 1
    • Grab the touch pad and slide it out to replace it.

Conclusie

To reassemble your device, follow these instructions in reverse order.

0 opmerkingen

Voeg opmerking toe

Weergavestatistieken:

Afgelopen 24 uren: 0

Afgelopen 7 dagen: 0

Afgelopen 30 dagen: 25

Altijd: 463