Ga door naar hoofdinhoud

Asus X55C Cooling / FAN System Replacement

Wat je nodig hebt

Video overzicht

  1. Asus X55C Cooling / FAN System Replacement, Keyboard: stap 1, afbeelding 1 van 1
    • Switch off the laptop and remove the battery.

  2. Asus X55C Cooling / FAN System Replacement: stap 2, afbeelding 1 van 3 Asus X55C Cooling / FAN System Replacement: stap 2, afbeelding 2 van 3 Asus X55C Cooling / FAN System Replacement: stap 2, afbeelding 3 van 3
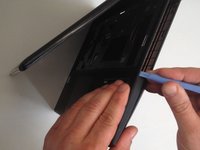
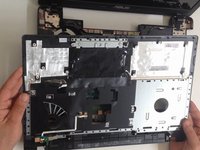
    • The Keyboard is held by 5x locking clips.

    • Pick up a little the one side of the Keyboard and start opening the clips one by one.

    • Disconnect the Keyboard flex cable from the mother board and remove the KB.

    • Please SUBSCRIBE to my channel ツ

  3. Asus X55C Cooling / FAN System Replacement, Motherboard: stap 3, afbeelding 1 van 2 Asus X55C Cooling / FAN System Replacement, Motherboard: stap 3, afbeelding 2 van 2
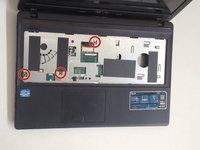
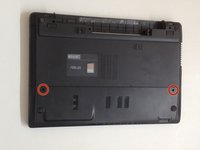
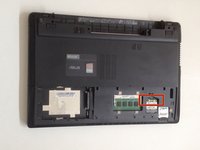
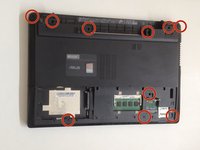
    • Remove 3x Philips screws.

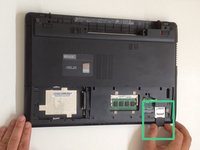
    • Disconnect the two small flex cables:

    • Power On button flex cable

    • Touch pad flex cable

  4. Asus X55C Cooling / FAN System Replacement: stap 4, afbeelding 1 van 3 Asus X55C Cooling / FAN System Replacement: stap 4, afbeelding 2 van 3 Asus X55C Cooling / FAN System Replacement: stap 4, afbeelding 3 van 3
    • Unscrew the two Philips screws and remove the HDD / RAM Cover.

    • Remove three screws securing the hard drive caddy (hard drive assembly).

    • Slide the hard drive assembly to the left to disconnect it from the motherboard.

  5. Asus X55C Cooling / FAN System Replacement: stap 5, afbeelding 1 van 2 Asus X55C Cooling / FAN System Replacement: stap 5, afbeelding 2 van 2
    • Disconnect the two coaxial antenna cables from the Wi-Fi card.

    • Remove any Memory or Dummy card.

  6. Asus X55C Cooling / FAN System Replacement: stap 6, afbeelding 1 van 3 Asus X55C Cooling / FAN System Replacement: stap 6, afbeelding 2 van 3 Asus X55C Cooling / FAN System Replacement: stap 6, afbeelding 3 van 3
    • The bottom cover is held by 10x Phillips screws. Remove them.

    • With a plastic tool separate the Upper cover and remove it.

  7. Asus X55C Cooling / FAN System Replacement: stap 7, afbeelding 1 van 3 Asus X55C Cooling / FAN System Replacement: stap 7, afbeelding 2 van 3 Asus X55C Cooling / FAN System Replacement: stap 7, afbeelding 3 van 3
    • Disconnect:

    • The Microphone cable

    • The LCD Display flex cable

    • Remove 3x Pillips screws.

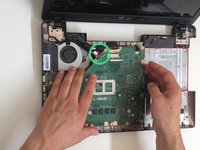
    • Lift the board first from the right edge.

    • There is another one cable, from the DC connector, connected to the underside of main board. We should spun the the board to disconnect the DC connector cable.
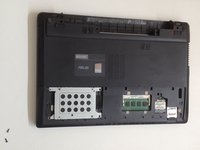
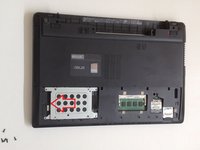
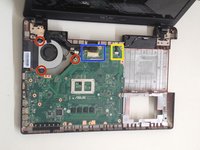
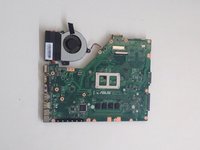
  8. Asus X55C Cooling / FAN System Replacement: stap 8, afbeelding 1 van 2 Asus X55C Cooling / FAN System Replacement: stap 8, afbeelding 2 van 2
  9. Asus X55C Cooling / FAN System Replacement, Cooling / FAN System: stap 9, afbeelding 1 van 3 Asus X55C Cooling / FAN System Replacement, Cooling / FAN System: stap 9, afbeelding 2 van 3 Asus X55C Cooling / FAN System Replacement, Cooling / FAN System: stap 9, afbeelding 3 van 3
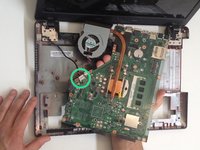
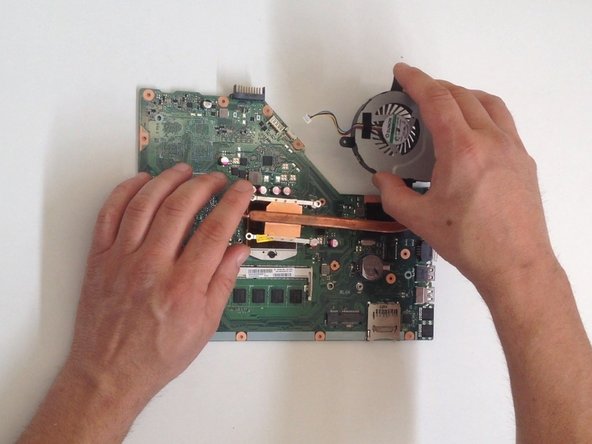
    • Disconnect the Fan cable from the Motherboard.

    • Remove the screws (4x Phillips screws) that hold the cooling system to the Motherboard

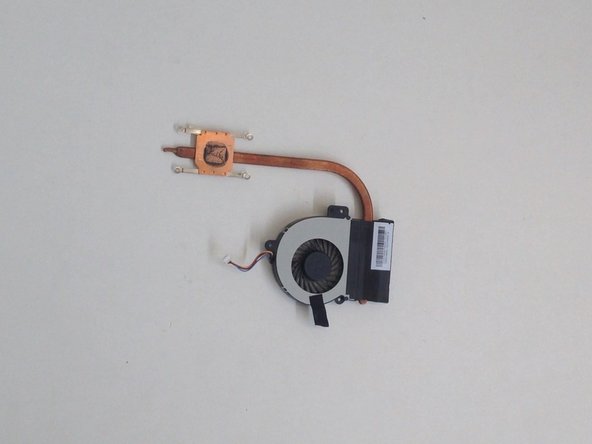
    • CPU Cooling System - Cooling Heatsink and Fan.

    • Remove the Cooling System carefully, if you don't want to break the CPU.

    • Before installing the new Cooling System, clean the CPU and put new thermal compound / paste.

Conclusie

To reassemble your device, follow these instructions in reverse order.

Één andere persoon heeft deze handleiding voltooid.

ZFix

Lid sinds: 12/09/13

191.055 Reputatie

330 handleidingen geschreven

Team

Master Techs Lid van Master Techs

Community

322 Leden

2.506 handleidingen geschreven

0 opmerkingen

Voeg opmerking toe

Weergavestatistieken:

Afgelopen 24 uren: 0

Afgelopen 7 dagen: 0

Afgelopen 30 dagen: 4

Altijd: 3,128