
Asus X55C CMOS / BIOS Battery Replacement

Inleiding
Ga naar stap 1How to disassemble the laptop and replace the CMOS / BIOS Battery.
__________________ Video manual: __________________
Wat je nodig hebt


Video overzicht
-
-
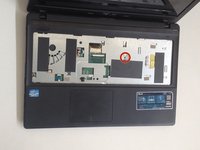
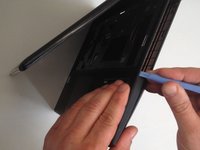
The Keyboard is held by 5x locking clips.
-
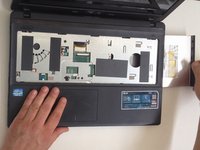
Pick up a little the one side of the Keyboard and start opening the clips one by one.
-
Disconnect the Keyboard flex cable from the mother board and remove the KB.
-
-
-
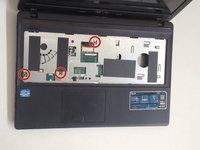
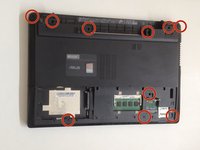
Remove 3x Philips screws.
-
Disconnect the two small flex cables:
-
Power On button flex cable
-
Touch pad flex cable
-
-
-
-
Disconnect:
-
The Microphone cable
-
The LCD Display flex cable
-
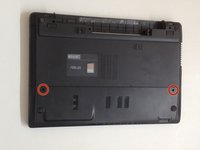
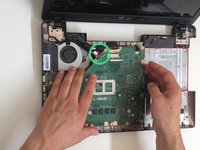
Remove 3x Pillips screws.
-
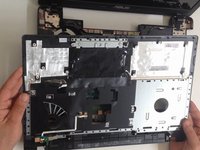
Lift the board first from the right edge.
-
There is another one cable, from the DC connector, connected to the underside of main board. We should spun the the board to disconnect the DC connector cable.
-
-
-
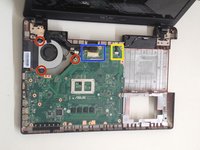
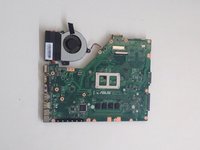
ASUS X55C iCore with 4GB no board RAM motherboard, model: 60-N0OMB1100
-
-
-
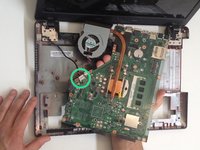
Use a sharp tool to remove the Battery.
-
CR2032 - button cell lithium battery rated at 3.0 volts.
-
Did you do it successfully?
-
.
-


To reassemble your device, follow these instructions in reverse order.
To reassemble your device, follow these instructions in reverse order.
Annuleren: ik heb deze handleiding niet afgemaakt.
8 andere personen hebben deze handleiding voltooid.

Team

Één opmerking
I have an ASUS X555Y laptop. It has an internal battery but for the life of me I cannot find the CMOS battery. I've taken everything apart and looked underneath the motherboard too,where the CMOS seems to usually be. No sign of it. Am I still somehow overlooking it? Or do I just not have one? I read in my searching that some models just don't have one.
I can't figure out what else is causing my laptop to not get past the "Aptio Setup Utility"