Ga door naar hoofdinhoud
Word lid van de reparatiegemeenschap - Account aanmaken

Asus Q525U Battery Replacement

Wat je nodig hebt

  1. Asus Q525U Battery Replacement, Back Cover: stap 1, afbeelding 1 van 3 Asus Q525U Battery Replacement, Back Cover: stap 1, afbeelding 2 van 3 Asus Q525U Battery Replacement, Back Cover: stap 1, afbeelding 3 van 3
    • Begin by powering off the device and flipping the device over.

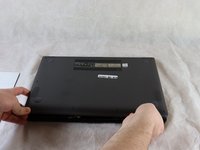
    • Carefully remove the two longer 9.5 mm screws on the corners with a Phillips #1 screwdriver.

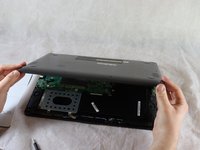
    • Remove the eight 7.5 mm Phillips #1 screws on the back of the device.

  2. Asus Q525U Battery Replacement: stap 2, afbeelding 1 van 3 Asus Q525U Battery Replacement: stap 2, afbeelding 2 van 3 Asus Q525U Battery Replacement: stap 2, afbeelding 3 van 3
    • Use an opening pick to separate the back cover from the device.

    • For easiest removal, begin by prying at one of the front corners and sliding the tool under the cover in a counter-clockwise motion (to the left) toward the laptop hinge.

  3. Asus Q525U Battery Replacement: stap 3, afbeelding 1 van 3 Asus Q525U Battery Replacement: stap 3, afbeelding 2 van 3 Asus Q525U Battery Replacement: stap 3, afbeelding 3 van 3
    • Once the cover has been separated from the device, carefully lift the back cover off the device (begin by lifting from the front of the cover first).

    • The back cover should be easily removable, allowing full access to all of the internal components.

  4. Asus Q525U Battery Replacement, Battery: stap 4, afbeelding 1 van 3 Asus Q525U Battery Replacement, Battery: stap 4, afbeelding 2 van 3 Asus Q525U Battery Replacement, Battery: stap 4, afbeelding 3 van 3
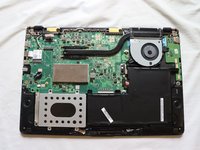
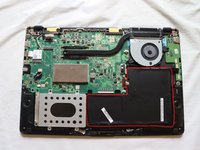
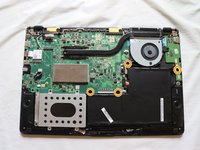
    • The battery of the device is outlined in red.

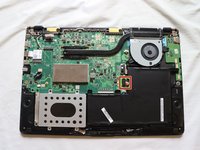
    • Using a Phillips #1 screwdriver, remove the four 5 mm screws that are holding the battery in place.
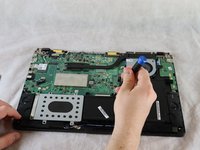
  5. Asus Q525U Battery Replacement: stap 5, afbeelding 1 van 2 Asus Q525U Battery Replacement: stap 5, afbeelding 2 van 2
    Gereedschap gebruikt in deze stap:
    Halberd Spudger
    $2.99
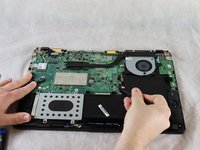
    • Using the Halberd spudger, carefully lift the battery connector up to disconnect it from the motherboard.

  6. Asus Q525U Battery Replacement: stap 6, afbeelding 1 van 1
    • Lift the battery out of the frame to remove.

Conclusie

To reassemble your device, follow these instructions in reverse order.

Één andere persoon heeft deze handleiding voltooid.

Will Targonski

Lid sinds: 02/22/22

153 Reputatie

1 Handleiding geschreven

Team

Clemson, Team 2-5, Hunter Spring 2022 Lid van Clemson, Team 2-5, Hunter Spring 2022

CLEM-HUNTER-S22S2G5

4 Leden

12 handleidingen geschreven

0Gids Commentaar

Voeg opmerking toe

Weergavestatistieken:

Afgelopen 24 uren: 3

Afgelopen 7 dagen: 25

Afgelopen 30 dagen: 71

Altijd: 1,859