
Acer Chromebook C740 Solid State Drive Replacement
Inleiding
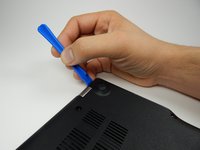
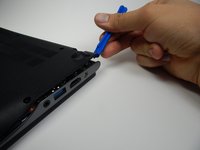
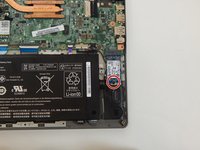
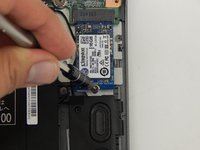
Ga naar stap 1The solid state drive replacement for the Acer Chromebook C740 requires removing the back panel and removing one screw. The solid sate drive stores data from the laptop.
Wat je nodig hebt
Onderdelen

Gereedschap


Toon meer…


To reassemble your device, follow these instructions in reverse order.
To reassemble your device, follow these instructions in reverse order.
Annuleren: ik heb deze handleiding niet afgemaakt.
9 andere personen hebben deze handleiding voltooid.
Team

Cal Poly, Team S22-G2, Livingston Spring 2017 Lid van Cal Poly, Team S22-G2, Livingston Spring 2017
CPSU-LIVINGSTON-S17S22G2
4 Leden
12 handleidingen geschreven