
Acer Aspire One D255E Keyboard Replacement
Inleiding
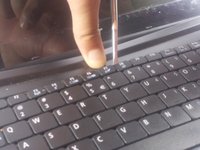
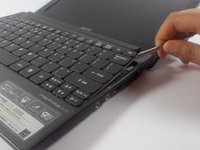
Ga naar stap 1The keyboard is the most essential input component on a laptop. Though this component is designed to have frequent usage either with old age or bad treatment this component may have to be replaced. You should read through the entire guide before performing the repair and should have all necessary tools readily available. You should also find a safe location to store the various screws taken out of the computer to ensure that they do not get mixed up or lost.
Wat je nodig hebt
Gereedschap


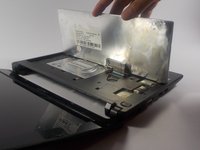

To reassemble your device, follow these instructions in reverse order.
To reassemble your device, follow these instructions in reverse order.
Annuleren: ik heb deze handleiding niet afgemaakt.
3 andere personen hebben deze handleiding voltooid.
Team

UMass Dartmouth, Team 16-8, Bhusal Spring 2016 Lid van UMass Dartmouth, Team 16-8, Bhusal Spring 2016
UMASSD-BHUSAL-S16S16G8
2 Leden
10 handleidingen geschreven