Ga door naar hoofdinhoud

ASUS X502CA Left I/O Board Replacement

Wat je nodig hebt

  1. ASUS X502CA Left I/O Board Replacement, Palm Rest with Keyboard and Touch Pad: stap 1, afbeelding 1 van 1
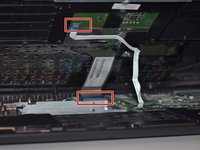
    • Use the Phillips #00 screwdriver to remove the seven 90mm screws.

    • Use the Phillips #00 screwdriver to remove the four 50mm screws.

  2. ASUS X502CA Left I/O Board Replacement: stap 2, afbeelding 1 van 1
    • Next, use the plastic opening tool to carefully pop off the keyboard cover panel.

    • Be cautious when pulling off the cover because there are cables you will have to disconnect before completely removing the panel.

  3. ASUS X502CA Left I/O Board Replacement: stap 3, afbeelding 1 van 2 ASUS X502CA Left I/O Board Replacement: stap 3, afbeelding 2 van 2
    Gereedschap gebruikt in deze stap:
    Tweezers
    $4.99
    Koop
    • Lift palm rest and unplug keyboard cable and touchpad cable using tweezers. After these two cables have been unplugged you can remove the keyboard cover panel.

  4. ASUS X502CA Left I/O Board Replacement: stap 4, afbeelding 1 van 2 ASUS X502CA Left I/O Board Replacement: stap 4, afbeelding 2 van 2
    • Lift Palm Rest away.

    • Replace with new palm rest.

  5. ASUS X502CA Left I/O Board Replacement, Left I/O Board: stap 5, afbeelding 1 van 2 ASUS X502CA Left I/O Board Replacement, Left I/O Board: stap 5, afbeelding 2 van 2
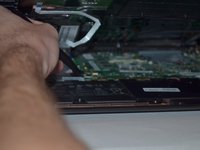
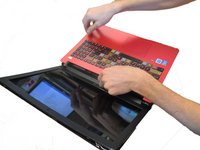
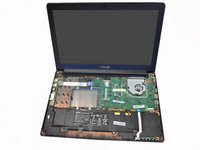
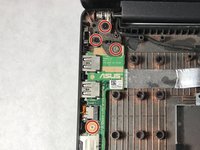
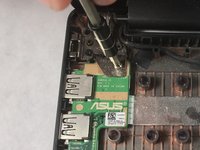
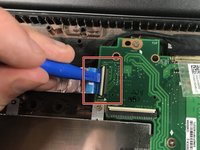
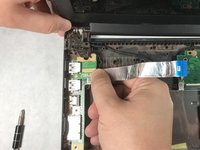
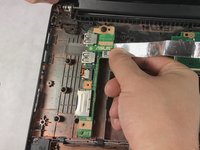
    • Locate the I/O board on the left of the computer. Using the Phillips #0 screwdriver, unscrew the three 5mm screws to unhinge the screen, which will free the board allowing it to be removed and replaced.

    • Be careful with handling your computer while one side is unhinged; mishandling or over pressuring the other hinge could cause damage to it or the screen.

  6. ASUS X502CA Left I/O Board Replacement: stap 6, afbeelding 1 van 2 ASUS X502CA Left I/O Board Replacement: stap 6, afbeelding 2 van 2
    • Unplug the power strip connecting to the motherboard with your fingers or plastic opening tool.

    • Make sure the power strip is disconnected before pulling the board out.

  7. ASUS X502CA Left I/O Board Replacement: stap 7, afbeelding 1 van 2 ASUS X502CA Left I/O Board Replacement: stap 7, afbeelding 2 van 2
    • Slightly pull the unhinged screen up to free the board and remove it.

Conclusie

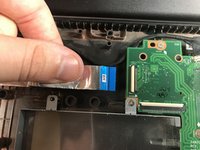
To reassemble your device, follow these instructions in reverse order.

Christian Spencer

Lid sinds: 11/06/18

436 Reputatie

4 handleidingen geschreven

Team

UMass Dartmouth, Team S5-G6, Gulbrandsen Fall 2018 Lid van UMass Dartmouth, Team S5-G6, Gulbrandsen Fall 2018

UMASSD-GULBRANDSEN-F18S5G6

3 Leden

5 handleidingen geschreven

0 opmerkingen

Voeg opmerking toe

Weergavestatistieken:

Afgelopen 24 uren: 0

Afgelopen 7 dagen: 0

Afgelopen 30 dagen: 9

Altijd: 196