Ga door naar hoofdinhoud
ASUS X502CA LED Board Replacement

ASUS X502CA LED Board Replacement

Beau Raymond

Beau Raymond en 2 andere bijdragers

Voor het laatst geüpdatet op December 19, 2018

10 minuten
Gemiddeld
Heeft betere plaatjes nodig
Knip- en plakwerk

This guide entails how to quickly and correctly replace the LED board for the lower led lights on the front of an ASUS laptop. The LED board is one of the simplest parts to replace on the inside of the ASUS laptop so don't be intimidated by the task. With the help of this guide you will be able to replace them without a hitch.

Wat je nodig hebt

Gereedschap

Toon meer…

  1. ASUS X502CA LED Board Replacement, Palm Rest with Keyboard and Touch Pad: stap 1, afbeelding 1 van 1
    • Use the Phillips #00 screwdriver to remove the seven 90mm screws.

    • Use the Phillips #00 screwdriver to remove the four 50mm screws.

  2. ASUS X502CA LED Board Replacement: stap 2, afbeelding 1 van 1
    • Next, use the plastic opening tool to carefully pop off the keyboard cover panel.

    • Be cautious when pulling off the cover because there are cables you will have to disconnect before completely removing the panel.

  3. ASUS X502CA LED Board Replacement: stap 3, afbeelding 1 van 2 ASUS X502CA LED Board Replacement: stap 3, afbeelding 2 van 2
    Gereedschap gebruikt in deze stap:
    Tweezers
    $4.99
    • Lift palm rest and unplug keyboard cable and touchpad cable using tweezers. After these two cables have been unplugged you can remove the keyboard cover panel.

  4. ASUS X502CA LED Board Replacement: stap 4, afbeelding 1 van 2 ASUS X502CA LED Board Replacement: stap 4, afbeelding 2 van 2
    • Lift Palm Rest away.

    • Replace with new palm rest.

  5. ASUS X502CA LED Board Replacement, LED Board: stap 5, afbeelding 1 van 3 ASUS X502CA LED Board Replacement, LED Board: stap 5, afbeelding 2 van 3 ASUS X502CA LED Board Replacement, LED Board: stap 5, afbeelding 3 van 3
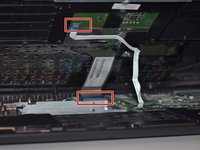
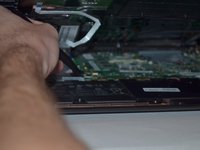
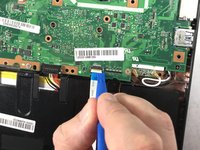
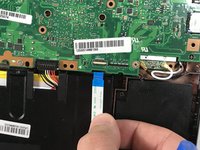
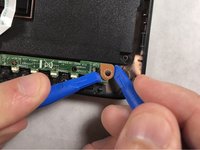
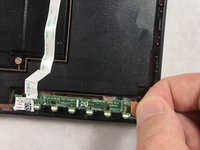
    • Use the plastic opening tool to flip up the small clamp and pull out the ribbon cable.

  6. ASUS X502CA LED Board Replacement: stap 6, afbeelding 1 van 2 ASUS X502CA LED Board Replacement: stap 6, afbeelding 2 van 2
    • Use 1 or 2 plastic opening tools to push down the small black plastic clips.

    • Pull the board up and out.

Conclusie

To reassemble your device, follow these instructions in reverse order.

Één andere persoon heeft deze handleiding voltooid.

Beau Raymond

Lid sinds: 11/06/18

103 Reputatie

1 Handleiding geschreven

Team

UMass Dartmouth, Team S5-G6, Gulbrandsen Fall 2018 Lid van UMass Dartmouth, Team S5-G6, Gulbrandsen Fall 2018

UMASSD-GULBRANDSEN-F18S5G6

3 Leden

5 handleidingen geschreven

0 opmerkingen

Voeg opmerking toe

Weergavestatistieken:

Afgelopen 24 uren: 0

Afgelopen 7 dagen: 0

Afgelopen 30 dagen: 1

Altijd: 233