
ASUS F555UA-EH71 CD Drive Replacement

Inleiding
Ga naar stap 1If you wish to replace or upgrade your CD Drive, use this guide to do so. Replacing a CD Drive is relatively straightforward, and there are only a few parts that need to be removed to complete this task. It is difficult to repair the CD Drive itself, so it’s best to replace the whole thing if you find that the CD Drive is not working.
Wat je nodig hebt
Gereedschap


Toon meer…
-
-
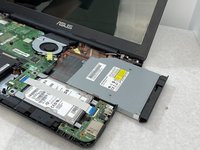
Remove the black 18 mm screws from the back panel of the laptop using the #000 Phillips screwdriver.
-
-


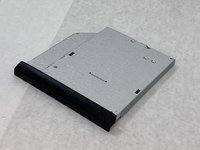
To reassemble your device, follow these instructions in reverse order.
To reassemble your device, follow these instructions in reverse order.
Annuleren: ik heb deze handleiding niet afgemaakt.
3 andere personen hebben deze handleiding voltooid.

Team

Embry-Riddle Aeronautical University, Team S24-G3, McClure Fall 2019 Lid van Embry-Riddle Aeronautical University, Team S24-G3, McClure Fall 2019
ERAU-MCCLURE-F19S24G3
4 Leden
5 handleidingen geschreven