Ga door naar hoofdinhoud

Repair guides and support for your Apple Wireless Keyboard. Connect and command your Apple computer wirelessly.

89 Vragen Bekijk alle

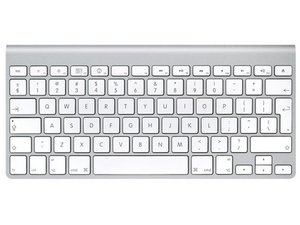
Opening keyboard WITHOUT ruining it

I saw the teardown pages for the keyboard, and I just want to open mine, clean whatever 'gunk' is in it (I think some liquid got in it when I cleaned the keys even though I used a damp cloth for that & sprayed the cleaner on the cloth, not the keyboard itself), preventing several keys from working and put it back together, but I don't want to ruin it (in case I ever decide to sell the iMac).

Any suggestions?

Beantwoord! Bekijk het antwoord Dit probleem heb ik ook

Is dit een goede vraag?

Score 3
3 opmerkingen

A kitchen palette knife is perfect for removing the plastic back. Once you have pushed it in, you can wiggle it down the long side and then gradually push it in further and keep going until you have separated all of the adhesive, without needing to bend or flex the plastic backing. On my A1314 the plastic cover was completely covered in adhesive, and it took some force to push the palette knife all the way in, but it only took a few minutes.

door

That video does NOT show how to open the keyboard, "Donald." Maybe Donalds just aren't the brightest...

door

Voeg een opmerking toe

8 Antwoorden

Gekozen oplossing

LOL, seems as though a teardown of this device = breaking the device. No, there is no way of getting any deep cleaning done without breaking it. Thanks for enlightening me Rich. Why did u tear that beauty UP by the way????

Was dit antwoord nuttig?

Score 5

7 opmerkingen:

Hector, you haven't looked at the teardown obviously. I did it and had to rip the thing apart. There's no putting it back together. It's Humpy Dumpty.

Apple Wireless Keyboard (A1255) Teardown

door

I haven't actually! LOL I figured if there's a teardown that it wouldn't actually mean the demise of the keyboard. ;)

door

edited my answer.

door

It's kind of like the towel machine in the mens room that says "Pull down, tear Up". It's toast, but the keys are worth three times what the keyboard costs ;-) And the little end cap sells for $18 if you can even find it.

door

Oh ok, if the keyboard is toast, then it served a good purpose with the teardown, and you can recover some cash from the keys and working parts.

door

2 commentaren meer tonen

Voeg een opmerking toe

Amazing, it worked on model A1314. Removed batteries, removed the middle plastic piece using lineman pliers to flex it, removed single screw, released the keyboard cable by carefully pushing up the two plastic pieces. Then all of the electronics come out of the tube from the switch end. Removed the glued plastic bottom cover, just pried it up with a couple of screwdrivers and then pulled it off.

Washed it in dishwasher. Put on fence in sun, was dry by end of day. Reassembled, but one key would still not work. Repeated disassembly and put through dishwasher a second time.

Now it works. This note is being typed from this repaired keyboard. Has worked OK now for a week.

I thought it was worth a try since it was otherwise rendered useless from a spilled soda.

Was dit antwoord nuttig?

Score 5

3 opmerkingen:

The keyboard described above is still working. Have tried this procedure on a second gunky keyboard with same result - it is still working now after at least a year.

door

Following Roberts description it was quite simple to disassemble without breaking anything. Thank you Robert!

door

Just took my A1314 apart as per Robert's advice. Yep, came to bits no problem with only minor scratching to the aluminium underside edge, that's never gonna be seen. It's going in the dishwasher now and I'll report back whether I get any good results or not.

Question is- do I use a dishwasher tab or not...?

door

Voeg een opmerking toe

Without disassembling, I found a way to clean some dirt and crumbs from around the keys of my A1314 keyboard.

Take small pieces of double sticky tape and slide them in around the edges of the keys. If there is loose debris it will stick. Takes a lot of little pieces of tape, and a lot of patience, but it works!

Was dit antwoord nuttig?

Score 2
Voeg een opmerking toe

Model A1314 (plastic antenna cover located centrally) can be disassembled. Under the plastic cover there is one screw, this frees the switch/pcb/battery assembly. When the keyboard ribbon is disconnected the whole thing will slide out sideways.

The white plastic base can be removed carefully by getting a couple of knives (use a sharp but heavy blade, fixed or locking, never a folder) under the short edge. Then carefully pull it off without bending or yanking, the adhesive will let go with no added heat.

The keyboard plate is fixed to the aluminium chassis with many small welds which I did not try to break. There must be at least 40 or so.

I did this to a broken keyboard that had a hot tea with milk spill over it, all the keys were gummed up. After removing everything I could it went in the dishwasher and the keys now operate freely. In a couple of weeks when it has had plenty of time to dry completely I will reassemble and try it out. It may not recover, but the point is you can disassemble without destruction. Even the adhesive survived the dishwasher and that white plastic is going to just stick back on.

Was dit antwoord nuttig?

Score 1
Voeg een opmerking toe

I managed to take the back off a previously wetted keyboard (A1314), not my doing. I took the board out and the back off before washing. It's drying as I type this.

The hardest part was getting it started. I used a strong thin knife edge to slightly lift the white back at one end. I ever so slightly marked the plastic and aluminium. As soon as I had room to push a smallish flat screwdriver in I did. Be careful to put it in flat so as not to damage the clastic or the aluminium grill with the edges of the screw driver.

Giving the screw driver a rotation twist I heard some glue pop free. While applying consistent but not too forceful lifting pressure on the white plastic I continued to sweep back and forth with the screw driver twisting to separate the part. I noticed there were key places where the glue was holding strongest and they were best places to twist.

I moved from one end to the other in a couple of minute. Remember, be patient! Don't bend the plastic too far and gently twist the screw driver so that the edges of the screw driver don't dent the white plastic or the aluminium grill.

Hope that's useful.

Was dit antwoord nuttig?

Score 1

3 opmerkingen:

Let us know if it works.

door

Only thing I wasn't really sure about was how long to soak it for, we don't have a dishwasher. I gave it a good wash in clean warm water with soak after the wash to get detergents out. Oh I also haven't seen reference to how much rice to put in the bad with the keyboard, does this in itself cause issues by introducing any rice particles or dust to the layers? If there is improvement but still issues I'll try again with a cleaner approach.

I'll do my best to remember to respond here in a week, very warm weather here at the moment. (Australia)

door

Well after drying and reassembling the result was exactly the same behaviour. I can't see any evidence any moisture got to the circuit. So I think either it did damage the circuit or the contacts in the keyboard layers has corroded. The keyboard is erratically connecting and disconnecting so I think it's kaput.

door

Voeg een opmerking toe

i tried opening it - destroyed the keyboard as well as a perfectly good knife and about 20 mins of me life

Was dit antwoord nuttig?

Score 0
Voeg een opmerking toe

https://www.youtube.com/watch?v=fh3x-Vcm...

This is the guide that will do it :-)

Was dit antwoord nuttig?

Score 0
Voeg een opmerking toe

There are a number of YouTube videos that suggest removing the batteries, then washing the keyboard in a dishwasher without soap (and without JetDry please), then drying it for four days or so in a warm location.

I don't think I'd go so far as to put it in a dishwasher, but you could put it in a container and add distilled water, then press each key a few times to help the water circulate underneath each key to help wash away whatever gunk you spilled on the keyboard. Change the water and do it a couple more times to remove as much of the sticky stuff as possible. Then dry for four days in a warm area, or use the 'put it in a bag with rice' trick.

I'd do this only if I'd given up and was ready to buy a new keyboard. Sort of a last ditch attempt to try to save the keyboard. If all else fails, take it completely apart and sell the pieces on eBay to others who need the parts!

Was dit antwoord nuttig?

Score 0
Voeg een opmerking toe

Voeg je antwoord toe

Mike Belanger zal eeuwig dankbaar zijn.
Weergavestatistieken:

Afgelopen 24 uren: 3

Afgelopen 7 dagen: 18

Afgelopen 30 dagen: 53

Altijd: 70,839