Ga door naar hoofdinhoud

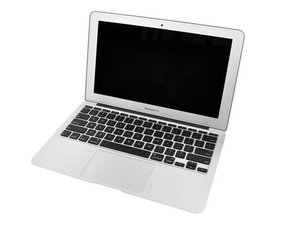
1.6 or 1.8 GHz dual-core processor, 2 GB or 4 GB of SDRAM, 64 GB or 128 GB SSD

192 Vragen Bekijk alle

How to fix a broken I/O board power cable socket?

I was following your repair guide MacBook Air 11" Mid 2011 Logic Board Replacement and completely removed the logic board. When installing the new logic board I reached the step 14 to remove the I/O board power cable from its socket. Unfortunately the socket broke off. Is there a way how to connect the cable with the logic board again?

Maybe soldering the cables directly to their target pin? Without proper connection of the socket, the battery cannot charge and the soundcard as well as 1 USB port are disconnected.

Here images of the broken part:

Block Image

Block Image

Here the image from your guide at Step_14, how it actually should look like:

Block Image

Update (02/16/2018)

What do you think about this strategy?

1) Putting back the socket to its original location:

Block Image

It still fits :-)

Block Image

2) Filling the connection gaps by soldering:

Block Image

Does this make sense?

Any tips on the type of solder?

Beantwoord! Bekijk het antwoord Dit probleem heb ik ook

Is dit een goede vraag?

Score 2
5 opmerkingen

Please post a good set of images of both the connector and the logic board where it was. So we can see whats damaged.

Voeg afbeeldingen toe aan een bestaande vraag

door

Thanks for your reply, images are added to the post.

door

@donpromillo - Do you have two boards? Or, where you putting your original board back?

door

The original board is still with me. So I will try experimenting on that first and will break the I/O socket the same way as it happened on the replacement board. Will post a soldering strategy and hope to get feedback from you if it makes sense.

door

Could you show a vid on soldering? I did the same mistake. Also, can you give me some info on good solders?

door

Voeg een opmerking toe

3 Antwoorden

Gekozen oplossing

@donpromillo yes, you can solder those for a repair. You could of course also solder small wire jumpers from the board to the connector. You will need to remember so that by soldering the connector it will have no real strength to the board. Careful when you reconnect the I/O board. It would be best of course to replace the complete connector, but I recognize sometimes we just have to fix things with what we got. I'd use regular solderfree 95/5 solder and a chisel tip on my iron. Covering as much of the plastic as possible with some Kapton tape will prevent accidental melting of parts of that.

Was dit antwoord nuttig?

Score 3

1 Opmerking:

Yes, you can. And thank you for the idea. Unfortunately I had 2 problems : 1 I had no magnifying devices and the connector I bought for replace was not the same. I did have to melt some of the plastic from the connector to reveal a bit more the little pins. Does not look pretty but it works. I used the cheapest soldering kit from Amazon , I didn't use the chisel because it was too wide but I used a similar tip and soldering wire was really hard to work.

door

Voeg een opmerking toe

Somehow I did not manage to solder the pins properly - guess this is due to poor soldering experience and equipment. Therefore a more “boy-scout-ish“ approach is used by tying the pins with a very thin copper-string (one of my copper cables was wired by multiple very thin copper-strings) .

Step 1: Extract the broken pins from the broken onboard socket (do not remove the pins which are still soldered to the mainboard, extract only the pins from the already brocken socket, see picture)

Block Image

Step 2: Push the extracted pins into the socket of the connector cable (from now on we reference these pushed-in pins as “ pins at the connector cable)

Step 3: Tie the copper string to the pin at the connector cable (tie it like shoelaces (see step 1 on how to tie shoelacet)

Step 4: Repeat Step 3, so you have two knots on the pin at the connector cable

Step 5: Perform Step 3 and Step 4 on all other remaining pins at the connector cable

Block Image

Step 6: Wrap the loose ends of the remaining copper string (from pin at the connector) around the corresponding pin at the mainboard and fasten it tightly (maybe wrap it around two times)

Step 7: Use hot-glue to glue pin-by-pin (Make sure it is fully covered and no copper string element is standing out and touching other pins)

Block Image

Tip: Start from right to left, since the right-most two pins are responsible for power-supply, the next two pins (center of socket) for USB and the remaining left-most two pins for audio.

In total I needed to repeat steps 3 - 7 multiple times (3 or 4) to get all pins working again. So far (9 Months) everything is working fine, but I use the macbook air more stationary - I commute with it outside the house maybe once or twice a week. The remaining days I use it inside the house.

Block Image

So far the CPU heating did not compromise the hot-glue paste although CPU intense tasks are performed (causing 15 or 20mins full fan speed).

Wish you good luck!

Was dit antwoord nuttig?

Score 1
Voeg een opmerking toe

Did this work? Ran into the same problem…

Was dit antwoord nuttig?

Score 0

1 Opmerking:

Unfortunately I had issues with the soldering. So an alternative approach was used. I will post the approach shortly.

Edit: Answer is posted, but iFixit Bot blocked it. I contacted them, hope they publish the post soon.

door

Voeg een opmerking toe

Voeg je antwoord toe

Ignaz Reicht zal eeuwig dankbaar zijn.
Weergavestatistieken:

Afgelopen 24 uren: 3

Afgelopen 7 dagen: 4

Afgelopen 30 dagen: 8

Altijd: 1,470