Inleiding
Deze demontage gaat de adapter zonder twijfel kapot maken. Hopelijk helpt het om te laten zien hoe de adapter in elkaar zit. Ook hopen we duidelijk te laten zien dat er een DAC op de adapter zit.
Wat je nodig hebt
-
-
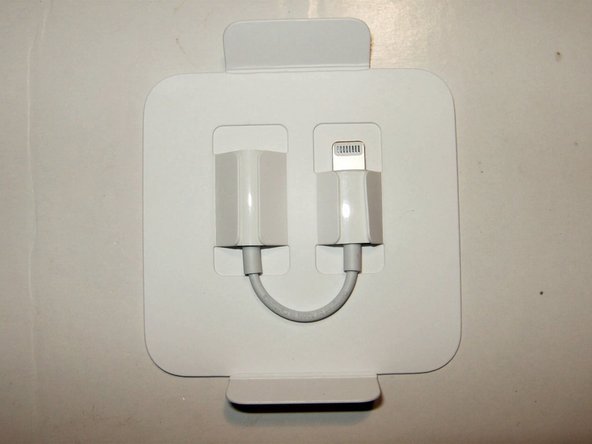
Typische Apple-productverpakking. Eenvoudig maar elegant.
-
Achterkant van de verpakking.
-
Onderaan de verpakking wordt de adapter beschreven als een A1749.
-
-
-
Nogmaals, mooie verpakking voor de adapter.
-
De totale lengte van de adapter is 3 1/8 inch of 8 cm. De ene kant bevat de lightning-aansluiting en het andere uiteinde bevat de 3,5 mm koptelefoonaansluiting.
-
Ik heb geprobeer een manier te vinden om de buitenkant van de adapter te verwijderen door er wat dun gereedschap tussen te schuiven, maar dat bleek niet mogelijk.
-
-
-
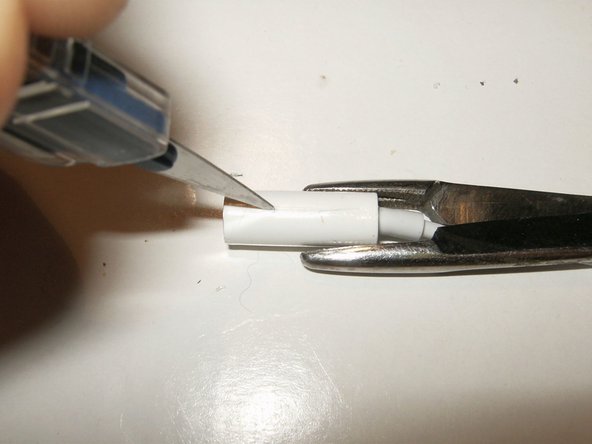
Aan één kant in de lengte insnijden.
-
Evenals de tegenovergestelde zijde.
-
Duw de behuizing vervolgens van de aansluiting af door deze vanaf de snede naar buiten te duwen en te verwijderen.
-
-
-
-
De connector blijft nu over met nog een plastic behuizing.
-
Gelukkig lijkt het erop dat het verwijderen van het aardingsschild open sleuven over de lengte van de plastic behuizing heeft achtergelaten.
-
Beginnend vanaf deze sleuven kun je de plastic behuizing op voorzichtige wijze van de printplaat verwijderen.
-
-
-
Een close-up van één kant..
-
..evenals de andere kant. Naarmate er meer informatie over de DAC beschikbaar komt, zal deze demontage worden aangepast.
-
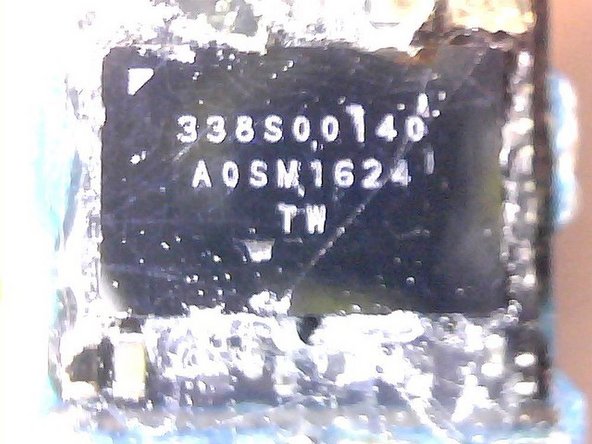
Dit zijn de markeringen op de DAC: 338S00140 A0SM1624 TW.
Do you happen to have a picture of the other side of the PCB? If you post it that would be very nice. Thank you.
-
-
-
Snijd de hoofdtelefoonaansluiting voorzichtig met een scherp mes open en pas op dat je niet in jezelf snijdt.
-
-
-
Op deze foto kun je de voortgang en destructieve aard van de demontage nog eens goed zien.
For me, the last two pictures are not instructive enough.
Showing the colors of the dreads inside the lightning adapter presumes the same in the 3.5 mm 4p female adapter.... Which pin of lightning is which ring in the male/female plug ?
Actually, none of those pins go directly to the headphone. The lightning connector interfaces with a DAC housed in the body for the male end of the connector, and on the PCB itself, outside of the DAC, those interface with the female end of the connector. The lightning connector still only outputs data.
Actually, none of those pins on the lightning connector itself directly interfaces to the female end of the connector. The lightning connector only interfaces to the DAC housed in the body of the lightning connector housing. From the DAC comes the analog output, which then goes to the female end of the connector. The lightning port is still only responsible for data/power I/O.
Oh you just stopped at the point that remains unanswered. Is that a 4-port or 3-port ? 3 is conventional stereo, 4 would mean support for a mic + headphones or handsfree. Plugging in a 3 port headphone into a 4 port adapter is not ideal. Would be good to keep cutting to see how many skinny wires go from the dac to that adapter. There is 4 to (3 port +1 )splitters on the market then you connect headphones to 3-port part.
I only see the wiring for TRS (3 port as you call it), but I do see the metal bands for 2 rings (meaning that the connector is TRRS or 4 port). The exposed copper wire is connected to a spring going down to where the tip would be. Below that wire you can see 2 solder joints. One goes to the ring and the other is connected to the metal plate which would make contact with the sleeve. It is likely that there is a 4th solder joint on the other side of the connector that connects to the second "ring" of the jack. Ignore my previous post. I tried to edit it but took to long and it wouldn't let me
https://cdn-0.idownloadblog.com/wp-conte...
The X-RAY photo shows that the short cable leading to the 3.5mm end is already analog, so it’s not part of any lightning data connection. Kudos to apple for fitting it into a Lightning connector shell though!
-
-
-
Repareerbaarheidsscore: 0 van de 10 punten.
-
Het apparaat is duidelijk niet bedoeld om op enigerlei wijze te worden geopend of gerepareerd.
-
Het is onmogelijk om de adapter te openen zonder deze ernstig te beschadigen.
Hey can you please tell me which color wire should be connected to which pin of 4 pin female audio jack there are 5 wires coming out from the lightning side red,green,blue,red+gold and green+gold
-


Met dank aan deze vertalers:
100%


Deze vertalers helpen ons de wereld te repareren! Wil je bijdragen?
Begin met vertalen ›

Team

32 opmerkingen
There seem to be a lot more wires than necessary going to the 3.5mm connector. By my count there appear to be 7 or 8 discrete wires?
At most there should be 4, TRRS, and maybe a shield ground. How are the other wires used here?
Mac 128 excellent question and I will try and take the jack end off as well asap. There is a total of 7 wires....
Perhaps it supports both standard pinout methods for mics/remotes, rather than just Apples flipped data/ground pin standard?
tipoo -
I am currently looking into modyfying an Apple TRRS connector so I can take some readings on what is what and how it may function. Only hold-up is that I do work for a living:-) so time is always an issue.
Mac 128 mystery already solved. Check this teardown by Mason Dowell Apple Earphones with Remote and Mic (Lightning Edition) Teardown. It'll explain what each wire does.
There might be 7 wires on the earphone side, but remember, it has to interface to the 4 pins of the 3.5mm plug.
The socket will have a switch in it to detect if there is a plug inserted. That could account for 1-3 of the wires, depending on how it's wired up.
@oldturkey03 -- thanks for the link. That does help explain what's happening. But they still have to be resolved onto four conductors of the TRRS jack of the adapter. So that means that of the four conductors, L, R, Mic, & Ground, only the L, R & Mic are discreet. The ground sleeve is where the L-, R-, & Mic-, must converge. So essentially 3 out of 7 wires are common ground in this adapter?
It seems like the EarPods maintain discreet ground wires for all 3 signal lines out of the amp, as well as the common ground, but combines them for any headphones plugged into the adapter jack. Does this mean the Lightning EarPods are providing balanced lines throughout? Whereas the adaptor is an unbalanced converter?
Mac 128 -
I couldn't edit this after 5 minutes, but I see a typo ... 4 out of the 7 discrete wires are common ground in the adapter.
Mac 128 -
thought about that as well. Seems to be way different from the privous one to be the "signalling" chip. It would be kind of like reinventing the wheel for Apple. That in itself would bot be uncommon, but doubtful. I think that chip would be the one on the opposite end. I will try and get more information on all the components on that board.
The lightning auth chip is much smaller, this big chip is obviously for audio.
Tom Chai -
I have completed a teardown of the Lightning headphones. I can confirm that the red and red/orange stripe wires are for the right speaker/driver, the green and green/orange strip wires are for the left speaker/driver, and the three others (red, green, orange) are what drive commands for the in-line volume control/mic. I will post pics if anyone is interested in seeing for themselves
@masongdowell would be great if you make a quick teardown and post it. Use this to post it as a teardown https://www.ifixit.com/Guide/new
Apple Earphones with Remote and Mic (Lightning Edition) Teardown
For your viewing pleasure! Sorry for the picture quality...I did not take them apart for the purpose of making a teardown post. If more photos are required, feel free to message me.
Thanks for this! I've been super curious to see what the DAC looked like and how they squeezed it all into that tiny connector
Hi guys, do any of you know what wires goes to what pin on the lightninghead?
Can I somehow replace the lightning pin with a mini USB / USB pin, and expect the DAC to do its thing with an Android, perhaps? :)) :dteamy:
:dreamy: *
Dumb keyboard
iOS recognizes the adapter as USB audio device; that's why if you have older headphones the wire-remote controls do not work!
Hi. My Earpods' lightning connector is bent and doesn't register a connection anymore. I want to just solder the cables into a standard 3.5mm 4-pole plug, as per this video: https://www.youtube.com/watch?v=nqqv03q3...
I want to know if the wires are identical between the 3.5mm Earpods and the Lightning Earpods, and whether simply cutting off the Lightning connector and soldering the wires to the 3.5mm plug would work. Thanks!
Interesting teardown ! However, the last two pictures are not instructive enough.
Showing the colors of the dreads inside the lightning adapter presumes the same in the 3.5 mm 4p female adapter.... Which pin of lightning is which ring in the male/female plug ?
Any chance on doing the HTC U11 adapter?
Is that one is similar to yours? Lightning 2-in-1 adapter for iphone 8 or iPhone Xhttps://www.headsetbuddy.com/lightning-t...
Is that one similar to yours? https://www.headsetbuddy.com/lightning-t...
can i get a scematic? that is something I noticed that does not get posted
++SeeGreatness++ schematics, even if available, are copyrighted. You cannot post copyrighted material on here.
Thank you! Very nice teardown.
there are six wires but eight pins in the lightning connector which of those wires go to which pin