Waarschuwing: Je bewerkt een vooraf vereiste handleiding. Alle wijzigingen die je hierin maakt, beïnvloeden alle 2 handleidingen die deze stap bevatten.
Stap 10 vertalen
Stap 10
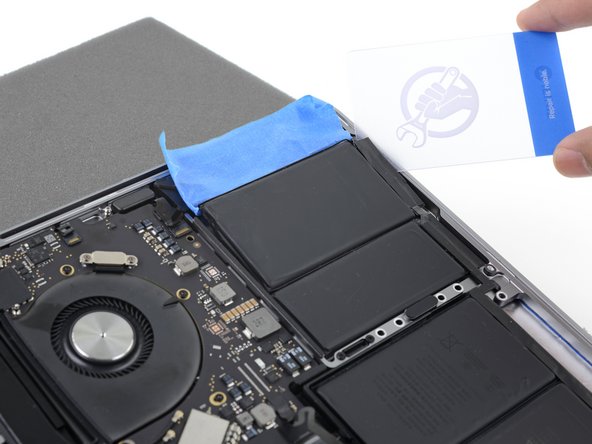


Separate the outside right battery cell
-
After a couple minutes, insert one corner of a plastic card underneath the far right battery cell, starting from the front edge.
-
Wiggle the card from side to side and slide it all the way under the battery cell.
-
Lift to fully separate the adhesive, but don't try to remove the battery cell yet.
-
Leave the plastic card temporarily underneath the cell to prevent it from re-adhering while you continue.
| [title] Separate the outside right battery cell | |
| - | [* black] After a couple minutes, insert one corner of a plastic card underneath the far right battery cell, starting from the front edge. |
| + | [* black] After a couple minutes, insert one corner of a [product|IF145-101|plastic card] underneath the far right battery cell, starting from the front edge. |
| [* icon_caution] This shouldn't require much force. If you have trouble, apply more adhesive remover and give it 2-3 additional minutes to penetrate. | |
| [* icon_caution] Try not to deform the battery. A damaged battery can leak dangerous chemicals and/or catch fire. | |
| [* black] Wiggle the card from side to side and slide it all the way under the battery cell. | |
| [* black] Lift to fully separate the adhesive, but don't try to remove the battery cell yet. | |
| [* black] Leave the plastic card temporarily underneath the cell to prevent it from re-adhering while you continue. |
Je bijdragen zijn gelicentieerd onder de open source Creative Commons-licentie.