Ga door naar hoofdinhoud

Microsoft Surface Pro 6 Teardown

Stap 3
Microsoft Surface Pro 6 Teardown: stap 0, afbeelding 1 van 3 Microsoft Surface Pro 6 Teardown: stap 0, afbeelding 2 van 3 Microsoft Surface Pro 6 Teardown: stap 0, afbeelding 3 van 3
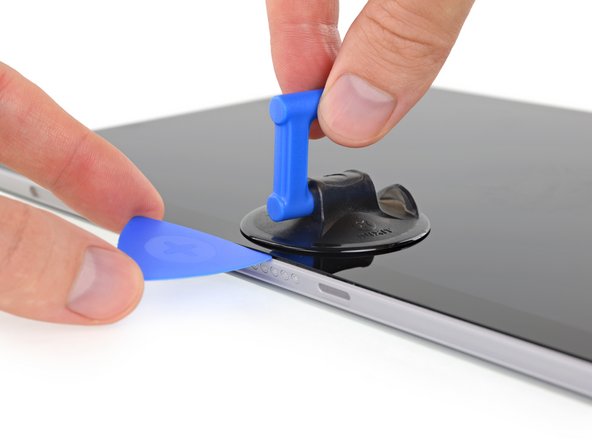
  • The Surface Pro series has a few different configurations, and they all come standard with upgraded adhesive.

  • Fortunately, we've got a tried-and-true recipe for Surface screen separation success:

  • Step 1: apply iOpener liberally.

  • Step 2: grab an Opening Pick and a Suction Handle, and fight for dear life through Microsoft's gauntlet of adhesive.

  • Step 3 (optional): get impatient, break screen.

  • Luckily, we don't run into any surprises as we free the display—everything's pretty much the same as before, save for an extra display cable compared to the Surface Go.

Das Surface Pro hat ein paar unterschiedliche Konfigurationen, die alle standardmäßig mit noch mehr Kleber ausgestattet sind.

Zum Glück haben wir eine altbewährte Methode zum erfolgreichen Ablösen des Surface Bildschirms:

1. Schritt: Lege mehrere iOpener auf das Gerät.

2. Schritt: Schnapp dir ein Opening Pick und einen Saugheber und kämpfe gegen die Kleberbarriere von Microsoft.

3. Schritt (optional): Verliere die Geduld und zerbreche den Bildschirm.

Glücklicherweise stoßen wir beim Ausbau des Displays auf keine unerwarteten Überraschungen, alles ist so ziemlich wie sonst auch, außer, im Vergleich zum Surface Go, einem zusätzlichen Displaykabel.

Je bijdragen zijn gelicentieerd onder de open source Creative Commons-licentie.