Inleiding
Is anyone else getting sick of apples? Time to take a bite out of a juicy Microsoft offering, the Surface Pro 4, to see just what it's made of. Personally, we're hoping Microsoft spent this last year thinking about what they've done and opting for a more fixable laplet (laptop+tablet, eh? ehh?). There's only one way to see inside...okay two ways, we have X-ray vision. It's teardown time!
For the rest of our fall lineup, check out our Facebook, Twitter, and Instagram to be #first.
Wat je nodig hebt
-
-
With the top-of-the-line model coming in at over $2600, the Surface Pro 4 had better be a cut above the rest—the spec sheet looks promising so far:
-
12.3" PixelSense 2736 × 1824 (267 ppi) IPS LCD display
-
Intel Skylake Core m3 (4M Cache, 2.20 GHz) up to Core i7 (8M Cache, 3.80 GHz) CPU
-
4 GB/8 GB/16 GB DDR3L 1600 MHz RAM
-
128 GB/256 GB/512 GB/1 TB of PCIe solid state storage
-
8 MP rear-facing 1080p camera, and 5 MP front-facing camera
-
USB 3.0 port, micro-SD slot, mini DisplayPort, and SurfaceConnect charging port
-
802.11a/b/g/n/ac Dual Band Wi-Fi and Bluetooth 4.0
-
-
-
At first glance, the Surface Pro 4 appears to outshine its predecessors with its forward sensor array.
-
We spy at least four nodes of interest. One's a camera, one's probably a microphone, but the rest?
-
On the rear of the new Surface, we find a familiar arrangement of circles—the 8 MP rear-facing camera accompanied by a status LED and microphone.
-
Anxious to see the camera array but too impatient to open the device? X-ray it.
-
-
-
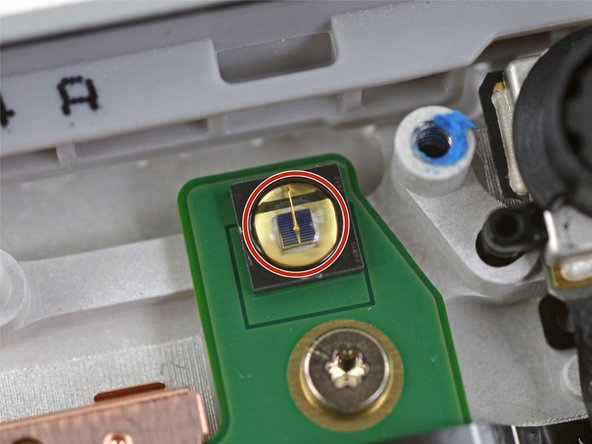
That's something we don't see too often—grease! The Pro 4's exposed kickstand hinges are lubricated to meet your transforming computational needs.
-
Just try not to get any lint, or pet hair, or sand in there...
-
To get such a wide spread of kickstand angles, with the resistance required to support the tablet's weight, Microsoft's engineers probably spent a lot of time on these hinges. So we X-rayed them.
-
-
-
Sticky nightmares still haunt our teardown engineers after the harrowing Surface Pro 3 teardown, and this year we've prepared for the worst.
-
Things start to heat up in the teardown room as the iOpener battles to weaken the display's adhesive.
-
Our iSclack joins the fight to provide us the leverage we need to make our entrance, and dare we say it, things seem easier than before.
-
Not even a Pro can keep us out. As soon as we get an opening pick underneath the edge of the display it's off to the races!
-
-
-
Well, these are new. The last time we tore down a Surface Pro, we encountered a display connector trapped beneath a springy metal bracket.
-
This time around, there are two cables holding the display to the body, preventing it from being opened like a book on any hinge. Our only recourse: tackle those connectors.
-
And of course, Microsoft has modified their connector design. The display connectors are relatively common press-on connectors—similar to an iPhone display—but they're trapped under snap-on metal shields.
-
-
-
It's not exactly a greeting card, but the underside of the display is adorned with heartfelt-looking barcodes.
-
Maybe it's a congratulatory message! More likely, it's proof of some intense quality controls.
-
Time for our favorite silicon-based snack—chips! Among them, a number of N-trig IC's, likely control hardware for the Surface Pen.
-
N-trig DS-D5000 touchscreen row driver (likely)
-
N-trig DS-A5048 touchscreen line driver (likely)
-
Macronix MX25U1635F 1.8V 16 Mb MXSMIO serial flash memory
-
-
-
-
Turning our attention to the rest of the Pro 4, we spy a suspicious blank space beside the motherboard (and heat sink tubing!).
-
The motherboard is so close, yet so far. Unable to wait, we skip to dessert and pop off some shields to get a closer look.
-
The rest of the motherboard is nestled too snugly to investigate, but that SSD looks ripe for the picking...
-
-
-
Oh Surface, look how you've grown!
-
The Surface 4's Samsung branded SSD is considerably larger than the little whipper snapper we saw in the previous generation.
-
Awww, they brought us more chips. The 128 GB Samsung PM951 SSD is packing the following:
-
Samsung S4LN058A01-8030 PCIe 3.0 x4 NVMe flash controller
-
Samsung K9CHGY8S5C-CCK0 64 GB NAND flash
-
Samsung K4E4E324EE-SGCF 4 Gb (512 MB) DRAM
-
Texas Instruments TPS22966 5.5V, 6A, 16mΩ, 2-channel load switch
-
Silergy power management (likely)
-
-
-
The Surface Pro 4's heat sink shows off its impressive makeover, flaunting longer copper heat pipes and a large copper plate for added heat dissipation.
-
Designed with a hybrid cooling system, the Pro 4 takes advantage of both passive and active cooling.
-
-
-
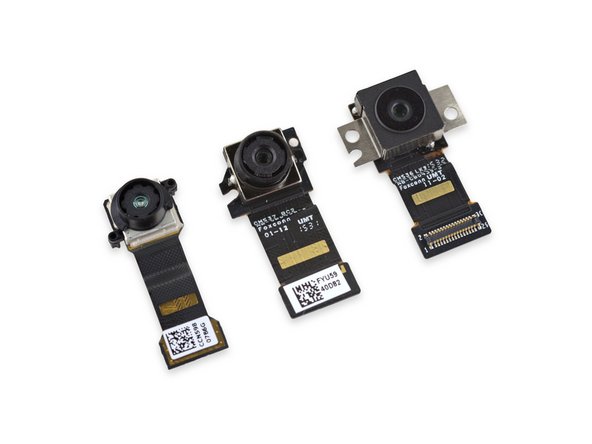
Amidst this sea of tech, the tablet's three cameras all float to the surface.
-
From left to right:
-
Infrared face-detection camera supporting Windows Hello
-
Front-facing 5 MP camera
-
Rear-facing 8 MP main camera
-
-
-
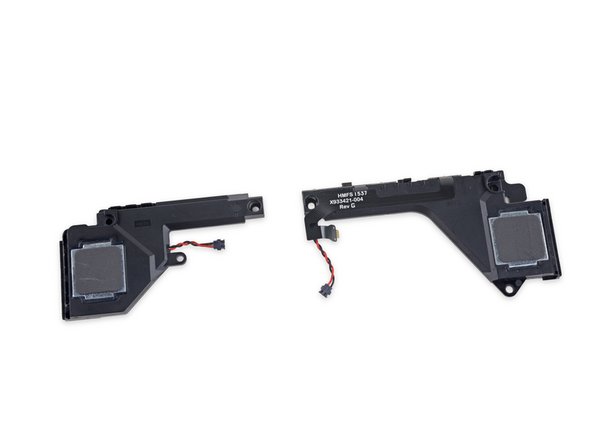
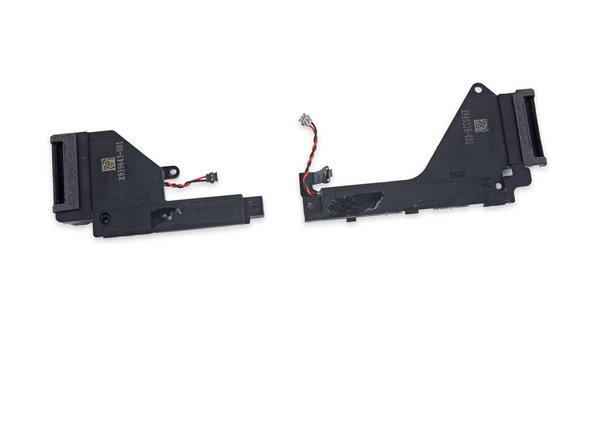
We tweeze out the two stereo speakers from the corners of the case and make an interesting discovery...
-
The Good: These integrated buttons are much less fidgity to replace as one piece than each button individually.
-
The Bad: The entire speaker will have to be replaced to replace one of the buttons, increasing the cost of repair.
-
-
-
With the peripherals deftly dissected, we can move on to the main event—the motherboard!
-
Intel SR2EN Core m3-6Y30 (4M Cache, up to 2.20 GHz)
-
Samsung K4E8E304EE-EGCF 8 Gb LPDDR3 (4 chips × 1 GB for a total of 4 GB)
-
Marvell Avastar 88W8897 802.11ac, NFC and Bluetooth SoC
-
Freescale Kinetis KL17 MKL17Z256VFM4 48 MHz ARM Cortex-M0+
-
ITE Tech, Inc. IT8528VG Embedded Controller
-
Realtek ALC3269 Audio Codec
-
Realtek RTS5304 micro-SD Card Reader Controller
-
-
-
Chip ID continued...
-
Winbond W25Q128FV Serial NOR Flash
-
Texas Instruments TPS51367 Integrated FET Converter
-
Infineon Technologies SLB96659TT20 Trusted Platform Module
-
Monolithic Power Systems MP3388S 50V, 8-String, Step-Up, White LED Driver
-
And on the reverse...
-
Intersil ISL95857 1+2+1 Voltage Regulator for Intel IMVP8 CPUs
-
This huge array of spring contacts connects the motherboard to the battery and the keyboard dock cable.
-
-
-
IC Identification—even more!
-
Bosch Sensortec BMI160 3-Axis Accelerometer/Gyroscope
-
Monolithic Power Systems MP2370DGT White LED Driver
-
Texas Instruments BQ24770 Battery Charge Controller w/ System Power Monitor
-
ON Semiconductor and Winbond Serial Memory
-
Texas Instruments TPS51285A Dual-Synchronous Buck Controller
-
Texas Instruments TPS62140, TPS62175, TPS62134A, TPS62134C, and TPS62134D Step-Down Converter
-
ON Semiconductor NCP380HMUAJAATBG Adj. Current‐Limiting Power‐Distribution Switch
-
-
-
This 38.2 Wh, 7.5 V battery is rated at 5087 mAh—a 9 percent decrease from the 5547 mAh battery in the Surface Pro 3.
-
Despite the smaller battery capacity, the 4 generally outperforms the 3 in terms of battery life.
-
Just to compare Apples to oranges, the iPad Air 2 weighs in with a 27.62 Wh battery, however the upcoming iPad Pro is probably a more apt comparison, function-wise. We'll have to wait and see!
-
-
-
Microsoft Surface Pro 4 Repairability Score: 2 out of 10 (10 is easiest to repair).
-
The SSD is replaceable.
-
The battery is not soldered to the motherboard, but very strong adhesive makes removal and replacement a hazardous chore.
-
Non-standard connectors make for tricky display removal.
-
The display removal procedure, while difficult, and required for any repair, is not as hard as in previous generations, due to less stubborn adhesive.
-
The display assembly consists of a fused glass panel and LCD, and is difficult to remove and replace.
-
Adhesive holds many components in place, including the display and battery.
-


82 opmerkingen
Looks great, much better than last year's. Pity about the glue for the screen. Would love to see screws. Know it's hard, because these are miracles of engineering, but there are lots of very smart men and women working on this, I'm sure they could find a way, especially since these are billed as enterprise devices, and having worked in an IT department, devices get broken a lot. No pen teardown? I'd imagine it's super similar to last year.
I want one of these even more now. Can't wait to see the Surface Book, if they managed to get one.
Thanks everyone at iFixit, keep up the good work. You're an inspiration to us all.
Is the set of huge connectors on the back of the motherboard in step 14 where the battery connects? They look too large for anything else.
Glad you liked it! They're tough to get ahold of, but we're definitely gunning for a Surface Book as soon as we can! Those are spring contacts on the reverse of the motherboard, that press against the battery cable and also the keyboard dock connector cable. I updated step 14 to mark them up and explain that, thanks for the reminder!
Hi,
I am curious about the copper plate over the battery. Is there some insulation against heat radiation to the battery? Does the plate radiate against the lcd (the battery also tells that the temperatures should not be higher then 140°F. Thinking about how they manage this)?
Thank you for the nice teardown (and fast!).
Hi ddink! The flat plate does diffuse heat into the battery and LCD plate. It actually works as one of two condensers that make up the hybrid cooling system. This article shows a bit more about how that works: http://www.techspot.com/news/62361-surfa...