Deze versie kan foutieve bewerkingen bevatten. Schakel over naar de recentste gecontroleerde momentopname.
Wat je nodig hebt
-
-
Als het scharnier van de iMac vrij is om te bewegen, zul je zien dat reparaties nogal gecompliceerd worden. Plaats daarom een iMac-ondersteuningswig tussen het scherm en de voet om je iMac te stabiliseren.
-
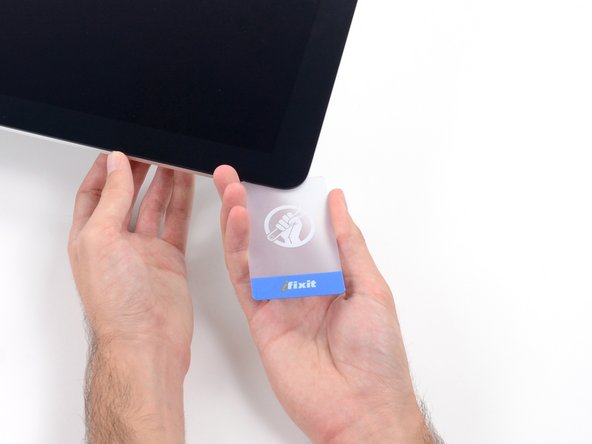
Als je gebruik maakt van de kartonnen iFixit-ondersteuningswig kun je deze handleiding volgen om deze in elkaar te zetten.
-
-
-
Steek je iMac-openingstool in de opening tussen het glazen paneel en de achterste behuizing. Begin aan de linkerkant van het scherm, dichtbij de aan-/uitknop.
-
-
-
Gebruik je tool als een pizzasnijder—rol deze door de opening en het zal de schuimen lijm in het midden doorsnijden.
-
Duw je tool langs de linkerzijde van het scherm omhoog.
-
-
-
Ga door en rol je tool omhoog en langs de linker bovenhoek.
-
-
-
Kantel de kaarten, als deze zo in de buurt van de hoeken geplaatst zijn als op de foto te zien is, om de opening tussen het scherm en de behuizing te vergroten.
-
Als er nog stukken zijn waar de lijm nog vast gehecht zit, stop je met het kantelen van je kaart en gebruik je een van je kaarten om de lijm in het desbetreffende gebied door te snijden.
-
Begin met het optillen van de bovenkant van het scherm, weg van het frame.
-
-
-
Gebruik je ene hand, terwijl je met je andere hand het scherm vasthoudt, om de stroomkabel van het scherm los te koppelen.
-
-
-
Til het scherm omhoog totdat deze bijna een verticale lijn beschrijft.
-
-
-
-
Pak het kleine lipje aan het einde van een van de onderste kleefstrips vast en trek de kleefstrips richting de bovenkant van de iMac om deze te verwijderen.
-
Herhaal deze stap met de andere kleefstrip en verwijder deze ook.
-
-
-
Til het scherm omhoog van het frame en verwijder deze van de iMac. Leg het scherm met het scherm omlaag op een vlakke en zachte ondergrond.
-
Het kan nodig zijn om het scherm eerst vanaf een kant omhoog te tillen, zodat je de kleefstrip aan de onderkant er direct mee af trekt.
-
-
-
Gebruik een kruiskopschroevendraaier(bitje) om de negen 3.2 mm lange schroeven die de ondersteuningsbeugel bevestigen te verwijderen.
-
Mogelijk moet je de kleefstrip van het scherm aan de onderkant van de iMac-behuizing gedeeltelijk omhoogtrekken om bij de schroeven te kunnen.
-
-
-
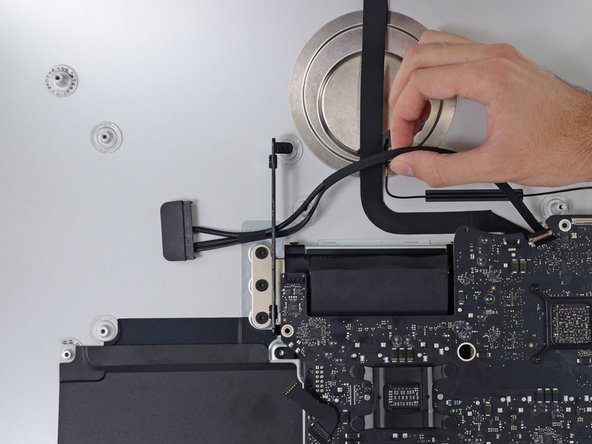
Trek de SATA data-/voedingskabel recht omhoog om deze los te koppelen van de harde schijf.
-
-
-
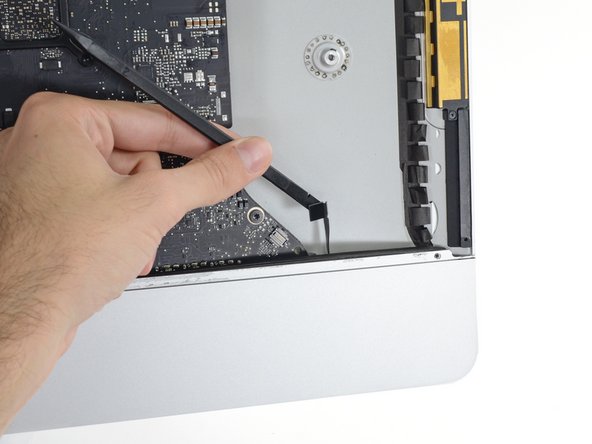
Koppel de controlekabel los van de stroomvoorziening.
-
-
Deze stap is niet vertaald. Help het te vertalen
-
Use a T10 Torx screwdriver to remove the two 10 mm screws securing the right speaker.
-
-
Deze stap is niet vertaald. Help het te vertalen
-
Gently rock the right speaker slightly to the right, to allow access to its cable's connection on the logic board.
-
-
Deze stap is niet vertaald. Help het te vertalen
-
Use a spudger to loosen the right speaker cable's connector from its socket on the logic board.
-
Pull the connector to the right to remove it from its socket.
-
-
Deze stap is niet vertaald. Help het te vertalen
-
Lift the speaker straight up and remove it from the iMac.
-
-
-
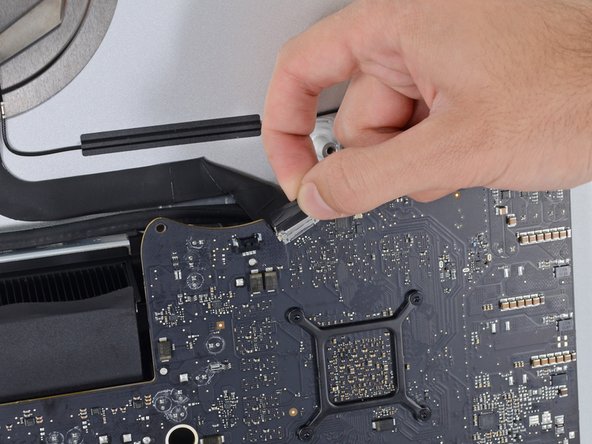
Gebruik de punt van je spudger om de aansluiting van de ventilator uit het contact op het moederbord te verwijderen.
-
-
Deze stap is niet vertaald. Help het te vertalen
-
Use a T5 Torx screwdriver to remove the two 4 mm screws securing the AirPort/Bluetooth antenna cables.
-
-
Deze stap is niet vertaald. Help het te vertalen
-
Use the point of a spudger to disconnect each of the four antenna connectors from the AirPort/Bluetooth card.
-
Leftmost
-
Top
-
Upper right
-
Lower right
-
-
Deze stap is niet vertaald. Help het te vertalen
-
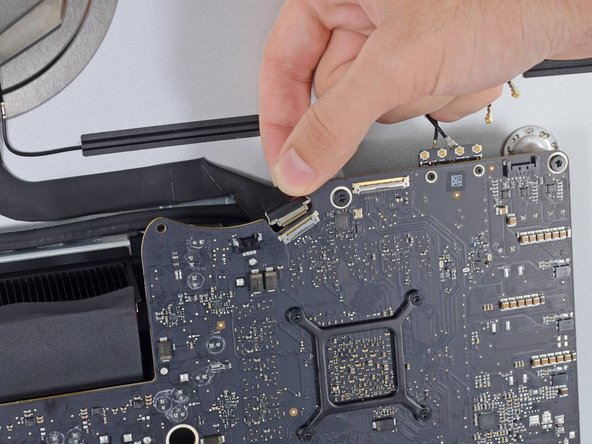
Flip up the metal retaining bracket on the iSight camera cable.
-
Pull the camera cable connector straight out of its socket, toward the top of the iMac.
-
-
Deze stap is niet vertaald. Help het te vertalen
-
Use the flat end of a spudger to disconnect the headphone jack cable connector from its socket on the logic board.
-
Gently push the cable out of the way.
-
-
Deze stap is niet vertaald. Help het te vertalen
-
Use the tip of a spudger to flip open the retaining flap on the microphone ribbon cable ZIF socket.
-
Use tweezers to gently pull the microphone ribbon cable straight out of its socket.
-
-
Deze stap is niet vertaald. Help het te vertalen
-
Remove the following screws securing the logic board:
-
Two 23.7 mm T8 screws
-
One 20.1 mm T25 spacer screw
-
One 17.6 mm T8 screw
-
One 7.2 mm T8 screw
-
Three 7.1 mm T8 screws
-
One captive T8 screw
-
-
Deze stap is niet vertaald. Help het te vertalen
-
Pull the hard drive SATA cable and connector through the right hard drive bracket. Move the cable to the right side of the iMac, out of the way of the exhaust port.
-
-
Deze stap is niet vertaald. Help het te vertalen
-
Use a T8 Torx screwdriver to remove the two 5.6 mm screws from the top of the heat sink exhaust duct.
-
-
Deze stap is niet vertaald. Help het te vertalen
-
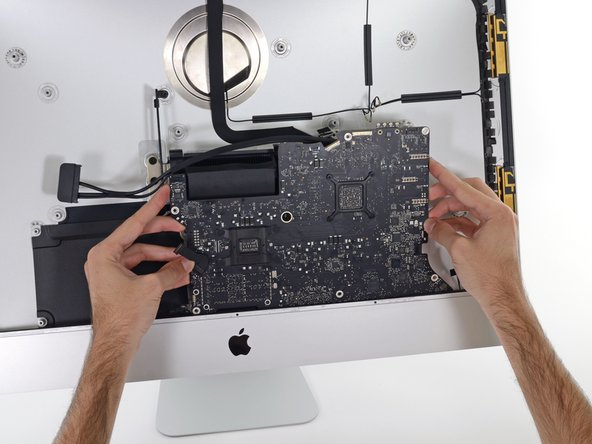
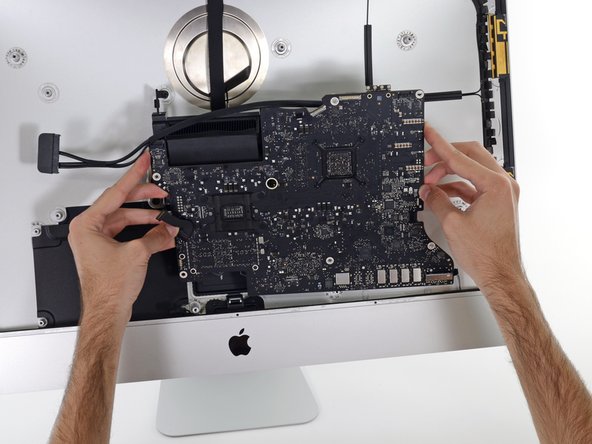
Tilt the logic board slightly forward.
-
Lift the logic board straight up and out of the iMac. Be careful not to snag it on any of the screw posts attached to the inside of the rear case.
-
-
Deze stap is niet vertaald. Help het te vertalen
-
When reassembling your iMac, be very careful to align the exterior I/O ports correctly. The logic board can sit crooked even when secured with all its screws.
-
You can use a USB flashdrive or ethernet cable to ensure the logic board is seated correctly while you screw it in.
-
-
-
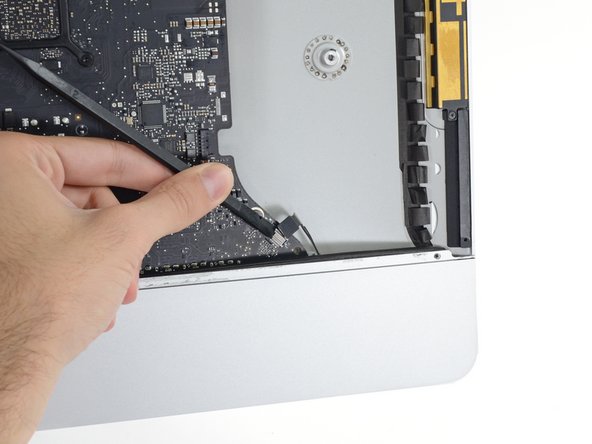
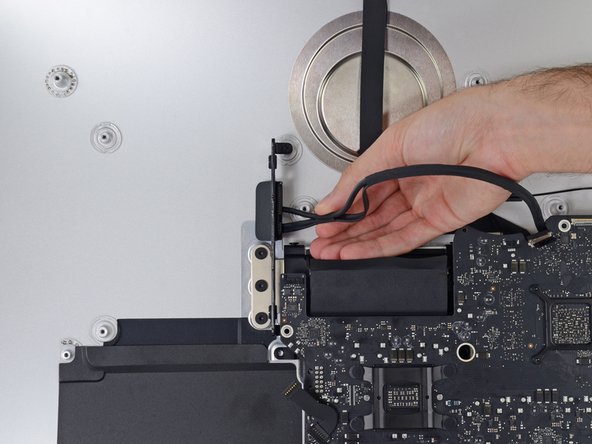
Trek de aansluiting van de SATA-kabel omhoog om deze los te koppelen.
-
Koppel de aansluiting los door de lip in de aansluiting in te drukken en de aansluiting zelf tegelijkertijd omhoog te trekken.
-
Verwijder de SATA-kabel van de moederbordmodule en haal de kabel uit de weg om schade te voorkomen.
-
-
-
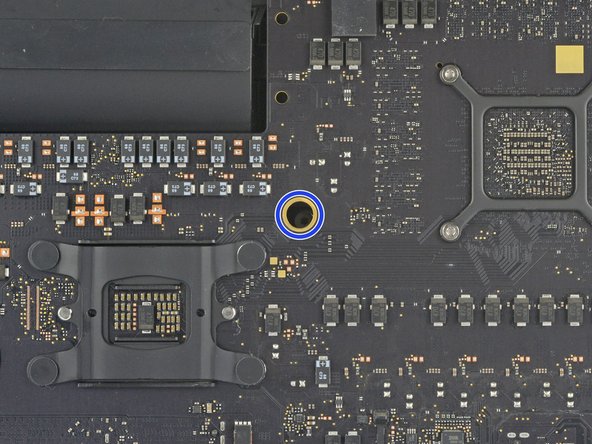
Verwijder de 5.3 mm lange T8-schroef die de SSD op het moederbord bevestigt.
-


Annuleren: ik heb deze handleiding niet afgemaakt.
13 andere personen hebben deze handleiding voltooid.

12 opmerkingen
About as complex as a Mac gets in the modern era :-)
I struggled with re-engaging the ZIF socket for the microphone. Patience won out.
Re-seating the rear ports took a little effort; tolerances for USB-C is less than the motherboard screws. I wound up loosening all the MB screws, fully populated the rear USB/Ethernet/etc, then tightened them.
Having the correct tools definitely helped. The pizza cutter and Service Wedge makes quite the difference. Well stocked with iFixit tools here, but purchase of the adhesive package definitely helped the build.
Great teardown, thanks.
And, wow, Terminal command I haven’t used before - “diskutil resetFusion”.
Made setting up a Fusion drive a snack!
Hat problemlos funktioniert, neue WD 2 TB -SSD eingebaut.
Adapter von Amazon: NGFF M.2 NVMe SSD Convert Adapter Card für Upgrade MacBook Air 2013 2014 2015 2016 2017 und Mac Pro Retina 2013 2014 2015 (Schwarz) von Anyoyo
MMOBIEL Klebe Sticker Strip Set für LCD Display kompatibel mit iMac 27" A1419 iMac13,2 2012, iMac14,2 2013, iMac15,1 Retina 5K 2014 mid 2015, bei Amazon gefunden und damit das Ganze wieder verklebt.
jetzt läuft die Monterey-Installation durch…
Vorsicht mit den Kabeln, wie immer, ist Alles sehr fummelig.
Mit Vorsicht hat die Bastelei etwa 3 Stunden gedauert…
Reparatur-Set für iMac 5,6 cm (21,5 Zoll) / 68,6 cm (27 Zoll), rutschfester Griff + 4 Ersatzrollen aus Karbonfaser ebenfalls von Amazon zum Öffnen.
das Teil hier zum Öffnen.
Hey need help !
I lost 8 screws ***Step 24*** Remove the support bracket during the reassemble. The manual tells I need eight 3.2mm screws.
Can anyone help to clarify what screws I need. I don't really understand this size. Is this M2x3mm?