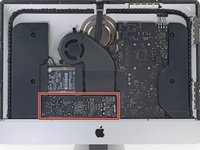
Inleiding
Gebruik deze handleiding om de RAM te installeren of te vervangen.
Wat je nodig hebt
-
Gereedschap gebruikt in deze stap:iMac Intel 21.5" Cardboard Service Wedge$4.99
-
Gereedschap gebruikt in deze stap:Plastic Cards$2.99
-
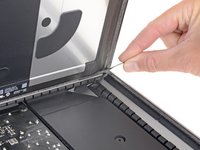
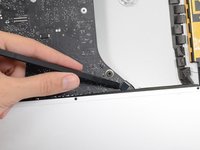
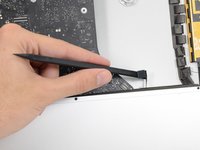
Steek een plastic kaart in de opening tussen het scherm en het frame. Begin in de rechter bovenhoek van het scherm.
-
-
-
-
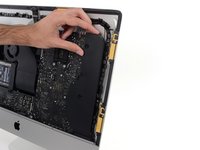
Verwijder de vijf kruiskopschroeven die de onderste ondersteuningsbeugel op z'n plek houden:
-
Vier 3.2 mm lange schroeven
-
Eén 1.7 mm lange schroef
-
-
-
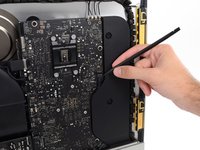
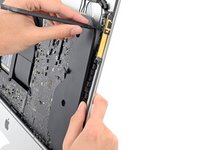
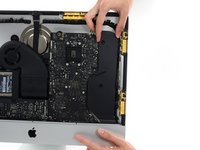
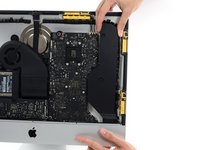
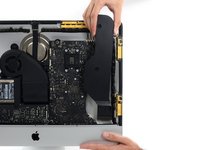
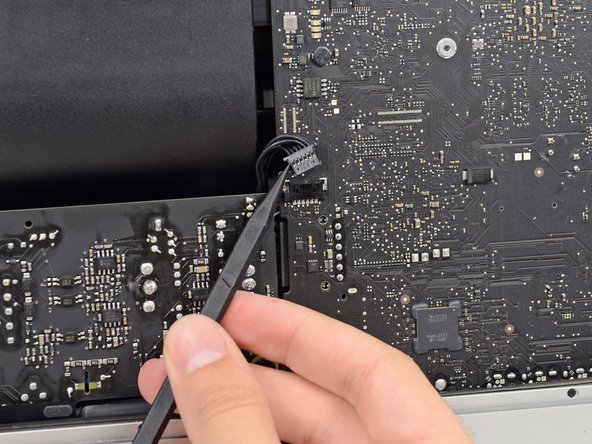
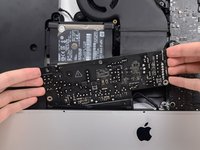
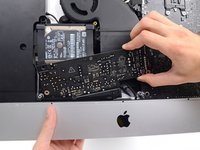
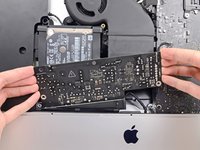
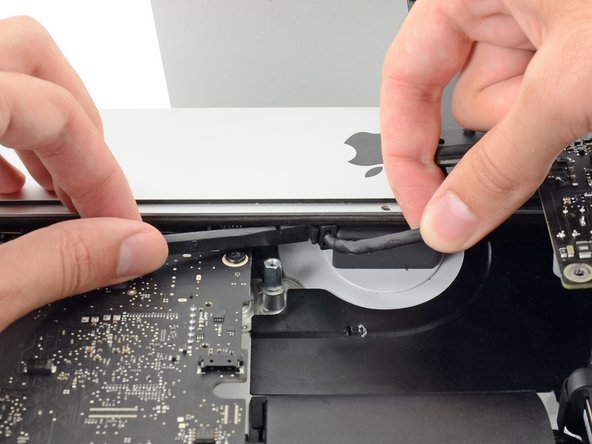
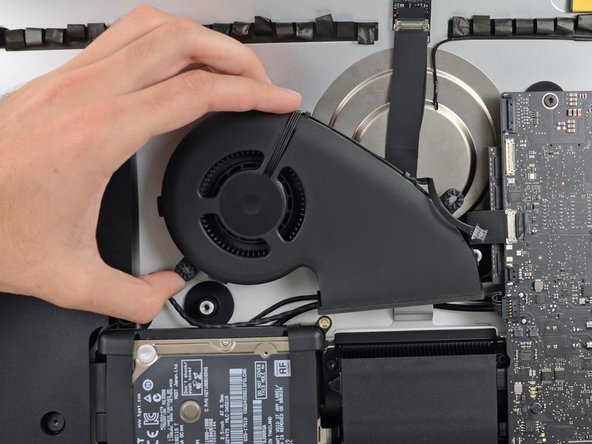
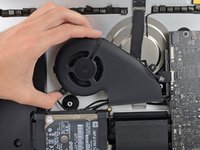
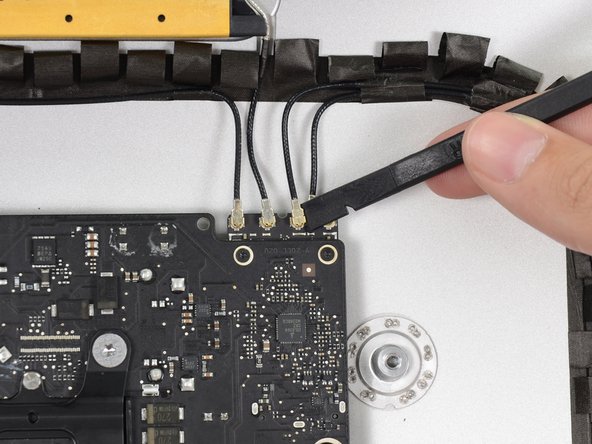
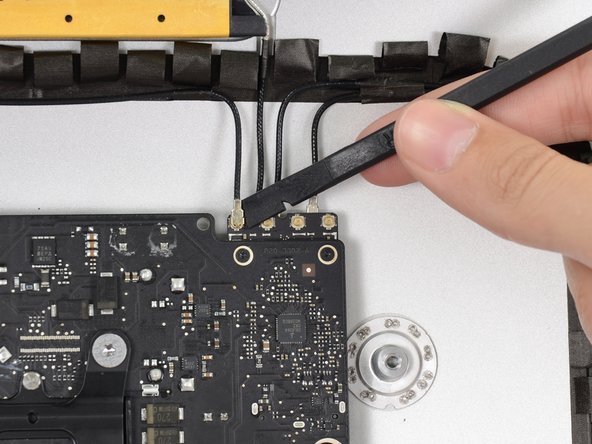
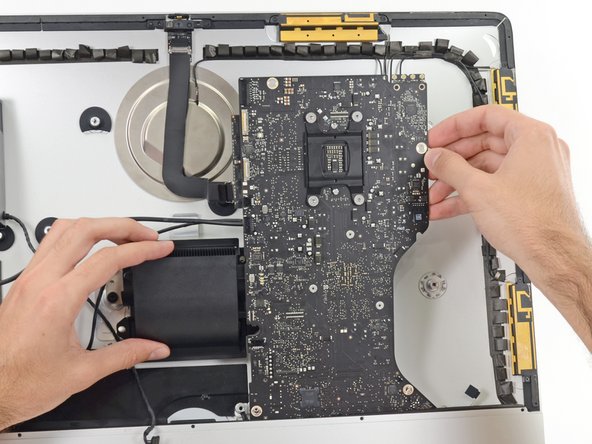
Gebruik een spudger om de aansluiting van de rechterspeaker uit het contact op het moederbord te verwijderen.
-
Trek de aansluiting weg uit het contact om de speaker los te koppelen.
-
-
-
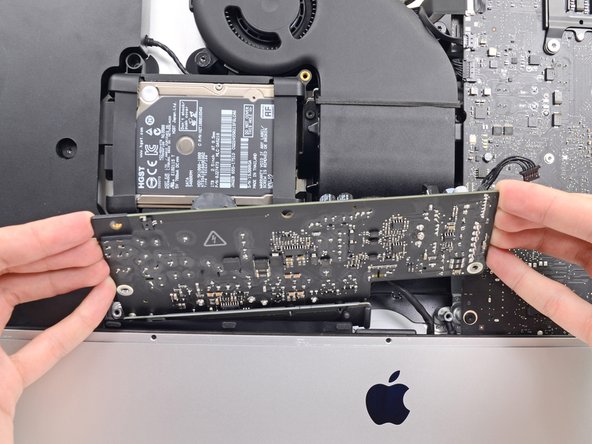
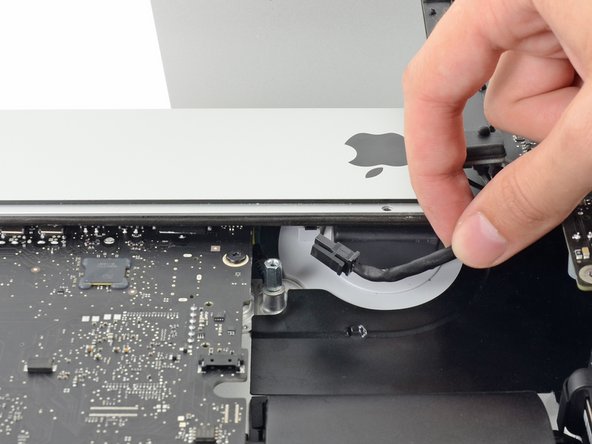
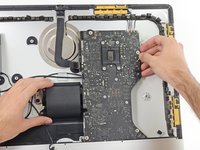
Trek de rechterspeaker ongeveer 2,5 cm omhoog richting de bovenkant van de iMac.
-
Til de rechterspeaker in een rechte beweging omhoog en verwijder de speaker uit de iMac. Dit kan wat kracht vereisen en we raden je aan om beide handen te gebruiken om de speaker uit de behuizing te wiebelen.
-
-
-
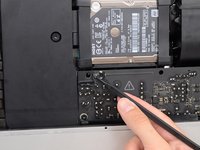
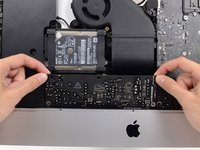
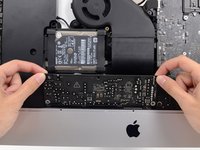
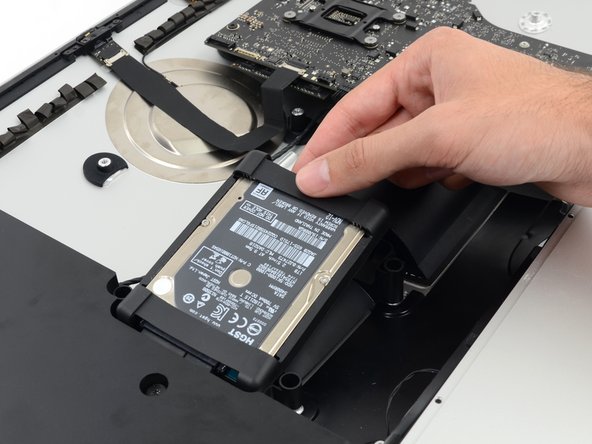
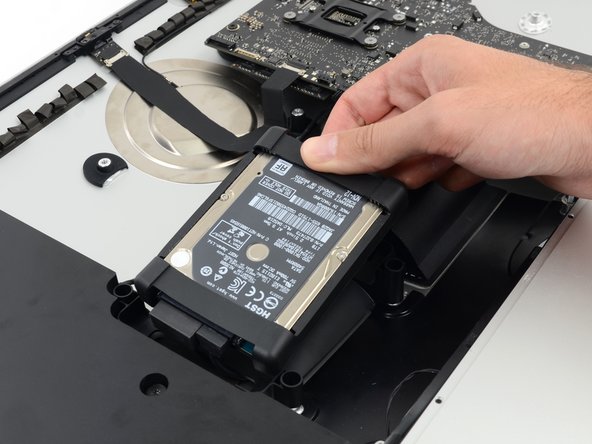
Verwijder de vier schroeven waarmee de harde schijfbeugel in de achterste behuizing is bevestigd:
-
Twee 21 mm lange T10 Torx-schroeven in de linkerbeugel;
-
Eén 9 mm lange T10 Torx-schroef;
-
Eén 27 mm lange T10 Torx-schroef.
-
-
-
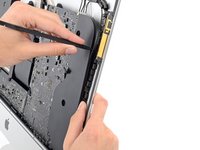
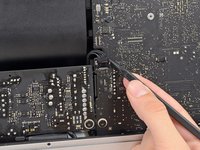
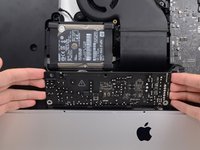
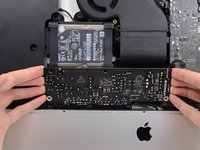
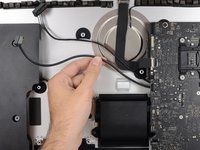
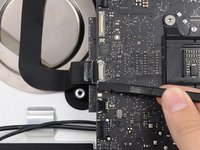
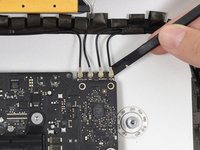
Gebruik de punt van je spudger om de aansluiting van de aan-uitknop te verwijderen. Duw beide zijkanten om en om uit het contact om de aansluiting als het ware uit het contact te 'lopen'.
-
-
-
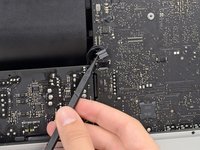
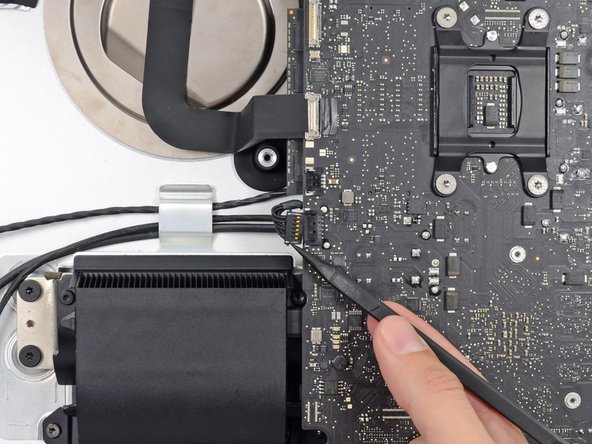
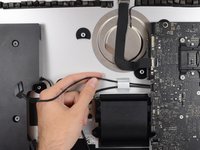
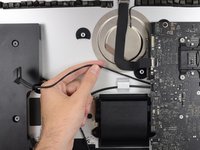
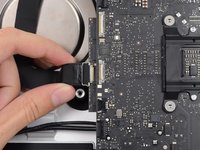
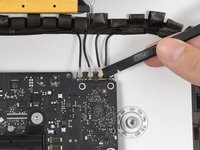
Trek de aansluiting van de ventilator in een rechte beweging uit het contact op het moederbord weg.
-
-
-
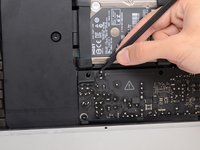
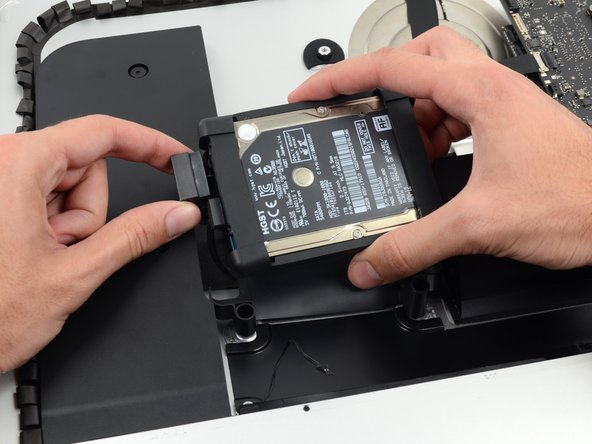
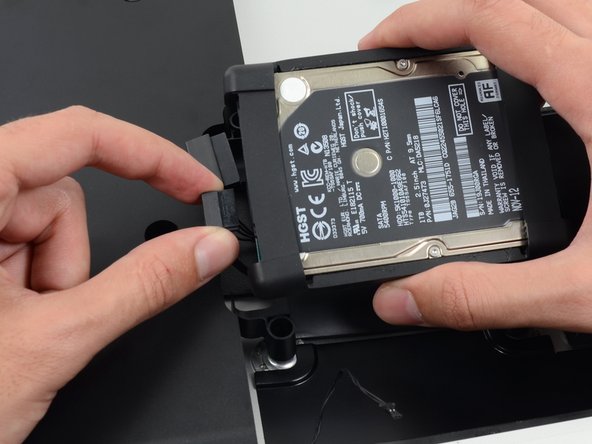
Til de harde schijf aan de kant die het dichtst bij het moederbord ligt omhoog en trek de schijf een stukje uit de inkeping in de behuizing.
-
-
-
Verwijder de 7.2 mm lange T10-schroef die de harde schijfhouder in de achterste behuizing bevestigt.
-
-
-
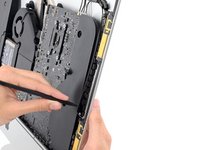
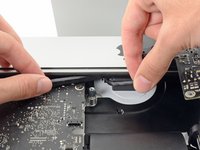
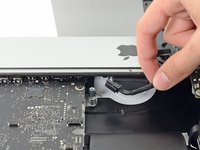
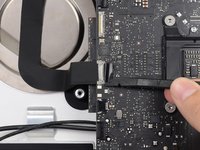
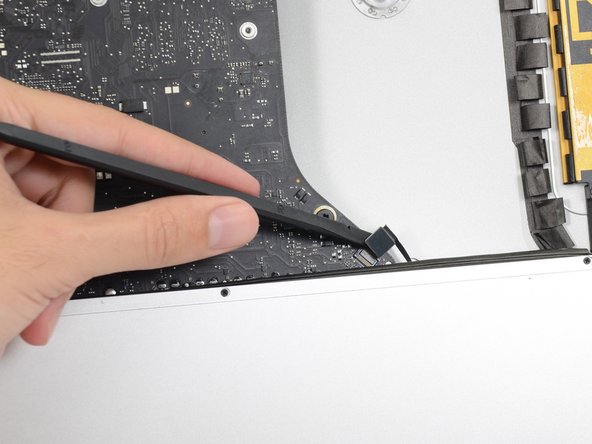
Gebruik de punt van je spudger om de beide zijden van de aansluiting van de linkerspeaker om en om uit het contact te duwen en de aansluiting als het ware uit het contact te 'lopen'.
-
-
-
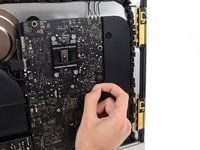
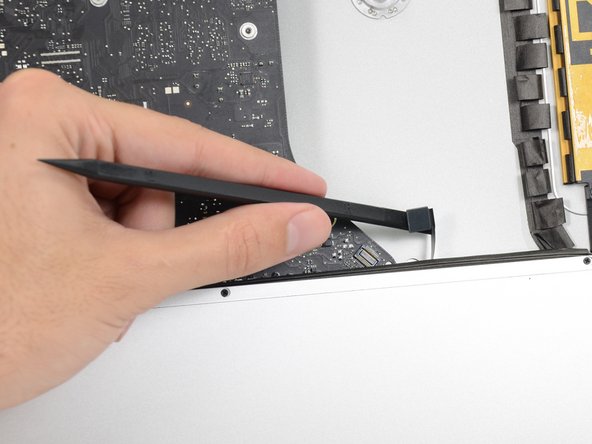
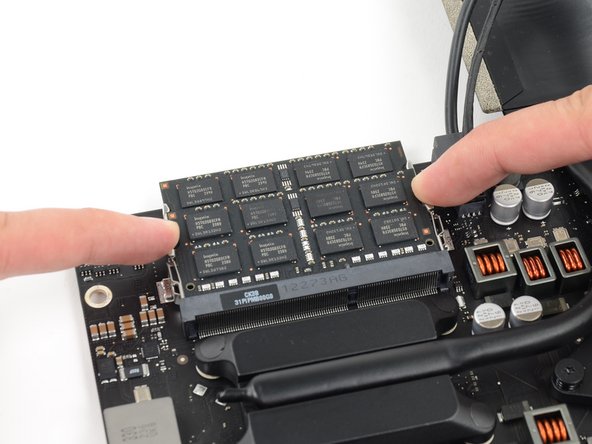
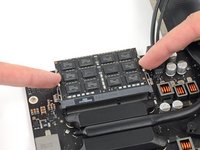
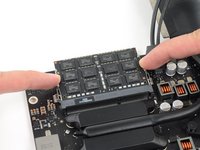
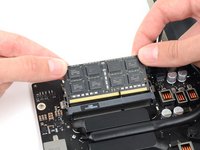
Maak beide zijden van de RAM uit de klemmen los door de klemmen tegelijkertijd naar buiten te duwen.
-
Pak de linker en rechter bovenhoeken van de RAM-module vast en trek de module voorzichtig uit het contact weg.
-


Volg bovenstaande instructies in omgekeerde volgorde om je toestel weer in elkaar te zetten. Gebruik deze handleiding om het glazen scherm weer te bevestigen.
Annuleren: ik heb deze handleiding niet afgemaakt.
142 andere personen hebben deze handleiding voltooid.
Met dank aan deze vertalers:
100%

Thomas Keulemans helpt ons de wereld te repareren! Doe je mee?
Begin met vertalen ›


19Gids Commentaar
I used the iMac Opening Tool just as shown starting in step 2 to separate the tape. DISASTER! The screen cracked! I used the tool slowly and carefully and despite this, the screen cracked. I should have simply used a guitar pick. That said, I decided to see if I could upgrade the 8GB RAM to 16GB RAM WITHOUT removing the logic board all performing all of these steps. I found I could simply remove the FAN assembly as shown in step 43. This makes enough room to reach behind the logic board and unclip the 2 memory modules. I installed 2 8GB modules (1600MHz DDR3L SO-DIMM PC12800 204 Pin) without much trouble. I used a plastic stick to reach behind the logic board and unclip the existing memory modules, then carefully inserted the new ones and clipped them into place. This is much easier than performing all of these steps.
Hi There, I am interested in going in and upgrading my RAM to 16. Did you do all the steps ups to 43? Remove the power supply? Did you remove the hard Drive? I take it you had to do step 53 as well and remove the iSight camera cable first? I may try it your way, I hate to have to unplug 98% of everything to do this. Thanks for the tip.
I added extra RAM by following step 1-23, then skipping to do just 41-43 and then reach the RAM from the back of the logic board. It was difficult to reach but possible.
Mikael -
Wow, thanks. That was much easier. I unscrewed the corner Torx screw holding the mobo down for just a touch of flex.
Used a couple of screw drivers to pull the tabs out
It helps if you have done a bunch of memory upgrades so you have a feel for how to get the chips in.
cyadmark -
Thanks for the tips here.I used a guitar pick and some credit cards as suggested, and to worked fine. I also followed Mikael’s suggestion :
“I added extra RAM by following step 1-23, then skipping to do just 41-43 and then reach the RAM from the back of the logic board. It was difficult to reach but possible.”
which worked fine for me too. Thanks for the suggestion. Have ordered tools & adhesive from ifixit anyway cos the site & its community showed me how to do it all anyway