Deze vertaling is door een computer gegenereerd en is nog niet door iemand nagekeken. Spreek je deze taal? Bekijk het hier.
Inleiding
Gebruik deze handleiding om je harde schijf te vervangen of te upgraden voor meer opslagruimte.
Wat je nodig hebt
-
-
-
Leg uw iMac met de voorzijde naar beneden op een tafel, met de onderkant naar u toe gericht.
-
Draai de enige kruiskopschroef in het midden van het toegangsklepje los.
-
Verwijder het toegangsklepje van uw iMac.
 Vraag FixBot
-
-
-
-
Gereedschap gebruikt in deze stap:Heavy-Duty Suction Cups (Pair)$16.95
-
Bevestig twee zuignappen aan tegenoverliggende hoeken van het glazen paneel.
-
-
-
-
-
Verwijder de volgende 12 schroeven waarmee het voorste raam aan de achterbehuizing is bevestigd:
-
Acht 13 mm T8 Torx-schroeven.
-
Vier 25 mm T8 Torx-schroeven.
-
-
-
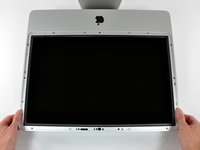
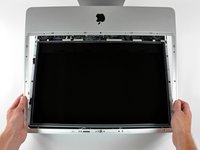
Til het voorste raam voorzichtig aan de bovenkant van de achterbehuizing.
-
Zodra de bovenkant van het voorste raam los is van de achterbehuizing, draai je het voorste raam naar de standaard toe en til je het van de achterbehuizing af.
-
Draai het voorste raam van de rest van het apparaat af en leg het boven de bovenrand van de iMac.
-
-
-
Koppel de (kabel)aansluiting van de microfoon los en verwijder hierbij tape waar nodig.
-
-
-
-
-
Trek de (kabel)aansluiting van de Temperatuursensor van de LCD recht omhoog uit het stopcontact op het logic board.
-
(bevindt zich bovenaan het logic board op de 24")
-
-
-
-
Verwijder de twee T6 Torx-schroeven waarmee de kabelaansluiting van het scherm aan het logic board is bevestigd.
-
Gebruik de bevestigde zwarte treklip om de kabelaansluiting van het scherm recht van het logic board te trekken.
-
-
-
Verwijder de acht Torx-schroeven van 8 mm die het Beeldscherm aan de achterbehuizing bevestigen.
-
Til het Beeldscherm op vanaf de linkerrand en draai het richting de rechterrand van de iMac.
-
-
-
Houd het beeldscherm omhoog en ontkoppel de vier inverterkabels.
-
(gecombineerd in één stekker op de 24")
-
-
-
-
-
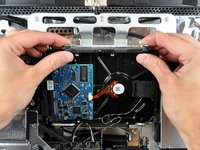
Om de harde-schijfbeugel te verwijderen, knijp je het midden tegen de zijkant van de harde schijf aan terwijl je de linkerbovenrand naar je toe draait.
-
Nadat de linkerrand is losgemaakt, draai je de beugel naar de rechterkant van de harde schijf.
-
Til de harde-schijfbeugel recht omhoog van het chassis.
-
-
-
Verwijder, indien aanwezig, het kleine stukje tape dat de kabels van de harde schijf en de Temperatuursensor van de optische schijf bedekt.
-
-
-
Trek de kabel van de Temperatuursensor van de harde schijf recht uit het stopcontact op het logic board.
-
-
-
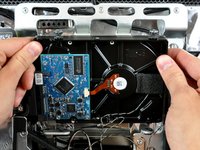
Draai de bovenkant van de schijf naar je toe en til de harde schijf vervolgens recht omhoog van de onderste pinnen.
-
-
-
Steek het platte uiteinde van een spudger tussen de SATA-datakabel en de rand van de harde schijf.
-
Draai de spudger om de SATA-datakabel los te maken van de harde schijf.
-
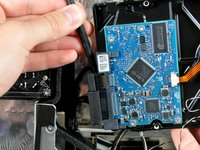
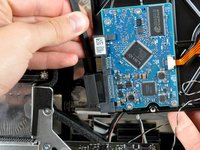
Koppel de SATA-datakabel los van de harde schijf.
-
Til de harde schijf uit je iMac en let daarbij op de thermische sensorkabel die verstrikt kan raken.
-
-
-
-
-
Verwijder de twee T8 Torx-schroeven en de bijbehorende rubberen ringen van de harde schijf.
-
-
-
Verwijder de twee T8 Torx-pennen van de zijkant van de harde schijf die het dichtst bij de voedings- en data-(kabel)aansluitingen zit.
-
-
-
Verwijder het stuk schuimtape dat de thermische sensor van de harde schijf bedekt.
-
-
-
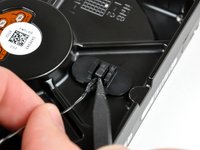
Om de thermische sensor van de harde schijf te verwijderen, gebruikt u de scherpe punt van een spudger om het middelste lipje van de beugel van de thermische sensor op te tillen terwijl u lichte spanning op de kabel van de thermische sensor uitoefent.
-
-
-
Gebruik de platte kant van een spudger om de beugel van de thermische sensor van de harde schijf los te wrikken van de lijm waarmee deze op de harde schijf vastzit.
-
-
-
Gebruik een spudger om het kleine stukje EMI-schuim van de bovenkant van de harde schijf te verwijderen.
-
-










Volg deze instructies in omgekeerde volgorde om je apparaat weer in elkaar te zetten.
Annuleren: ik heb deze handleiding niet afgemaakt.
247 andere personen hebben deze handleiding voltooid.

19Gids Commentaar
Because there are no instructions for the 24", I used these and they worked fine. I shelled out $10 for the suction cups ifixit provides, but honestly the glass is really thin and lightweight, so cheapo suction cups from Home Depot should work just fine.
I couldnt agree more. The "Glass" is of couse plastic. I bought some whimpy suction cups in multi pack from Target and after i stuckem to the glass, it came off almost to easy. I was expecting a fight, i didnt get one.
I am about as untechnically proficient as you can imagine, yet replacing the hard drive was not as daunting as it first seemed when following these FANTASTIC step by step instructions. I was forced to do this because of a lack of money, but having done it, I'm glad I did. Even if I had the money, it's not worth the $500 it costs to have an Apple dealer or Apple themselves replace the hard drive. Just take your time and don't force anything, and you should be done in no more than an hour. Kudos ifixit!
On my 24" iMac, I only needed to disconnect the first LCD Cable (before removing the LCD's torx screws), then I was able to pivot the LCD up 90 degrees, to get access to the hard disk. It was nice not having to disconnect (and reconnect the 2nd and 3rd cables. Now I have 3TB! (Seagate Barrracuda ST3000DM001). Note: I first tried putting the 3TB disk into an SATA USB enclosure, so I could transfer the data before opening up the iMac, but I found out the some of the older USB enclosures don't work with >2TB disks.
I followed the guide, and it worked fine. The new HD is working without problems. But now my Mac has a buzzing noise on it's top left part. What should I do?
